")


I’m sure you’ve heard time and time again about the benefits of having a CRM (client relationship manager) for your photography business. In fact, that’s probably what’s landed you here. You may be interested in using Honeybook as your CRM, but the kicker is; setting it up and actually using it high-key stresses you out.
So that’s what I’m here to help you with. We’re diving deep into exactly how to set up your honeybook account for your photography business!

No matter what CRM you decide to use, you’re going to have to spend quite a bit of time setting it up to work best for your business. However, the goal today is to help you with a step-by-step plan for setting up your Honeybook, so you can breeze through the setup process and be well on your way to using Honeybook.
There are a few different phases of the Honeybook setup process you’ll walkthrough:
- 1st Phase: General Account Setup
- 2nd Phase: Inquiry / Lead Generation Systems / Onboarding Systems
PHASE ONE: GENERAL ACCOUNT SETUP
PART 1: MY ACCOUNT
First, you’re going to need an actual Honeybook account, (duh.) If you haven’t started your free trial yet, you can do that here — (and if you sign up using that link, it’ll get you 50% off of your first year!)
Next, you’re going to want to click on your profile (in the top right corner,) and then click on “My Account.”
- Here is where you’ll input your personal information (name, job title, email address, phone number, personal address, password, security phone number, add/manage your payment methods, etc.)
PART 2: COMPANY SETTINGS
Next, you’ll click on “Company” and then on “Company Brand”.
PART 2.1 – Company Brand
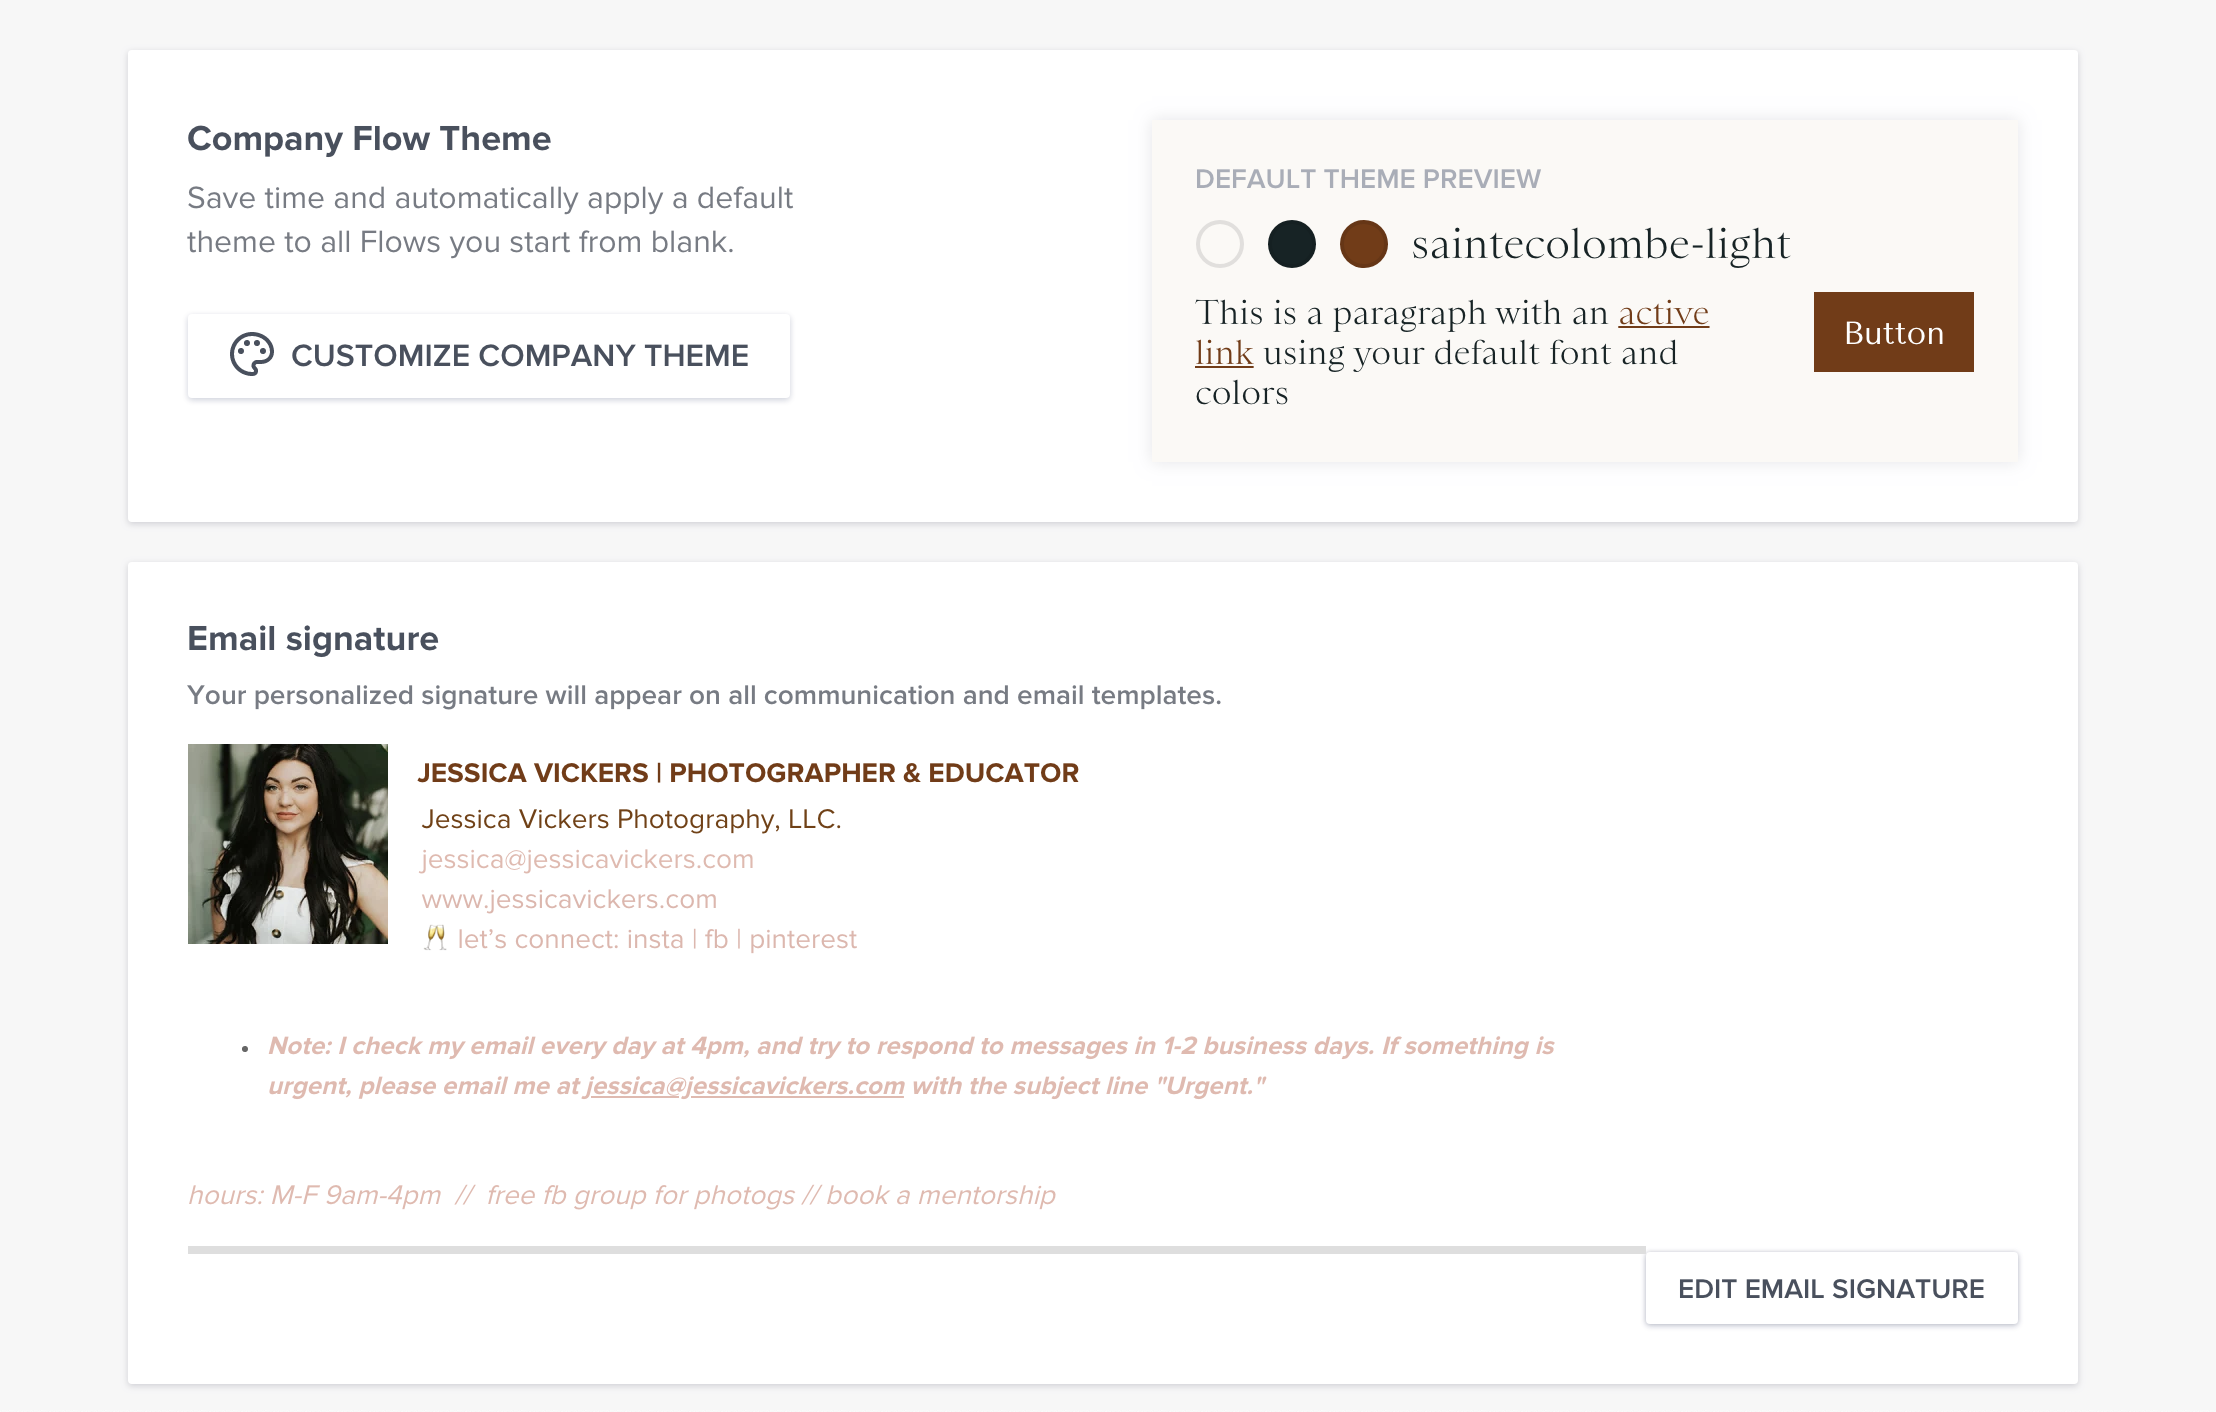
- Here is where you’ll add your company type, company email, phone number, company website, and brand elements (main and secondary logo, main button color, default header image, and any additional images.) Then, you’ll configure your company flow theme, your email signature, social links, and any additional information.
Here’s what those two sections look like in Honeybook:

Next, you’ll want to update your company’s “Flow theme,” (which is what you see at the bottom of the image above.) By doing so, you’ll be able to save time by automatically applying a default theme to all Flows you start from blank.
Next, you’ll want to personalize your Email signature. Here’s what mine looks like:
Lastly, you’ll add the remaining info about your company, social media handles, and company address.
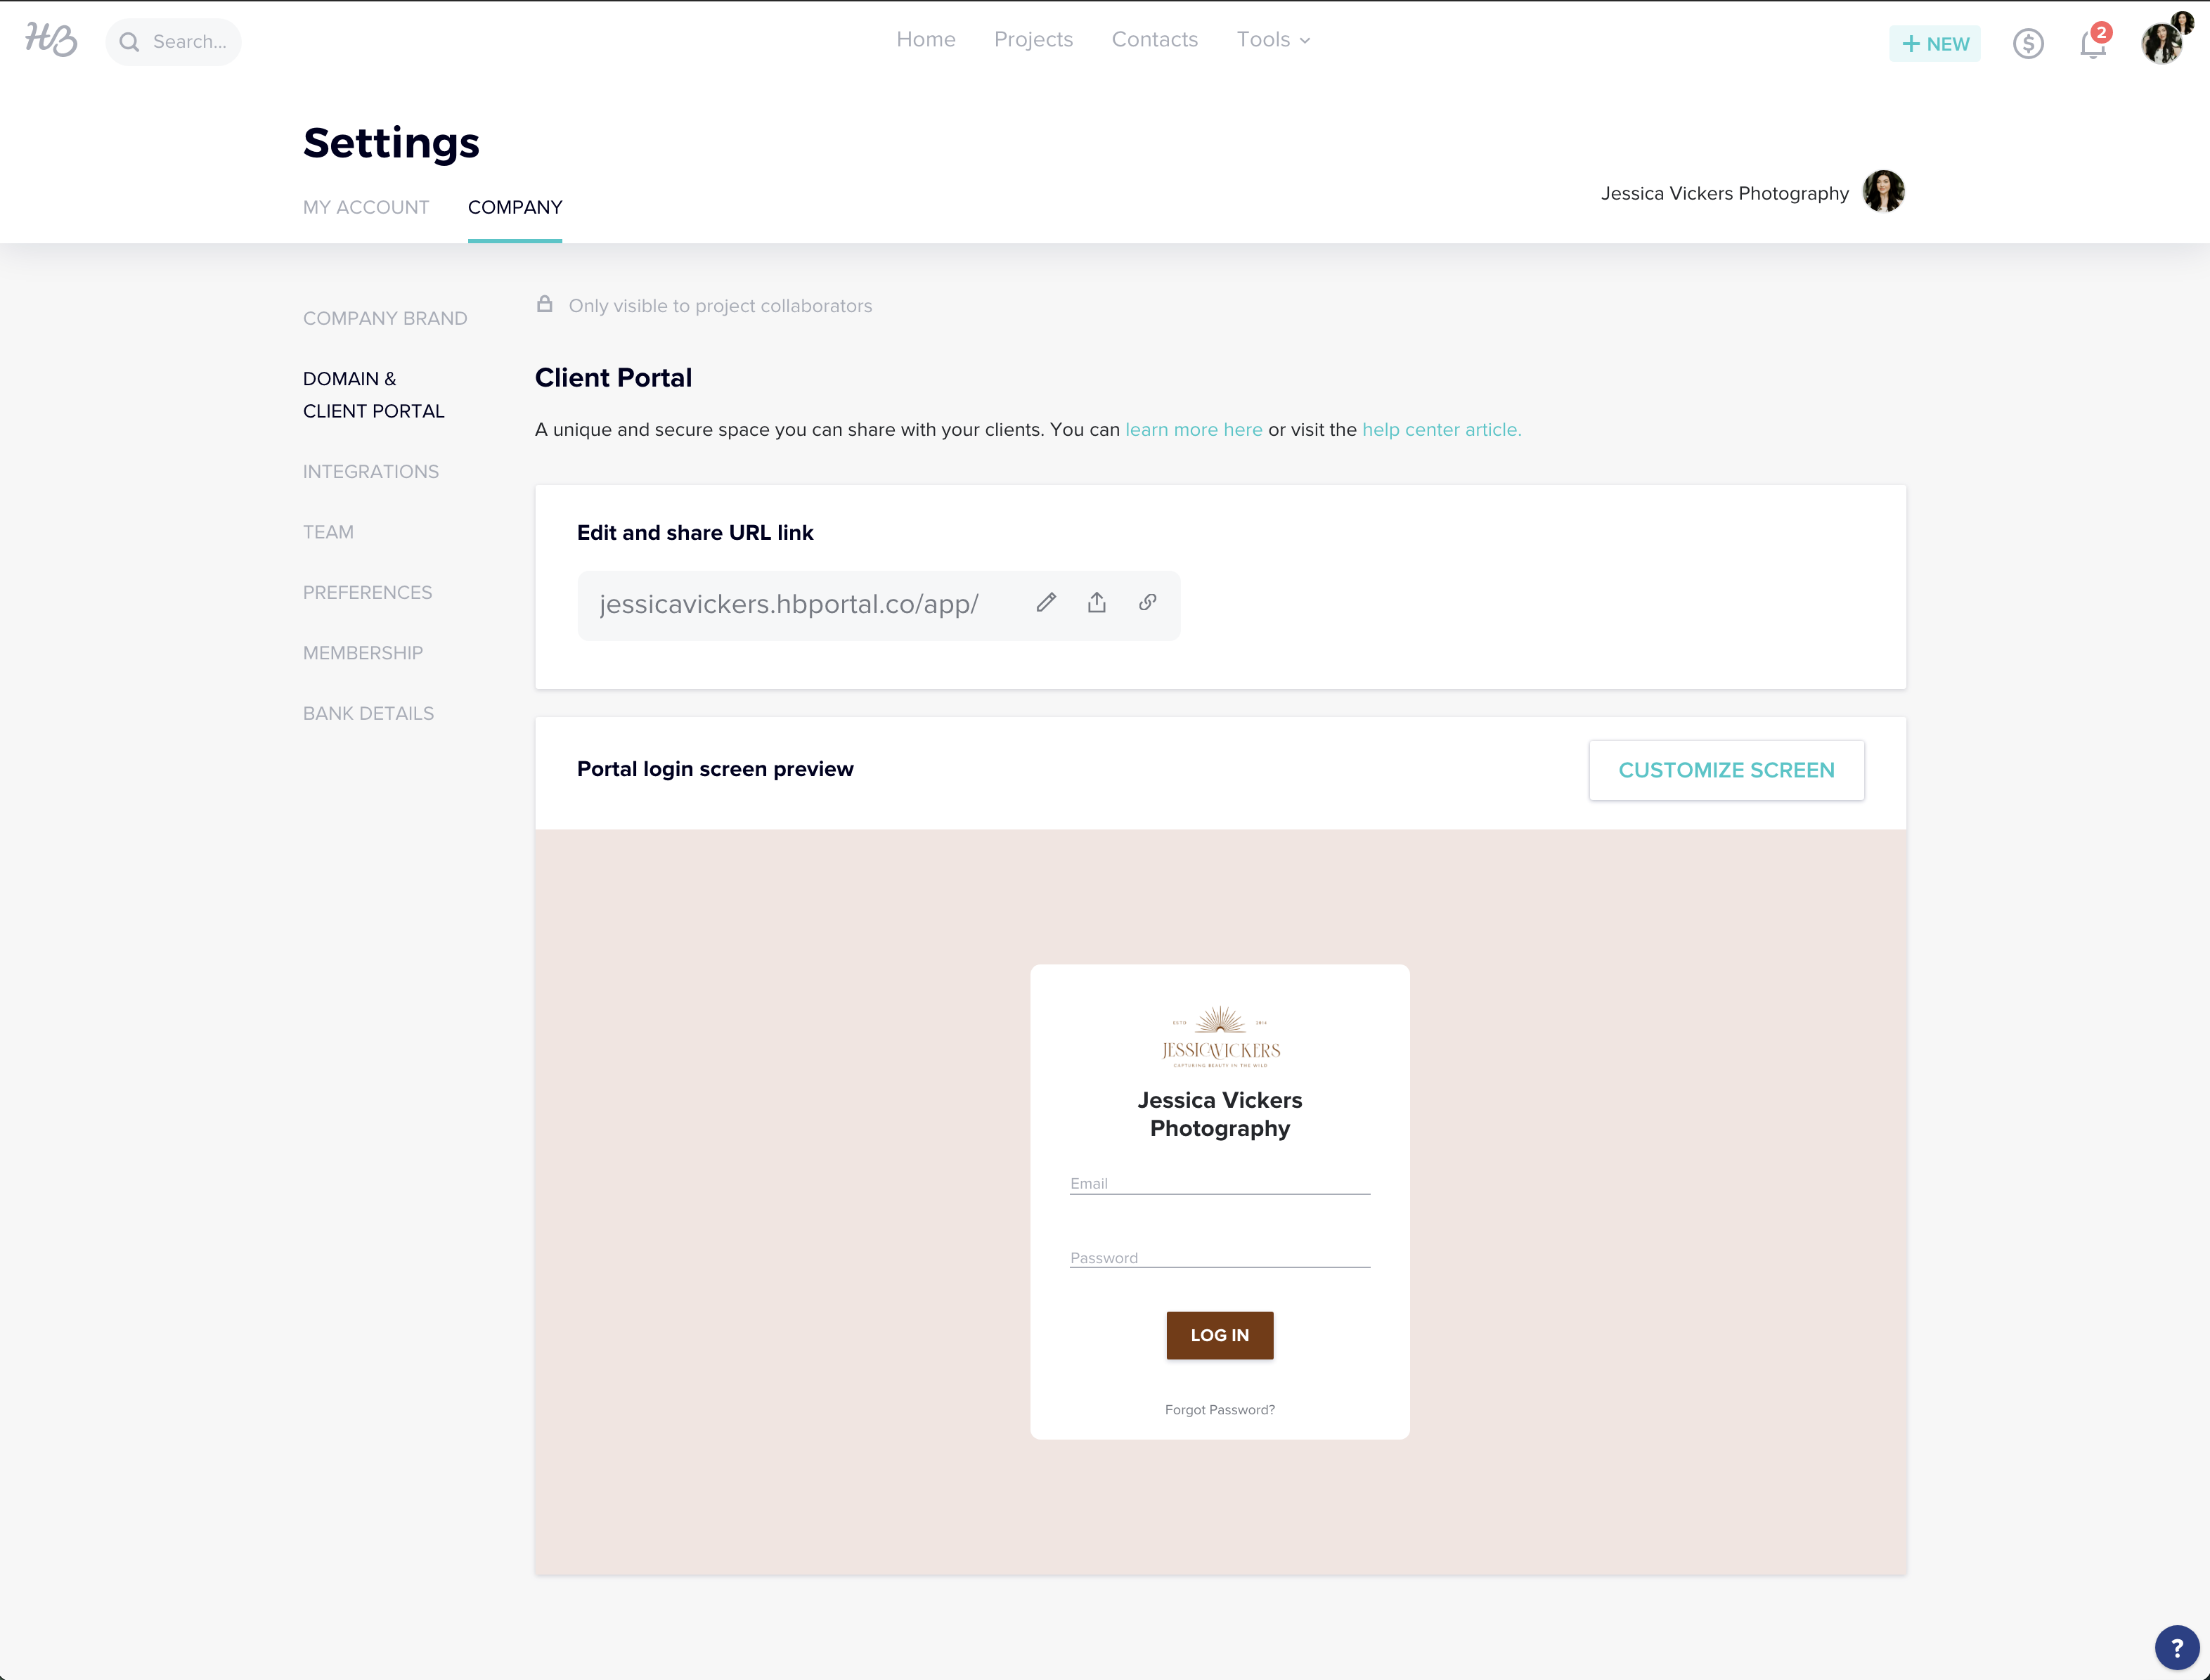
PART 2.2 – Domain & Client Portal
You’ll want to personalize your Domain & Client Portal. This is what shows up when your clients receive files to log into and see! Here’s what mine looks like, and where it’s located:
Part 2.3 – Integrations
You’ll want to integrate your email first and foremost, then you can decide which of the remaining six integrations you’d like to use. (I use zapier and the honeybook chrome extension!)
Part 2.4 – Team
If you have a team that will be accessing your CRM, you can input them here. I have my accountant and my VA (virtual assistant) listed here.
Part 2.5 – Preferences
Here, you’ll have some super important information to fill out!
You’ll start with the first option, called “Lead Sources.” This is where you’ll want to put all the possible options for where people can find you. Mine are as follows:
-
- Personal Website
- Referral
- Friend
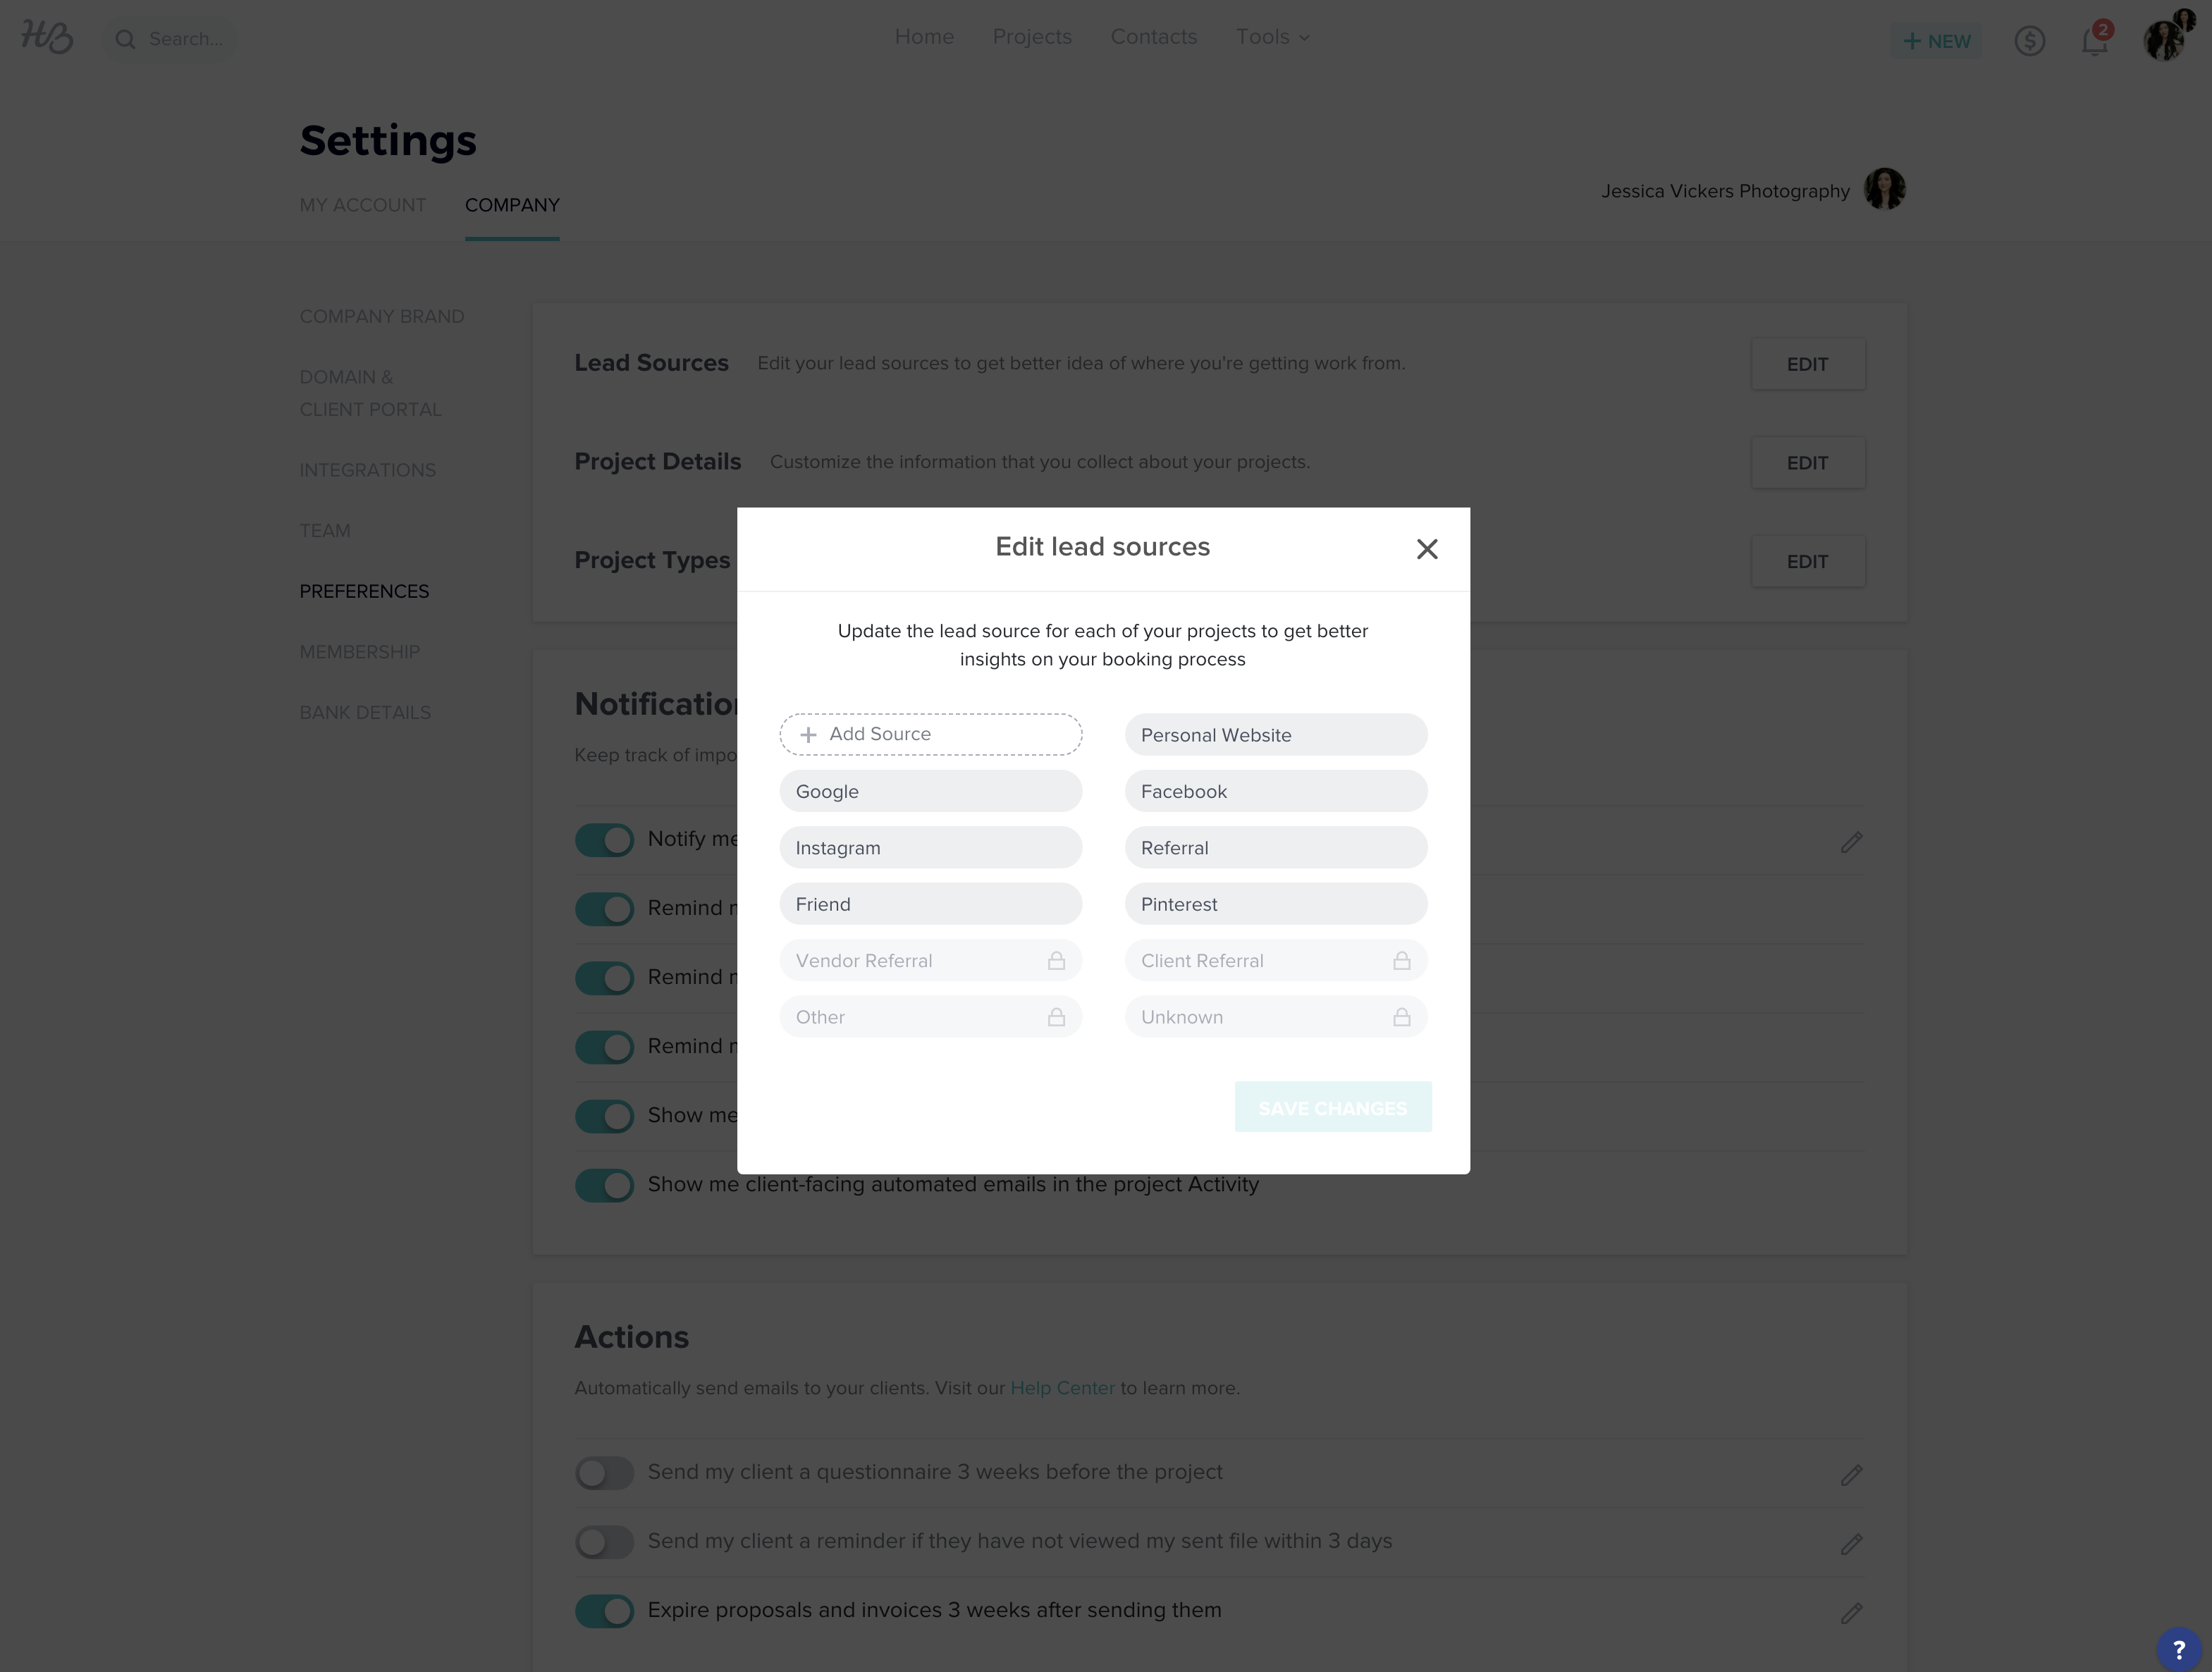
This is VERY important, because when a client reaches out via your contact form, there will be a section that says, “How did you hear about me?” — and this is where this list will drop down from.
We need this information, because it shows us what is (and what isn’t) working in our marketing efforts so we can adjust accordingly. So don’t skip it!!
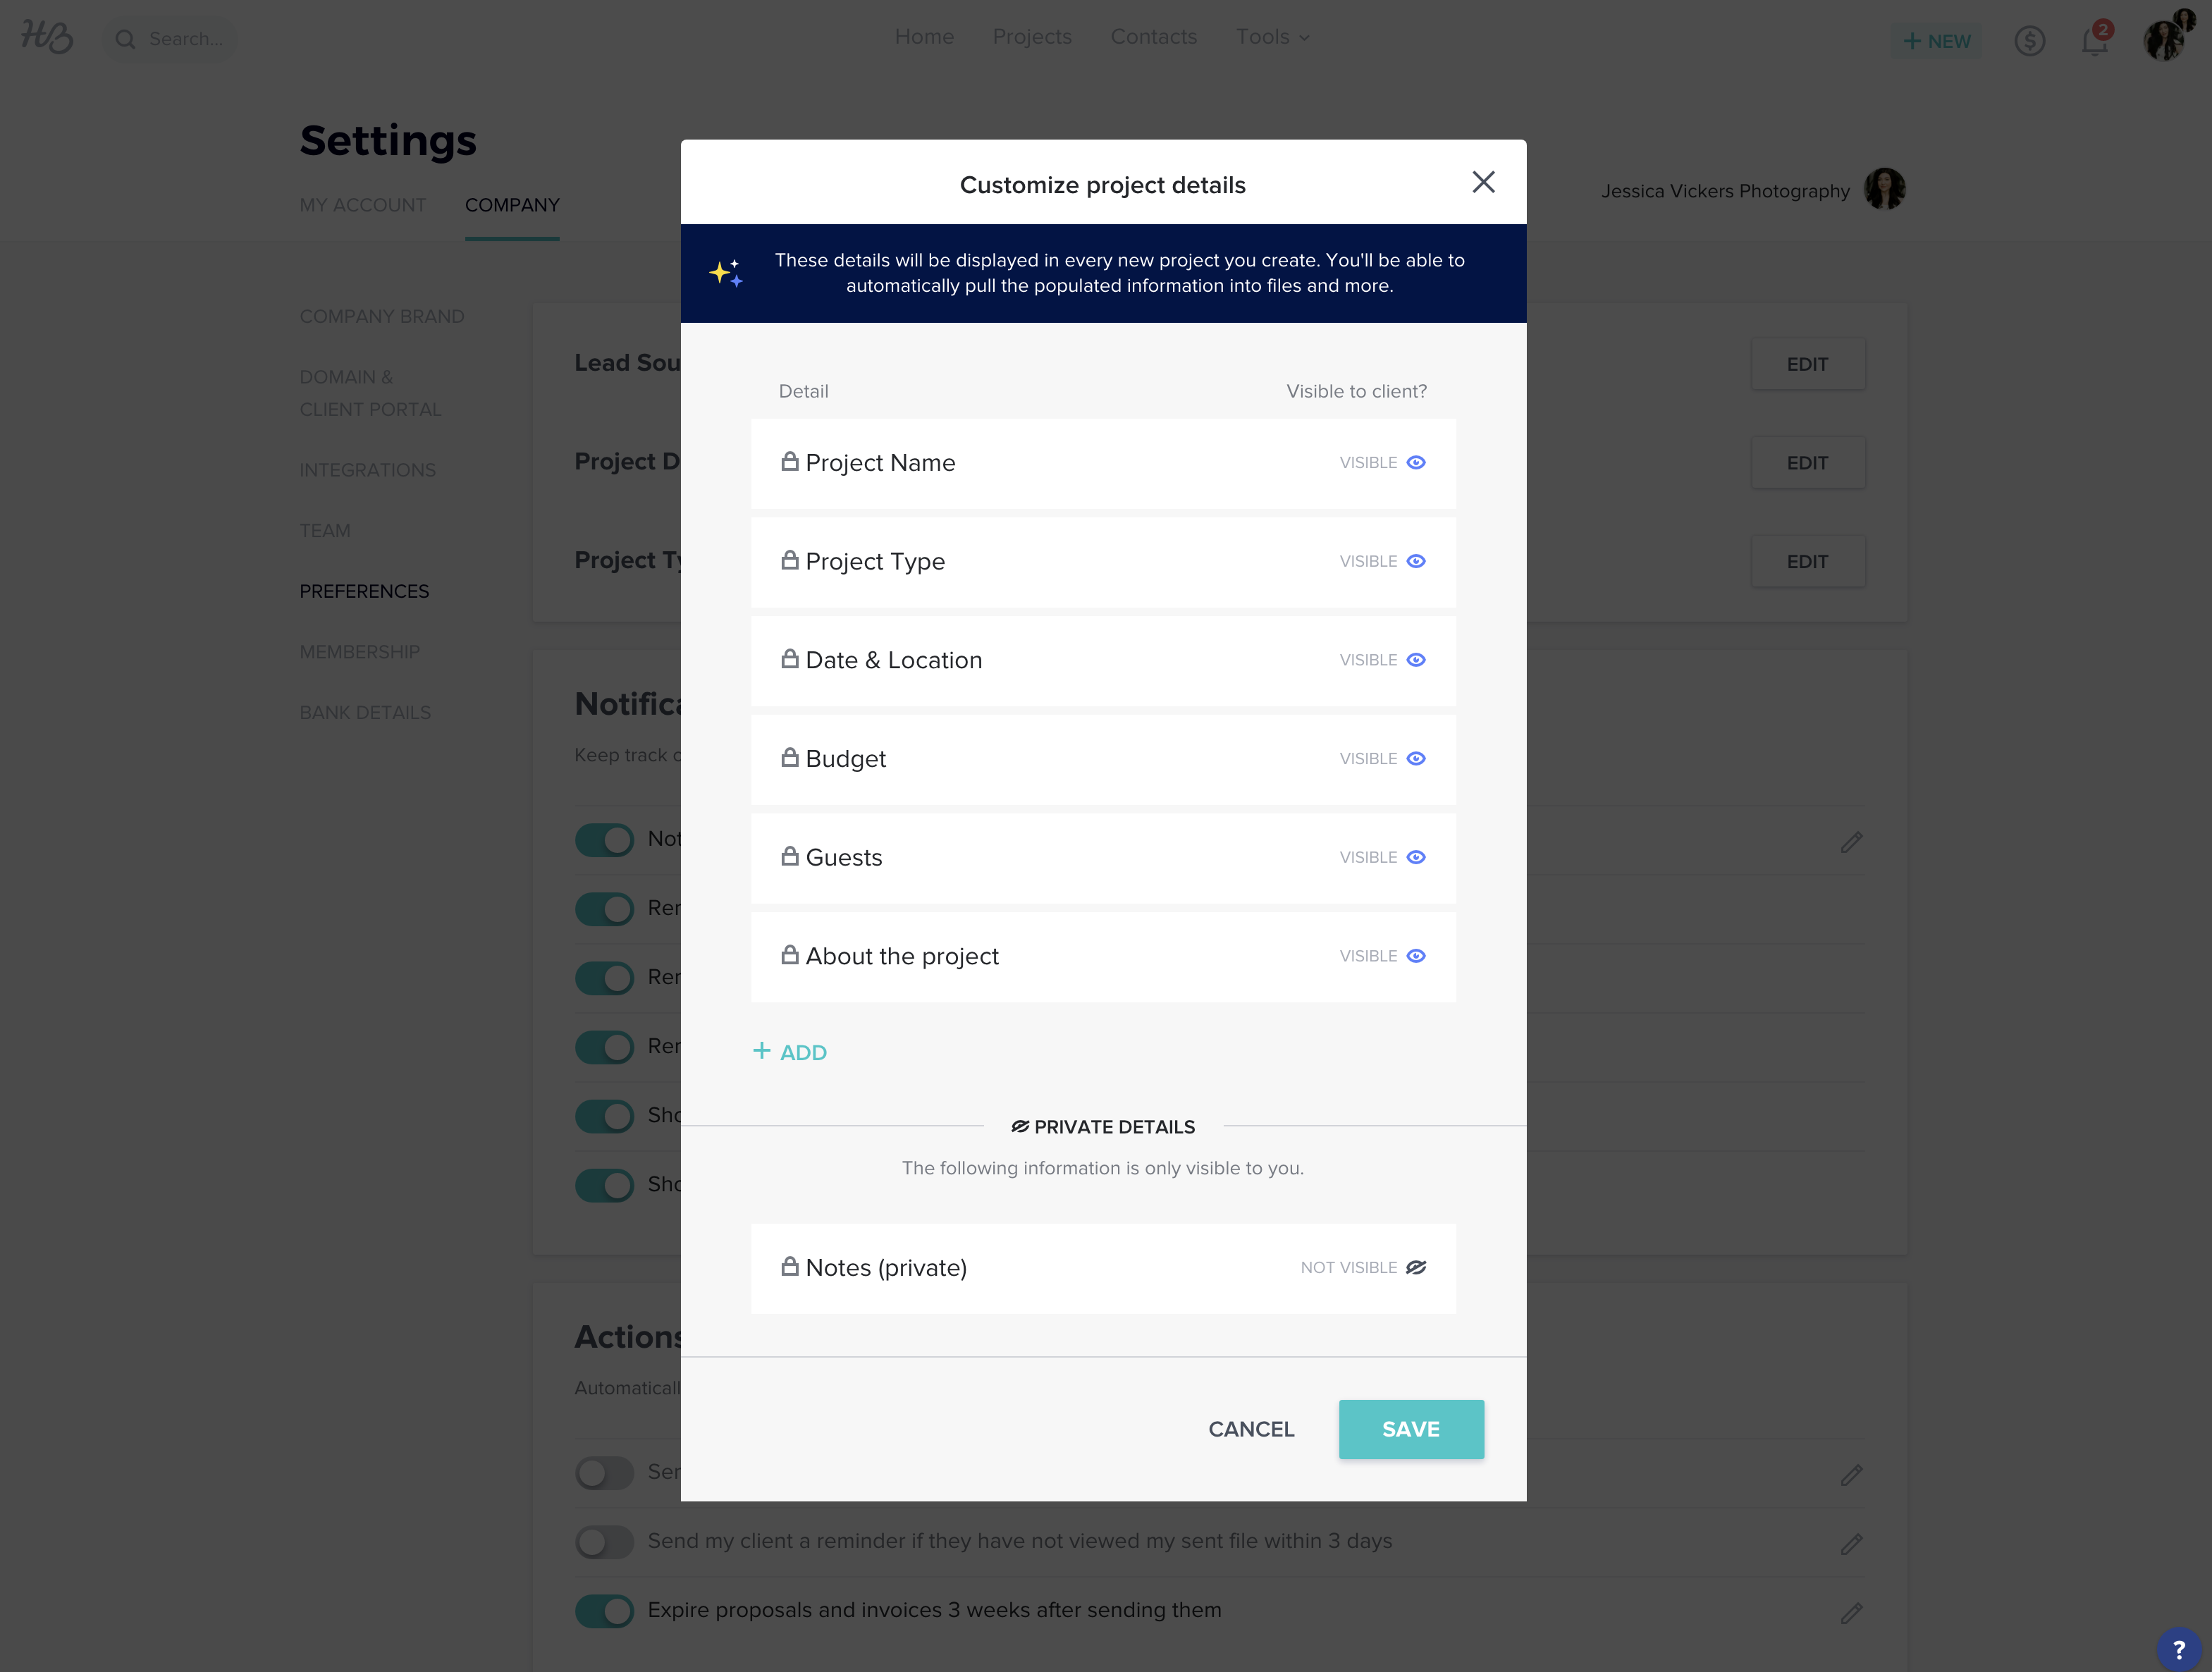
Next, you’ll move onto “Project Details.”
This is simply the details that will be displayed in every new project you create. You’ll be able to automatically pull the populated information into files, etc.
Project Types:
Then, you’ll fill in your project types; which is just like it sounds. These will be the type of sessions you do; for example, Wedding, Couples, Maternity, Newborn, Family, Fashion, Brand, Elopement, etc.!
Here are what mine look like; (keep in mind that I offer photography and education, so that’s why you’re seeing different offers interlaced beside photography sessions!)
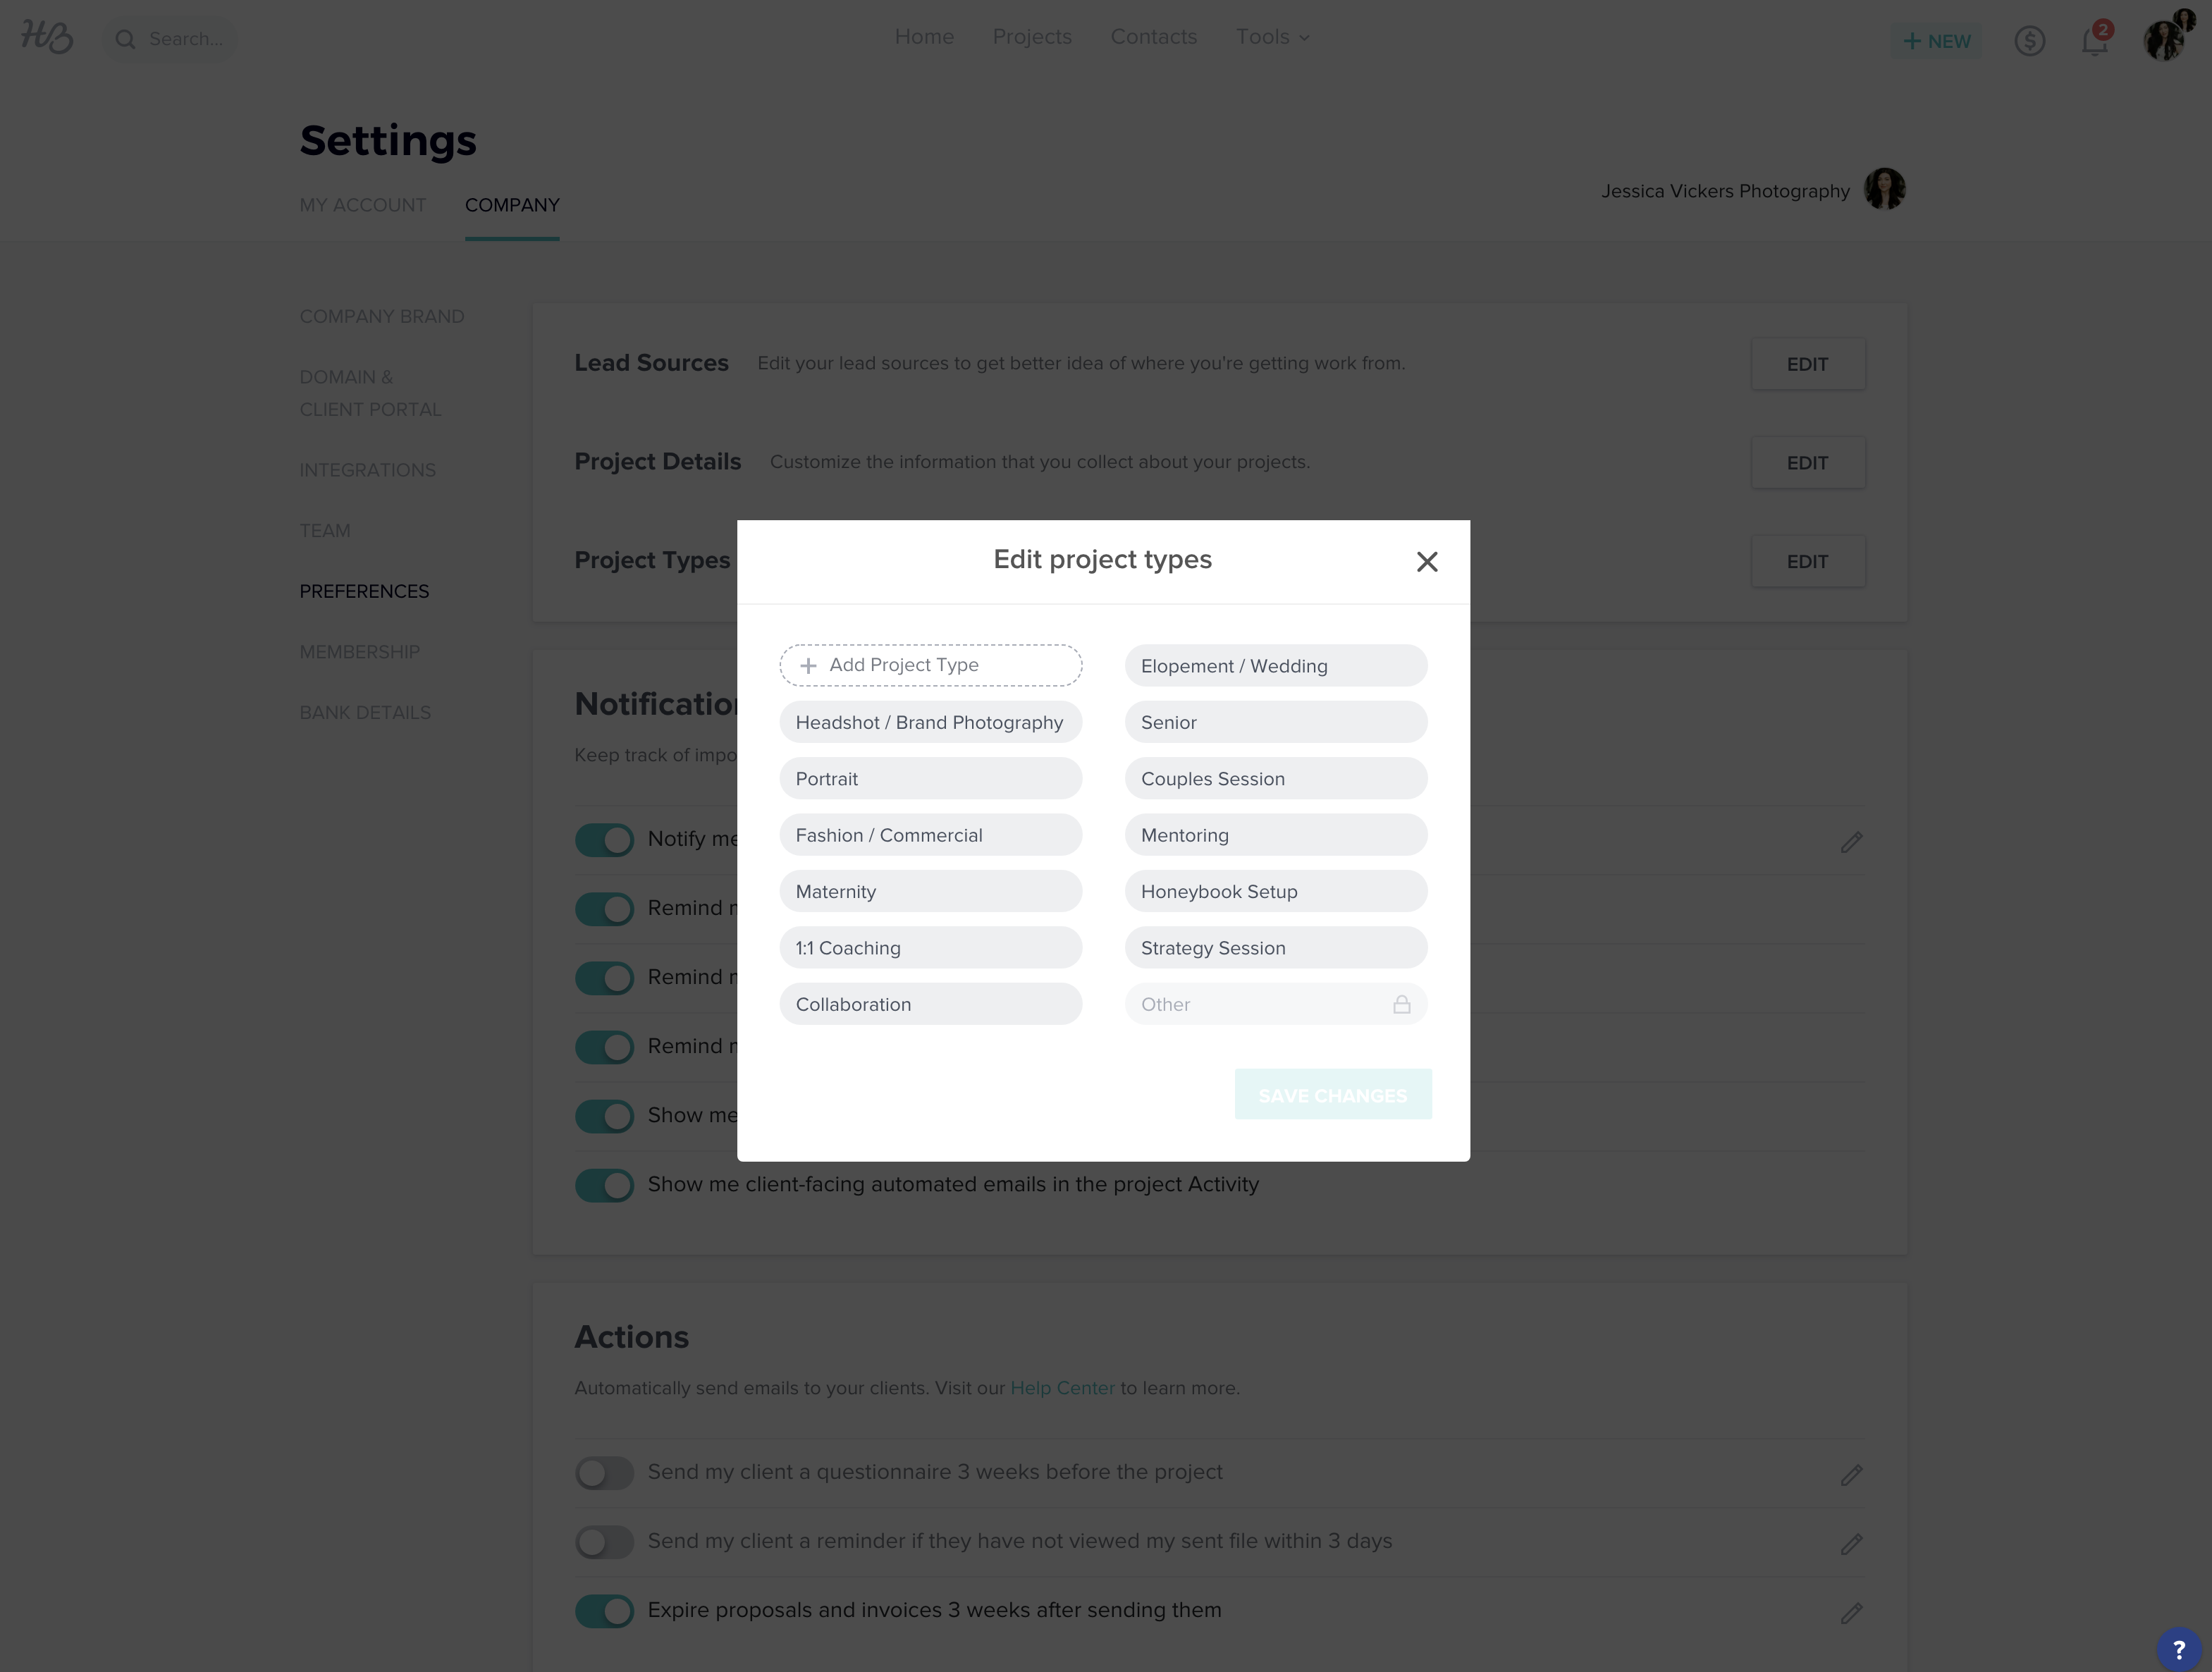
(You can set these in the “Project Type” section in Honeybook. Go to Company Settings > Preferences > Project Types. If you’re still unsure how to get there, read this.)
Notifications:
Next, you’ll have your notification preferences. These are how I have mine set, but set yours to what works best for you/what you prefer!

Part 2.6 – Membership
This is where your membership information is located; things like the subscription you signed up for, your billing information, invoice history, etc.
Part 2.7 – Bank Details
Here is where you’ll connect your bank account and list the business owner, (that’s you!) You can also enable “instant deposit” here, and have your money within 30 minutes when people make their payments.
And that’s it for Phase 1! Whoop whoop, you did it! You’re one step closer to having your entire Honeybook account set up for your business — and that’s something to celebrate.
PHASE TWO: INQUIRY / LEAD GENERATION SYSTEMS SETUP
Now we’re moving on to setting up the actual workspace, as well as the documents/files you’ll be sending out to your potential clients and current clients.
PART 1: Packages Setup
The first and most important step is to set up your Packages. In simple terms, this is all of your pricing and services info. By being sure to set these up first, you’ll be able to build out your brochures/proposals/flows so much quicker.
You’ll click “Create A New Package,” and then begin to build out each of your different collections. Here’s what a new, empty package looks like:
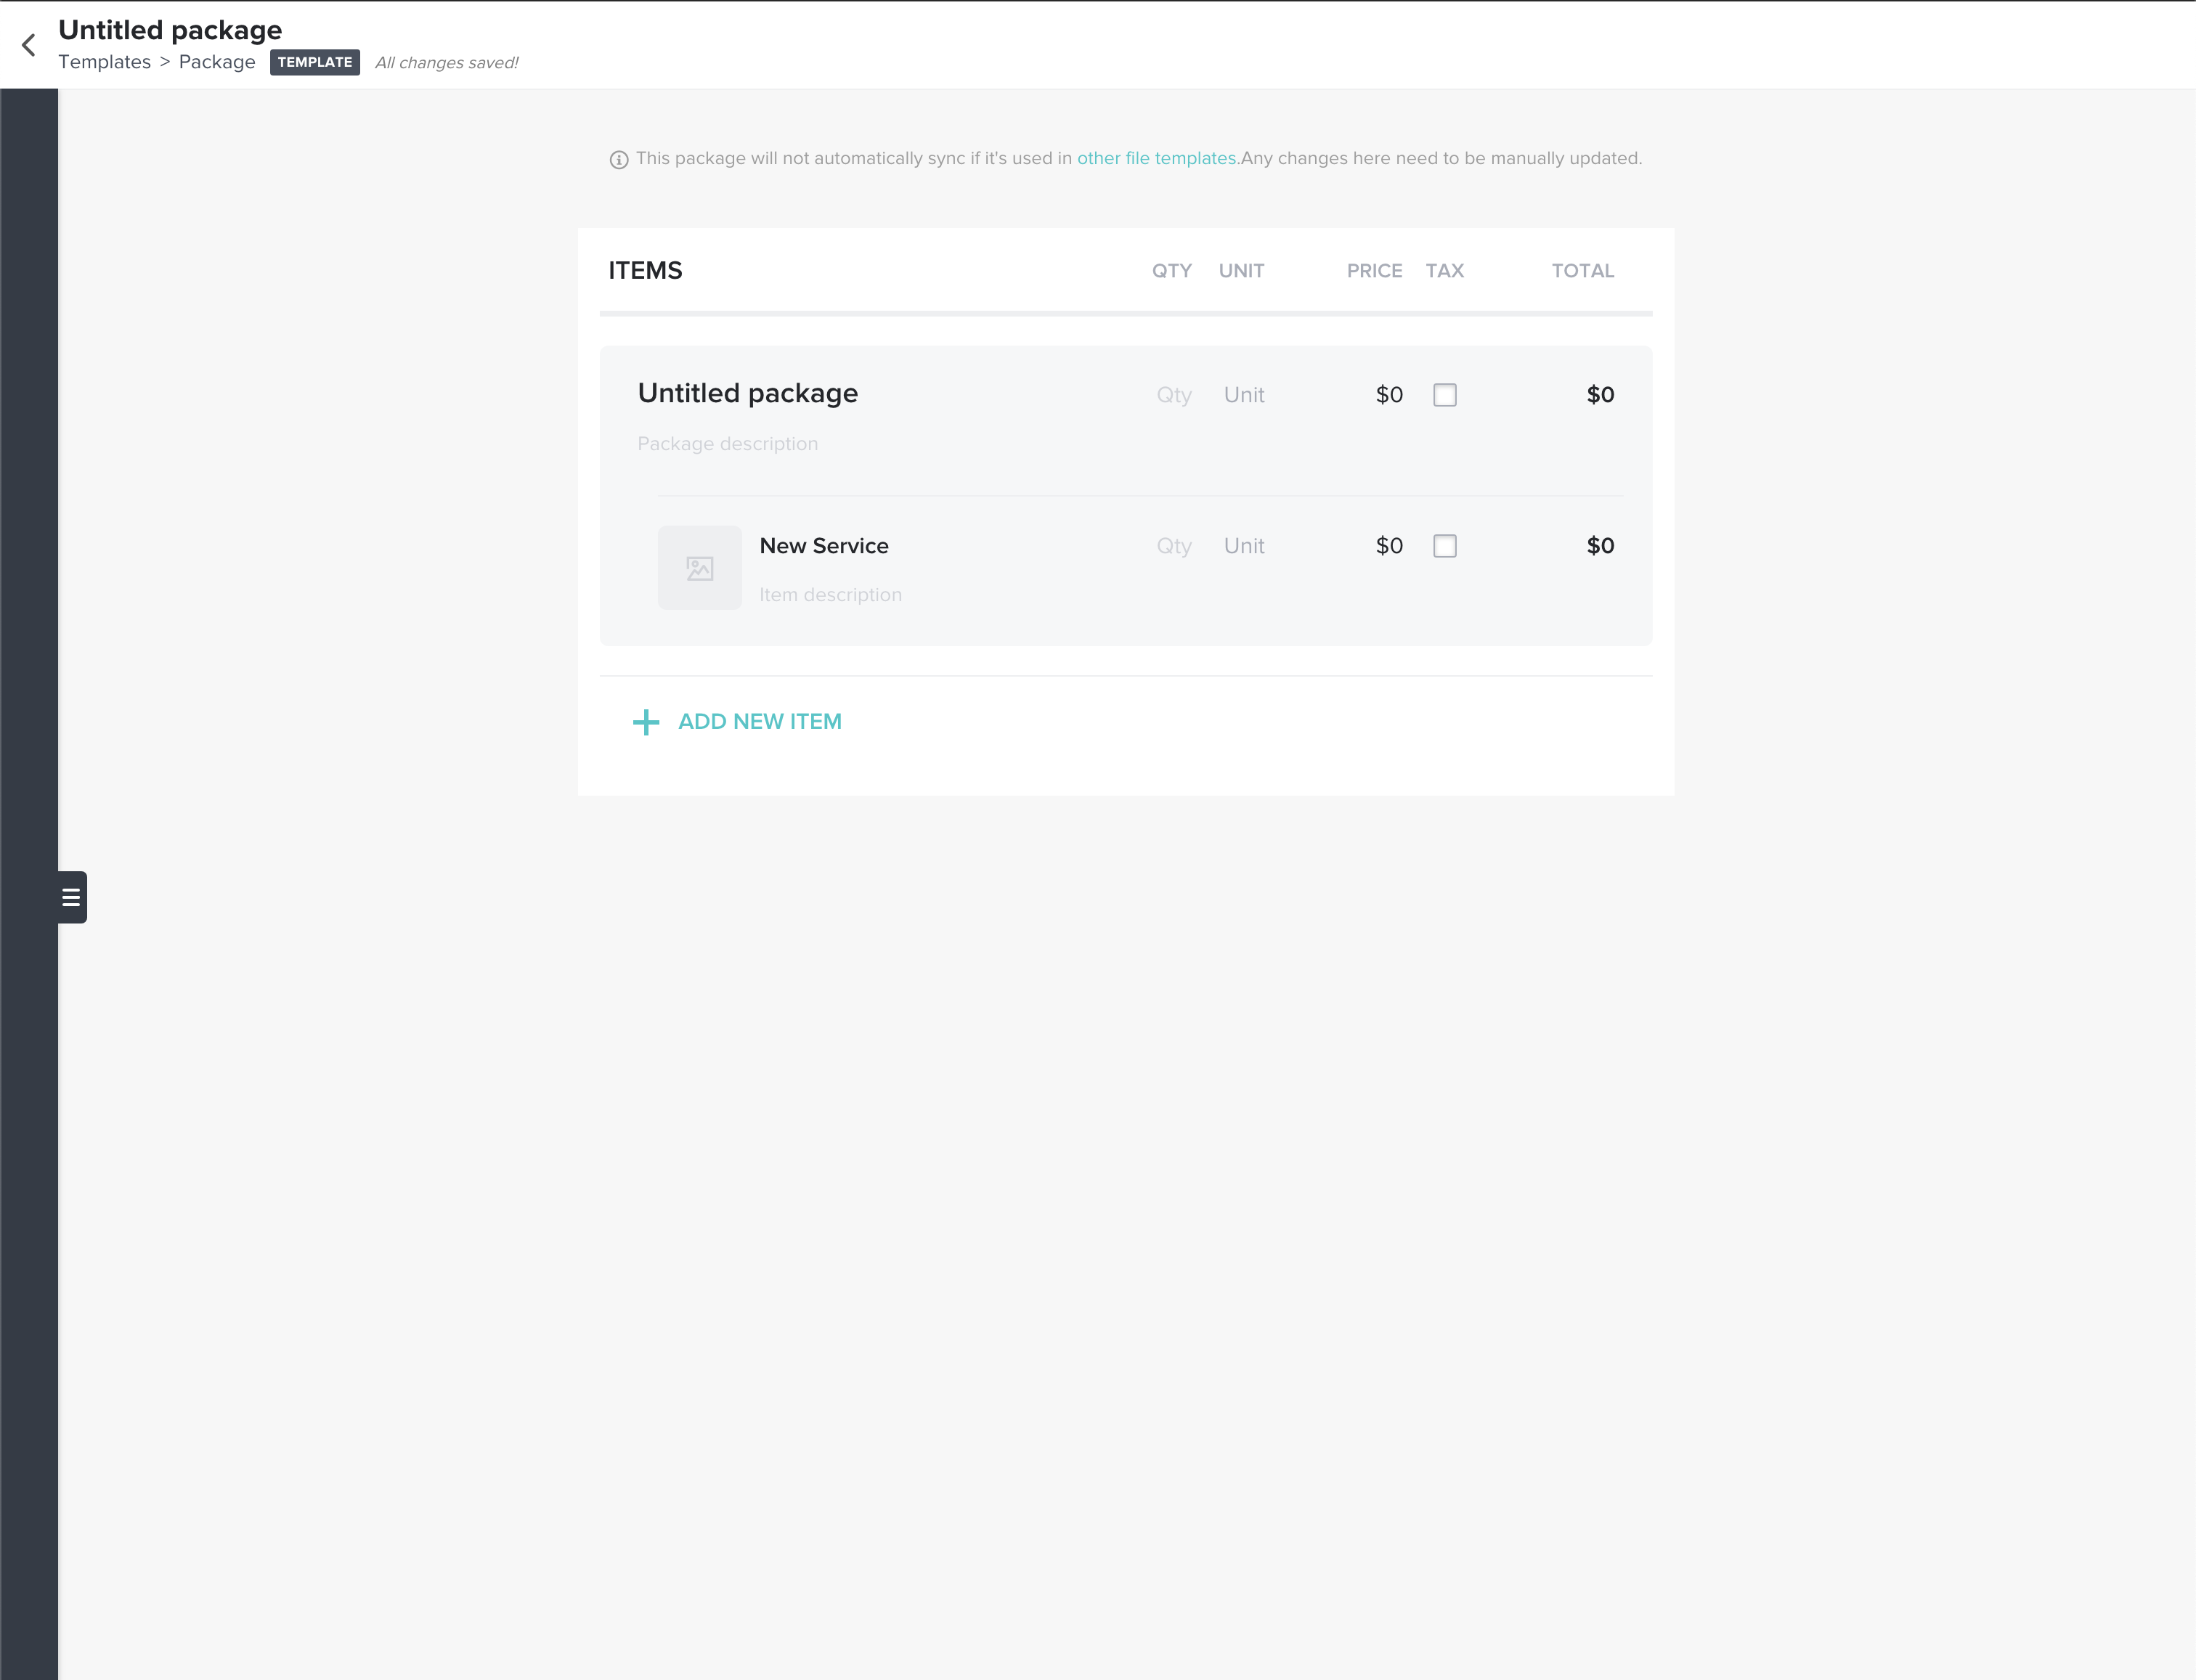
You’ll name it at the top left where it says “Untitled Package” and call it whatever your collection name is.
So, let’s say you have three different options for Couples sessions. You’ll have a package for what’s in your Couples Session: Collection 1, one for your Couples Session: Collection 2, and one for your Couples Session: Collection 3. And so on and so forth!
Then, you could name your first package you’re creating “Couples Session: Collection 1”
If we went with that, here’s an example of a “filled out” package for our first couples collection:
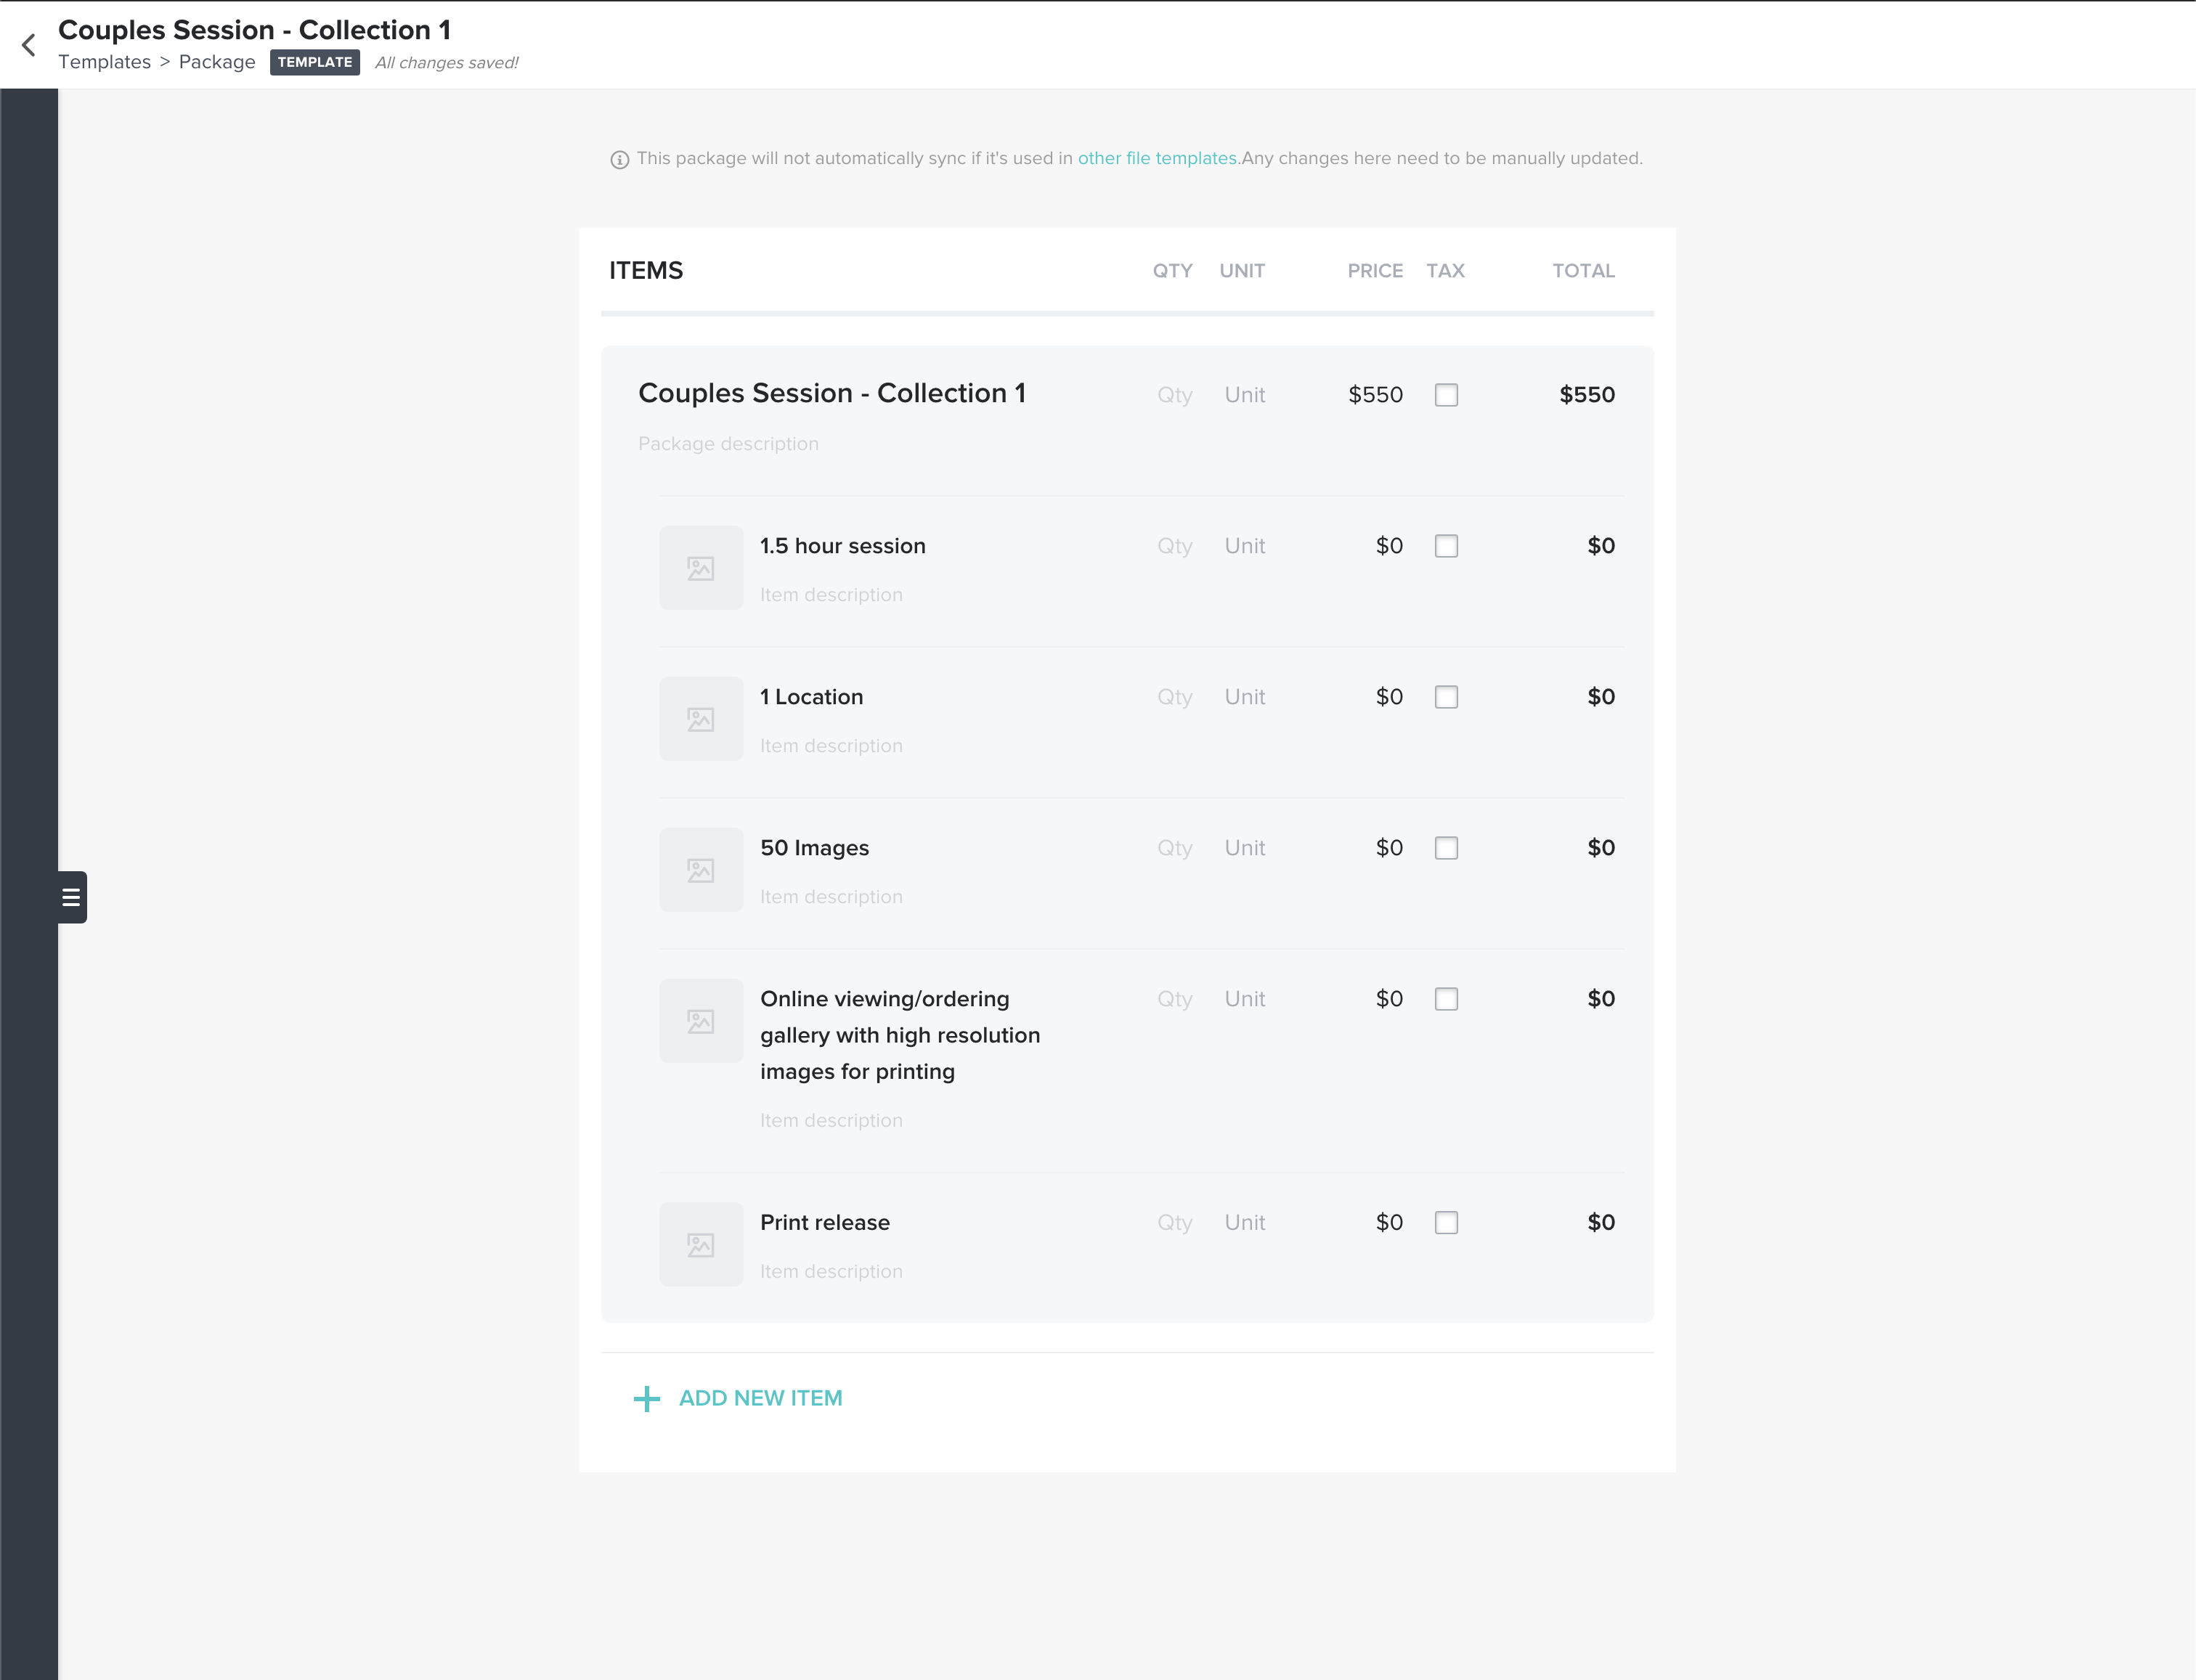
You can add images for each thumbnail as well, and write descriptions below each line item if you choose!
PART 2: Contact Form Setup
This is the very first step of communicating with me. It’s where it alllll starts! Before showing you how to build out your contact form in Honeybook, let’s take a look at what a live Honeybook contact form looks like.
Here’s my “Contact” page on my website. Notice it has four different options, for the four different main services I provide: weddings, couples sessions, brand sessions, and coaching.
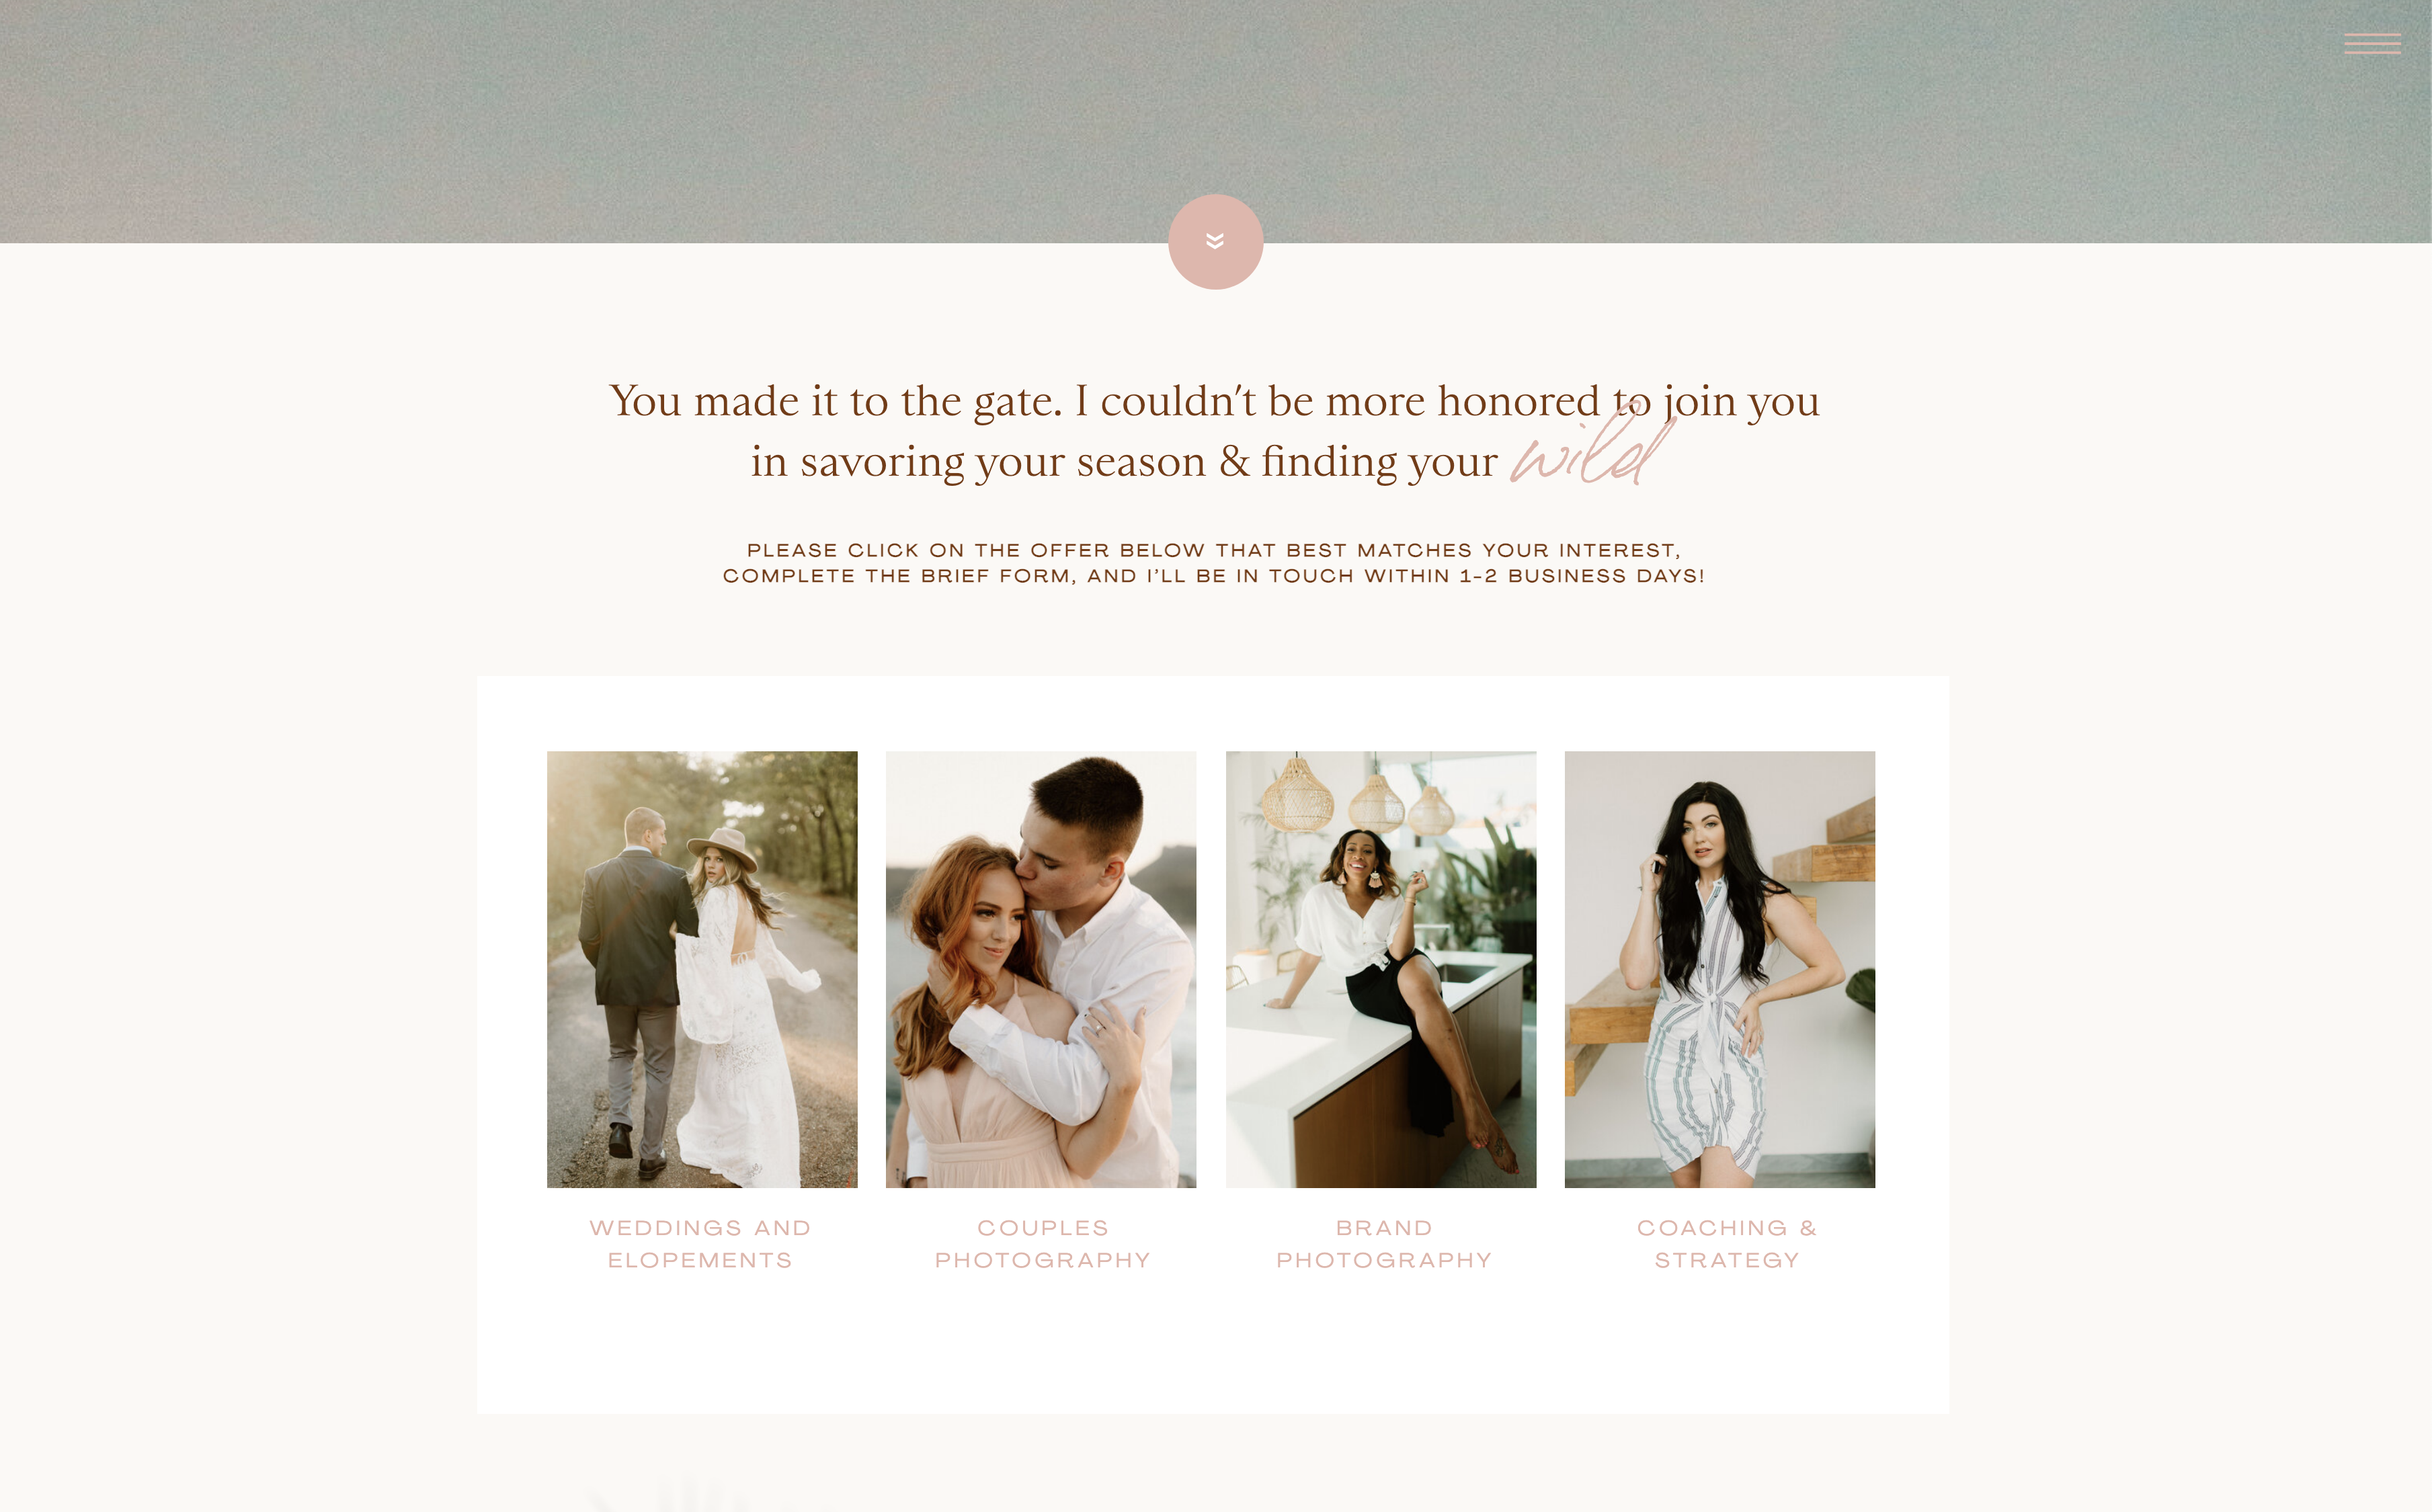
I have them all separated, because each one of these services has a different contact form attached to it. Why separate them? Glad you asked!
I have them separate because I’m asking the potential client different types of questions for each service. This helps to keep it really organized in the backend of Honeybook.)
For example, I need to know how many guests are going to be present for an intimate wedding, but I don’t need to know that for a brand photoshoot.
Or, maybe I need to know what a photographer is struggling with most for mentoring purposes, but that wouldn’t pertain to a couple looking to book an anniversary shoot. See?
So, let’s click into one of these and see what’s happening, and what information I’m collecting!
We’ll use my Couples Session Contact Form for example. Here’s what it looks like on my website:
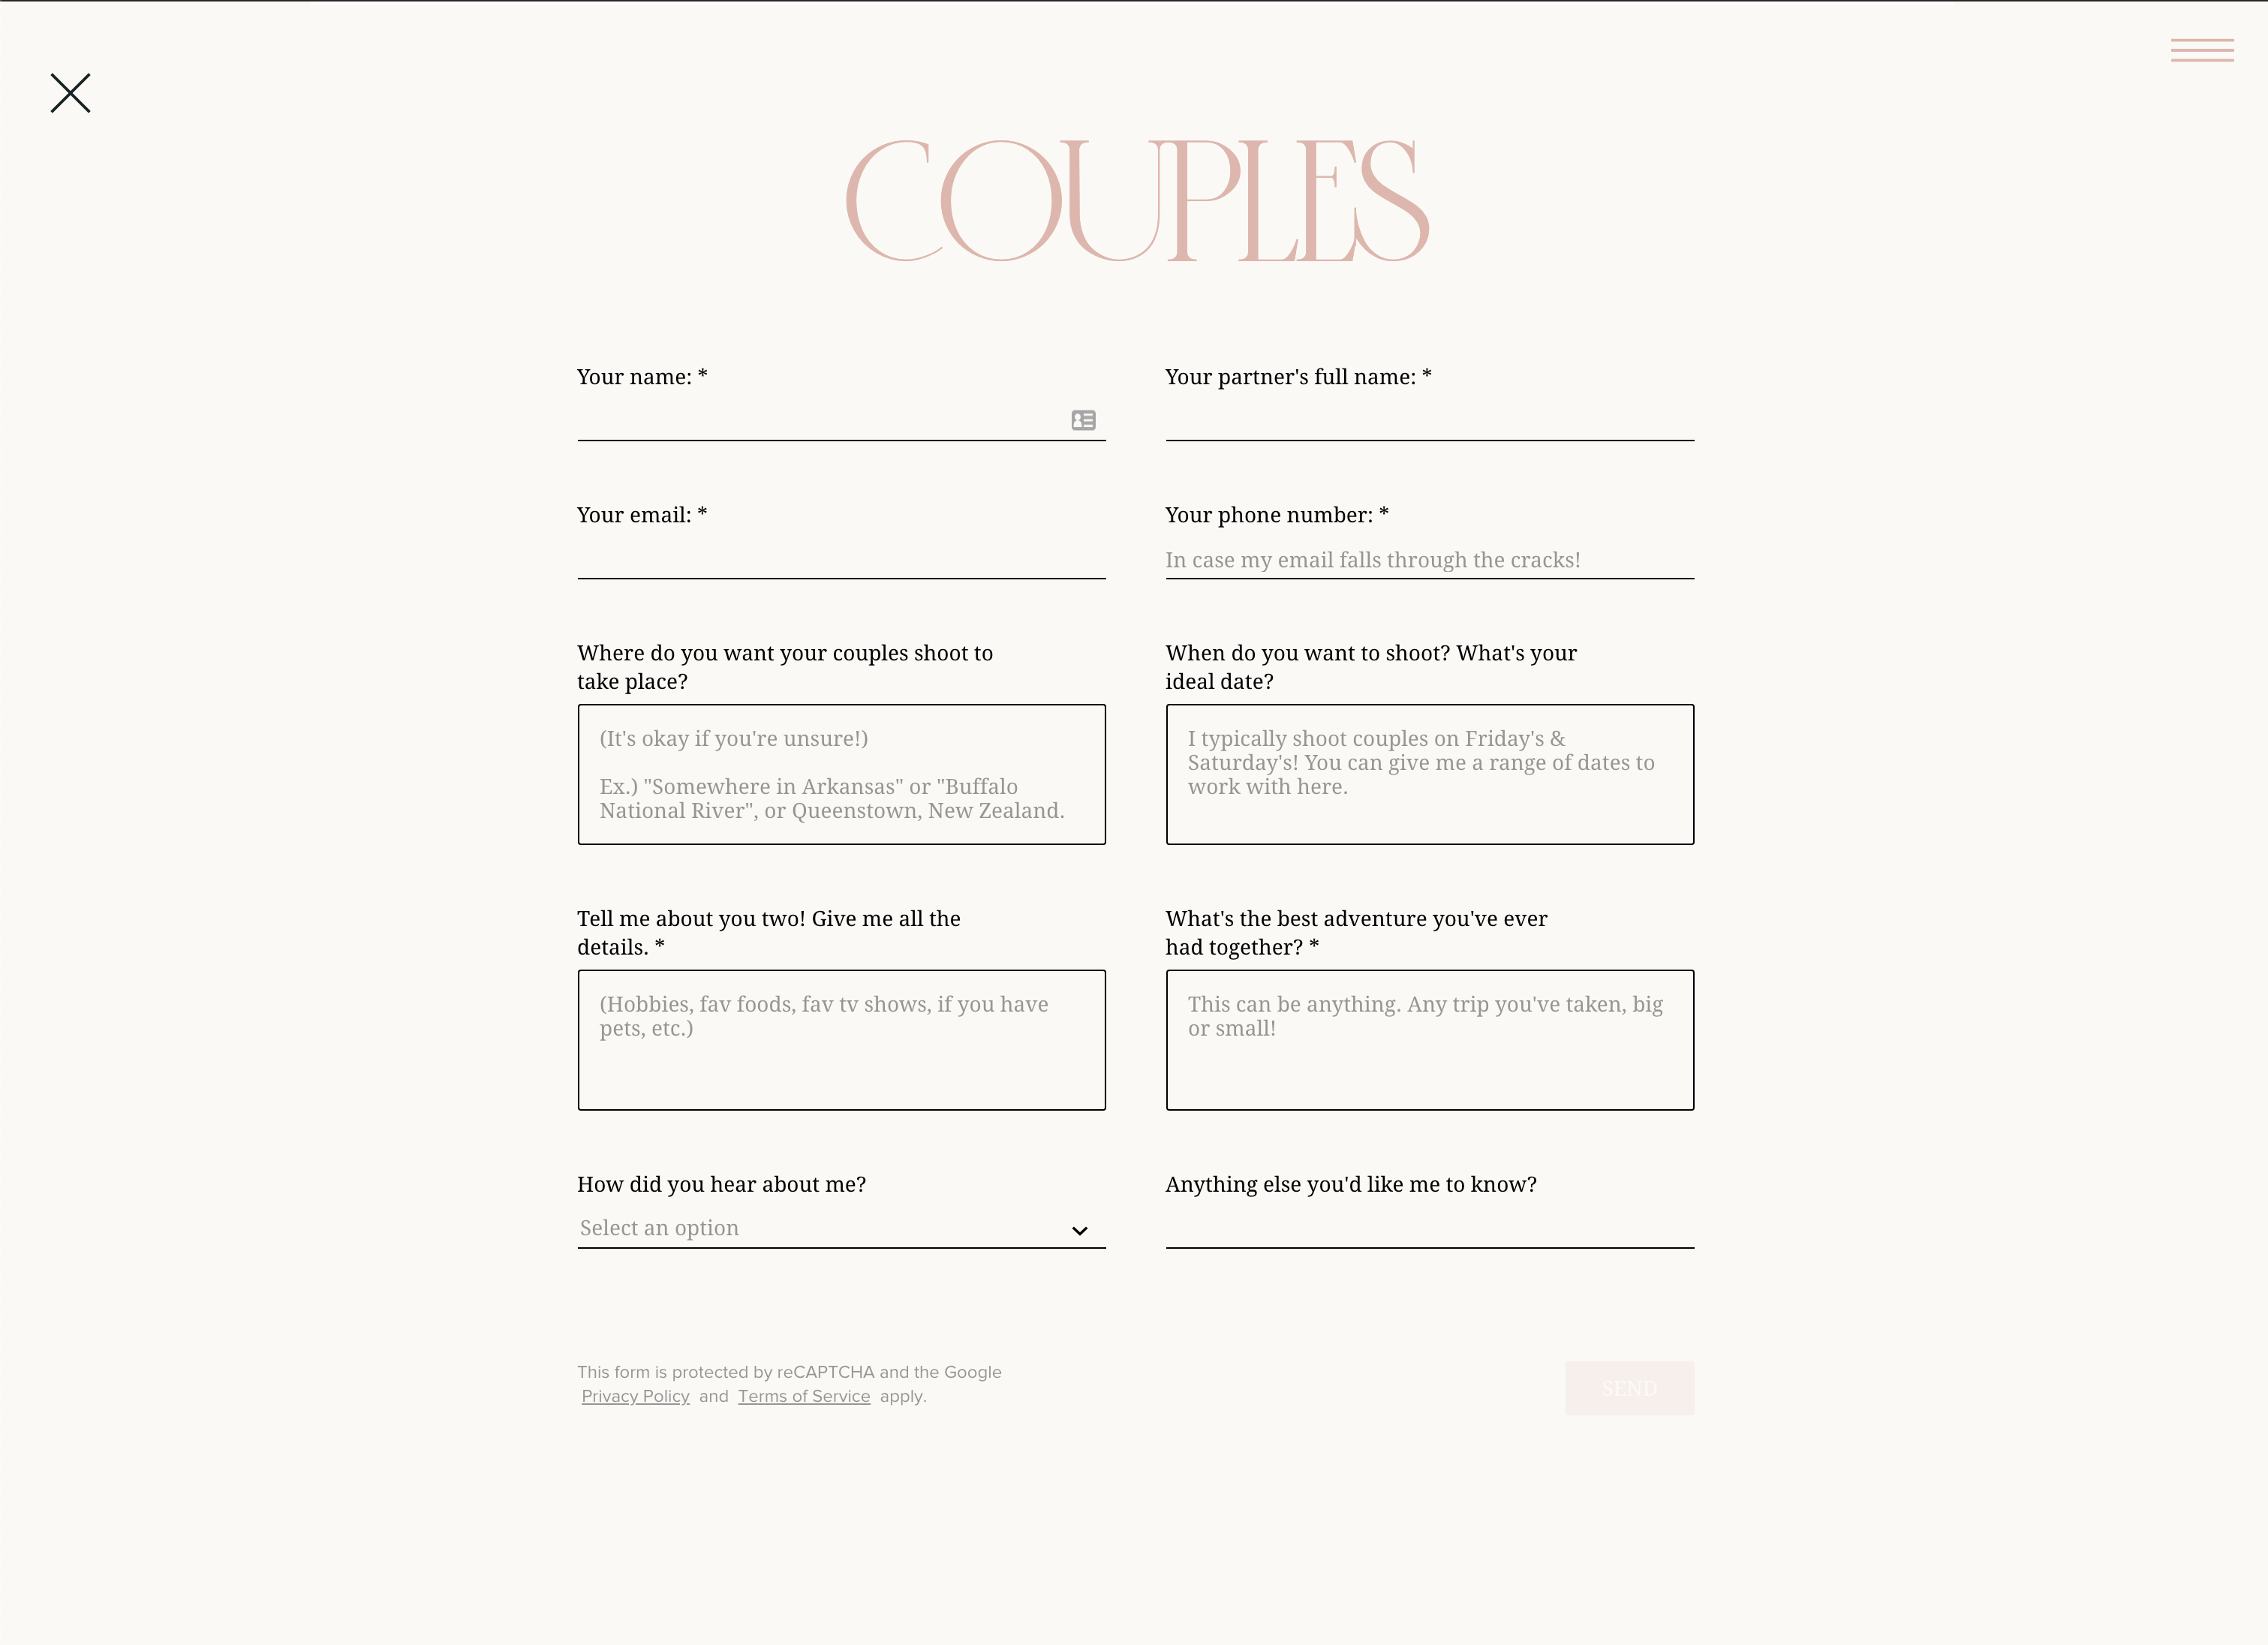
We see fields for:
- Name
- Partner’s name
- Their email
- Their phone number
- Where they want their shoot to take place
- When they want their shoot to take place
- More details about them
- The best adventure they’ve had together
- How they heard about me
- Anything else they want me to know
In the back-end of Honeybook, it looks like this:
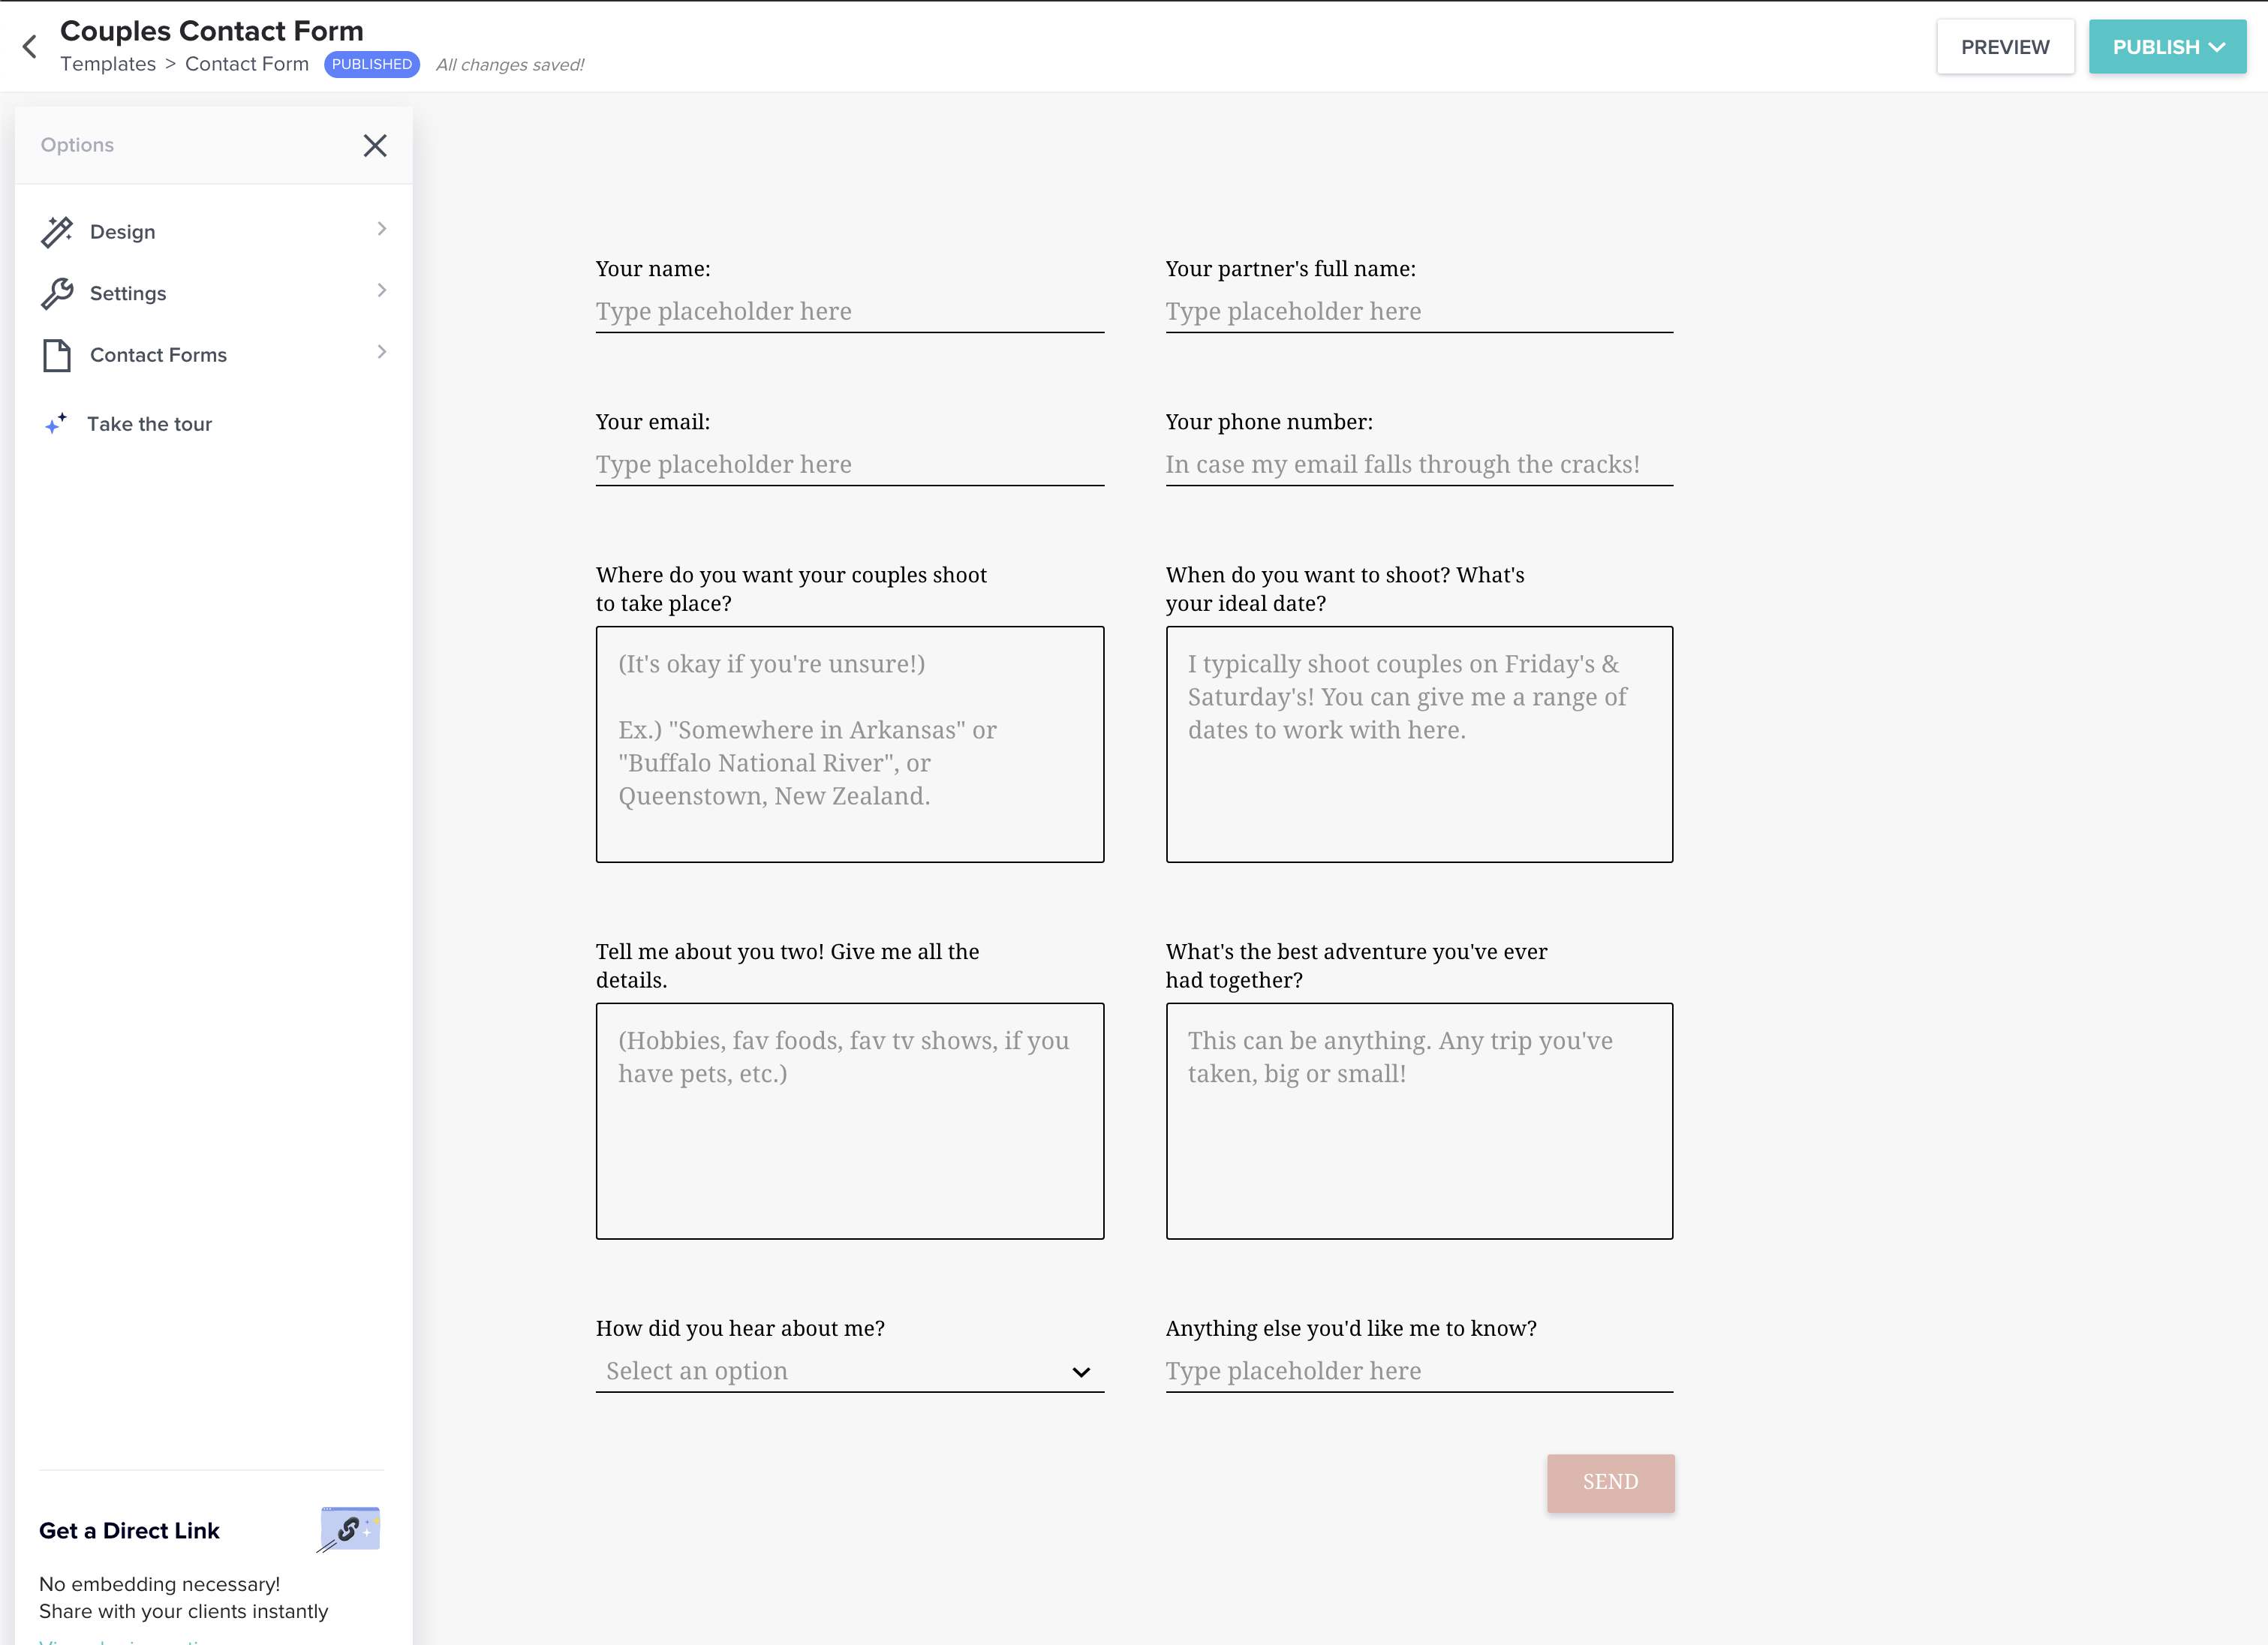
So, we see the same fields here as we do on my site. Neat right?
Now, onto the actual customization part of contact forms. Here’s a helpful article from Honeybook on exactly how to customize the contact form. It’s laid out really well, and is very easy to follow! So, do that first — then come back and proceed!
You also may be wondering, “Okay cool, but how the heck did you get your contact form on your website…?”
I gotchu. It’s super easy. You simply just grab an embed code from the contact form in Honeybook, and add it into your website provider. I use Showit, so after adding it, and after any changes I make, I just click the publish button, and my changes are published immediately!
Here’s an article from Honeybook on exactly how to add your Honeybook contact form to a showit website, and if your’e using something else — here’s an article on how to embed or distribute your contact form on a variety of websites!
Now, what about if you don’t have a website yet…? Can you still have and use the contact form?
The answer is… YES! You can share your contact form via a Direct Link — and send by text message, on Social Media, or anywhere else you get inquiries from! Here’s a helpful article from Honeybook on exactly how to do that!
PART 3: Importing Clients + Creating New Projects
There are multiple ways to get your clients into Honeybook once you’ve gotten it set up. You can either: a) manually add individual clients while also creating an individual project for them, b) manually add an individual client without creating a project, or c) add a list of clients via a CSV.
Here’s an article from Honeybook on how to add your clients to honeybook, for each of the aforementioned options! And here’s a video walkthrough on creating a new project.
PART 4: Understanding & Using Projects
Projects are how you’ll communicate with, and send files to, your clients. They’re created whenever either a) someone fills out your contact form and selects the type of project they want to book, or b) when you manually enter someone (by way of part 3: importing clients and creating new projects.)
Honeybook’s dashboard lists your projects in one beautiful, simple, organized spot; so you can easily navigate to the project you’re needing to hop into and check the status of it, send files, chat to your clients through it, or whatever you need to do.
Projects are so helpful because they eliminate the “all over the place” communication you’re probably used to!
With projects, when you’re gearing up and getting ready for a shoot and need the details, you can find exactly where it’s at, what time, what details you sent their way and what they’re wearing — instantly because all of that jazz is in one organized place. (No more fishing through texts and emails and FB messages trying to find it all!)
Basically, projects are all-encompassing folders with your client’s name on them.
Once you click inside of a project, you’ve got a ton of options. Here’s just a short list of what you can do inside of a project:
- Reply in the chat area (which is sent through as emails as well, so no worries about them not seeing)
- Send a brochure
- Send a proposal (these are the invoice & contract all in one, packaged up perfectly. I LOVE these! They’re so nice because your clients can view their package, sign the contract, and pay the invoice all at the same time, so there’s no more back and forth emails or awkward pricing convo’s)
- Send an invoice
- Shoot over a timeline for the wedding day
- Email a contract
- Email questionnaires
- Send any attachments
- And many more!
PART 5: The Honeybook Pipeline
At the top of your main projects page, you’ll see a pipeline, which is completely customizable. Here’s an article from Honeybook on understanding the project pipeline.
You can move your client through your process manually, however; some stages automatically adjust as you go along. The pipeline helps you to see exactly which clients are in which stage, and which need attention first!
In case you guys wanted an inside peek at my pipeline, here are the stages I have set up; so you can swipe my workflow & plug ’em in when you’re setting up your account!
- Inquiry received (automatically adjusts)
- Responded to inquiry (automatically adjusts)
- Follow up (if I haven’t heard back from the lead)
- Proposal sent (this one automatically adjusts when you send a proposal)
- Proposal signed (this one automatically adjusts when they sign the proposal/contract)
- Retainer paid (this one automatically adjusts when they pay the retainer)
- Planning (this is when we’re planning all the shoot details)
- Editing (this is after I’ve shot their session and I’m in the editing phase)
- Upload gallery (this is after their gallery has been edited & needs to be uploaded to Pic-time)
- Blog session (when I need to blog their image
- Send gallery (this is after I’ve sent their gallery to them)
- Completed (when their workflow is complete)
- Testimonial request (an email requesting a testimonial about 3 weeks after their session)
- Archived – after they’re through the complete workflow, they’re sent to the archive
PART 6: Your Master Templates
Next, you’ll want to set up your master templates. These are the templates you’ll be using day-to-day when clients inquire or book, and just in your general communication with clients/potential clients.
The primary templates you’ll want to focus on setting up are your email templates, brochures, contracts, proposals, and questionnaires.
EMAIL TEMPLATES:
These are one of my all-time favorite things about Honeybook. I have an email template for any email I’m regularly sending out to clients. At this point in my business, (7+ years,) I’ve got 200+ loaded into the back-end of my Honeybook account.
(Obviously you won’t start off with that many, but it sure as heck has helped me to have so many templates so I don’t have to write every email from scratch!)
Email templates are so amazing, because they allow you to insert an entire email with the click of a button. Seriously, it’s a miracle.
We want to build these email templates out in the back-end of Honeybook before we start using them for our inquiries/projects. We’ll do that by going to Tools > Templates > Emails
The email templates that (in my personal opinion,) are absolutely necessary for your photography business are:
- Auto-responder email (sends right after someone inquires)
- Response to Inquiry / brochure, etc.
- Proposal email
- Official Welcome + What to wear email (can be split up if need be)
- Timeline for session
- Prep for session (sending any other relevant details/info over)
- Day of reminder
- Thank you + day after details
- Blog is live email
- Gallery is live email
- Testimonial request
- Follow up email #1
- Follow up email #2
- Out of office email template (for when you’re on vacay, etc.)
BROCHURES:
Brochures are a feature inside of Honeybook, that make the process a bit more simple for clients to progress from an inquiry to booked.
You can present your potential clients with your brochure (which has the different collections you offer in it,) and then they can choose the collection they want from the brochure. Then, Honeybook will automatically create a “proposal” file from their selection on the brochure! 🙂
In order to create a brochure, you’ll go to “Tools > Templates > Brochures.”
Here’s an article from Honeybook on how to create a brochure template:
Alternatively, you could have a hidden pricing page on your site that has your collections on it, and have the client email you back with the collection they’d like to book.
That option would look something like this:
- In the Email Templates document, you’d send out “Email Template 2: Response to Inquiry” and link your pricing guide inside the email.
- If you don’t know how to design your own pricing guide from scratch, (or simply don’t want to take the time to,) you can always purchase a template!
- OPTION 1: If you want a hidden pricing page on your site, (that’s built on/hosted on showit,) I recommend this one from Davey & Krista at The Palm Shop.
- OPTION 2: Alternatively, you could attach a .PDF version of a pricing guide. You can search “pricing guide” on sites like Etsy or CreativeMarket. 🙂
CONTRACTS:
Contracts are one of the most important features in your photography business. I tell EVERY single one of my mentoring clients that they HAVE to have one. It’s a non-negotiable.
I’ve had situations where I thought I didn’t have to have a contract, (spoiler alert: you always do, no matter who you’re working with,) and I’ve had them take over $1,000 out of my bank account filing a dispute because there wasn’t a contract in place. So moral of the story, always have one. ?
Second, don’t try to write it yourself. The best thing you can do is purchase a contract template from a lawyer that’s made for photographers. My top recommendations for where to get these are either:
Honeybook also has contracts built in that are available to you, but I recommend purchasing one from a lawyer that’s built it specifically geared towards your business if possible! It’s the best way to go. 🙂
After you’ve purchased you can copy and paste the contract straight into your Honeybook templates section for contracts. (Go to Tools > Templates > Contracts.)
PROPOSALS:
Proposals are one of my MOST favorite features in Honeybook. This is where our virtual cash register dings. ?
Proposals are basically the scope of the project, the payment plan, and the contract all wrapped up in one pretty little document.
Here’s an example of my proposals, how I have them set up, and how I use them in my business:
QUESTIONNAIRES:
Questionnaires are really useful when communicating with clients/potential clients. Instead of having to email back and forth your questions, you can send over a questionnaire form, and they can easily answer and submit it when they’re finished!
I use questionnaires for things like couples sessions, engagement sessions, elopement location options, wedding timelines/details, etc.
Here’s an article from Honeybook on how to create and send a questionnaire.
Whew, okay that was a LOT. I know. But, the good news is you made it through, and you can easily just bookmark this or pin it and save for later when you’re setting your Honeybook account up. That way, you can just come back to it and follow along! 🙂
Stressed at the thought of setting up your entire Honeybook account by yourself, and just wish somebody else would do it for you?
You’re in luck! I now offer a full-scale Honeybook setup service, and you can find out more about it here, or click the image below! 🙂
LOOKING FOR MORE HELPFUL PHOTOGRAPHY TIPS? FEEL FREE TO BINGE ON THESE BLOG POSTS, OR PIN ’EM ON PINTEREST FOR LATER! 
If you’re short on time, follow me on Pinterest – and you’ll get these kinda tips delivered straight to your feed! You know… when you’re scrollin’ through Pinterest with coffee in hand, ready to take on the day… or, procrastinate.
Whatevs. Pinterest biz sesh, anybody!? 


Read the Comments +