")


Before my Honeybook days, I used to be so disorganized when it came to my photography business. Yup, I said it. I didn’t know what I was doing when it came to communicating with clients, or where the heck all of my clients even were in their workflow, (or lack thereof.)
“Did I send out that gallery…? … Did I respond to that inquiry? … Did I email them a testimonial request?” That was me on the daily, hoping nobody would figure me out, and realize I did *NOT* in fact — have my stuff together. ?
It was messy, and I was constantly putting out fires everywhere. I wasn’t sending out contracts with every job I booked, and I was constantly having to wait for clients to pay all awkward like after their session. *shivers*
That is, until I found Honeybook. *cue the choir*
Honeybook not only saved my business, but it gave me my sanity back. I finally felt like I was legit, and it helped me stay on top of my workflows and know where I was with each client I was working with. I could go on and on talking about all the ways it’s made my life easier and my job more enjoyable, but I’d rather show ya. ?
Let’s take a deep-dive into the back-end of my biz. Here’s how I use Honeybook to manage my photography business!
1. Contact Form
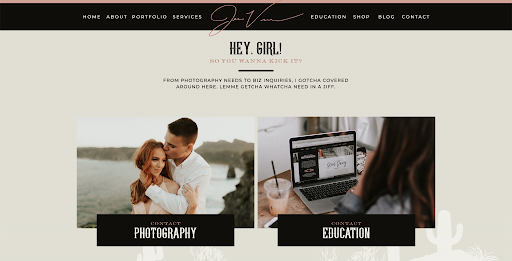
I seriously love how the back-end of Honeybook is set up, and the entire process starts with my contact form on my website.
(You don’t have to have a contact form, or even a website in order to have Honeybook, this is just how I do it!)
So here are my contact form options on my website, the one on the left is for photography inquiries and the right is for education, (like one-on-one mentor-ships with photographers — that’s you guys!)
(Here’s a look at the inside of one of them (excuse the fact I had to zoom out a ton to make it all fit,) and then the next image shows that exact contact form on the back-end of Honeybook!)
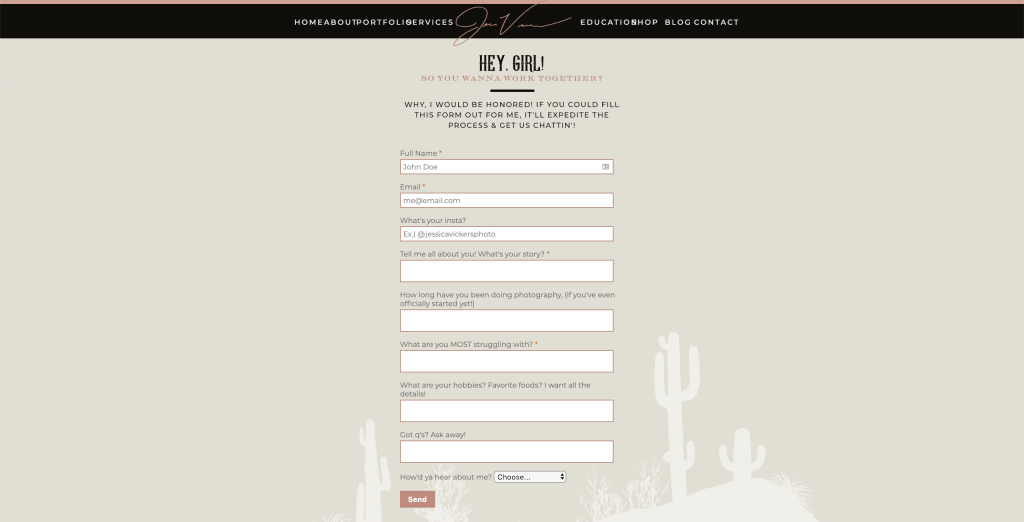
Here’s the back end of that contact form above inside my Honeybook account!
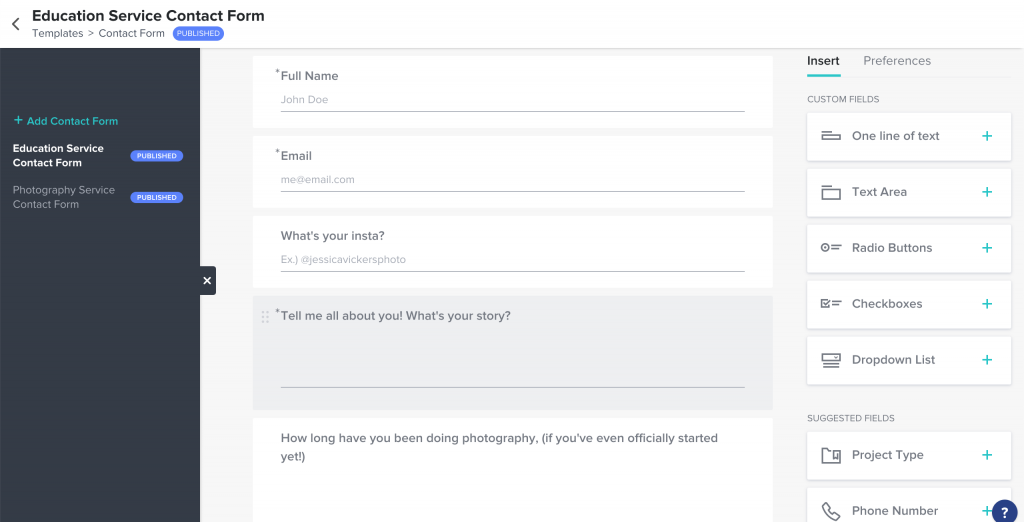
Adjusting your contact forms and plugging them into your site is literally THAT easy! Your changes are immediate, so it’s like- heaven.
Here’s the rundown on how the contact form starts the workflow process:
- Once a client fills out my contact form, that inquiry is immediately added into what’s called a “project” in my Honeybook account.
- I receive a notification from the Honeybook mobile app as well as an email that I received a new inquiry, and the project is created inside Honeybook; all in a matter of seconds.
I even have an auto-responder setup that lets my clients know I’m out of office, but that I received their inquiry. (Since they receive immediate communication, it increases my chances of booking! Workflow for the win!)
Pro tip: In order to keep my inbox super organized, I set up auto-responders on all of my social media accounts that directs everyone to my contact form; so I only have one direct stream of inquiries feeding my Honeybook.
Fun fact: I used to accept inquiries from 57,493 places… texts, email, facebook, Instagram dm’s, etc. – and I was dropping the ball on responses, like… all the time.
Setting up auto-responders that directed people to my contact form changed the game for me!
2. Projects
Projects are your individual inquiries, and you can categorize them by shoot type (i.e. wedding, couples, engagement, family, boudoir, newborn, senior, etc.)
Honeybook’s dashboard lists your projects in one beautiful, simple, organized spot; so you can easily navigate to the project you’re needing to hop into and check the status of it, send files, chat to your clients through it, or whatever you need to do.
Projects are so helpful because they eliminate the “all over the place” communication you’re probably used to! That way when you’re gearing up and getting ready for a shoot and need the details, you can find exactly where it’s at, what time, what details you sent their way and what they’re wearing instantly because all of that jazz is in one organized place. (No more fishing through texts and emails and FB messages trying to find it all!)
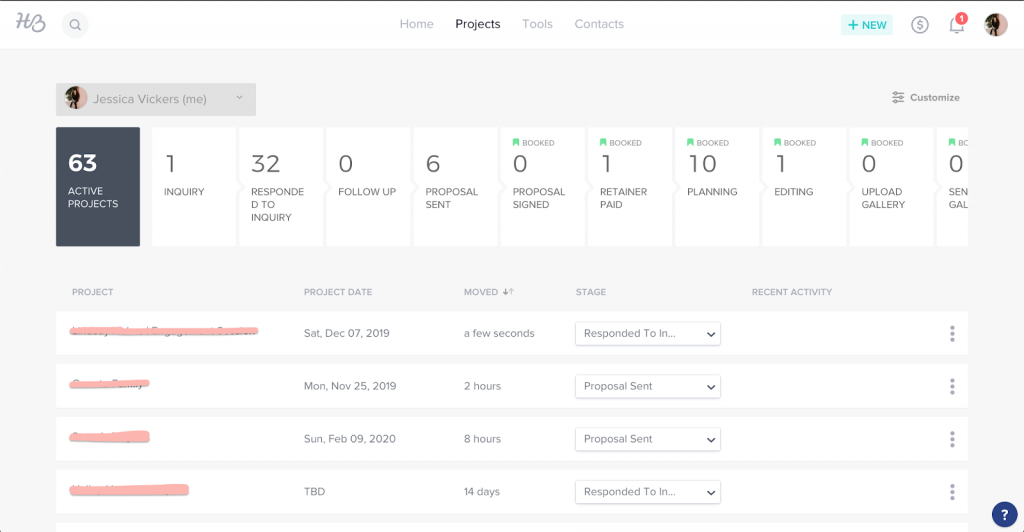
Here’s a screenshot of my projects on a desktop, (you can also just as easily view your projects on the mobile app!)
Basically, projects are all-encompassing folders with your client’s name on them. Once you click inside of a project, you’ve got a ton of options. Here’s just a short list of what you can do inside of a project:
- Reply in the chat area (which is sent through as emails as well, so no worries about them not seeing)
- Send a brochure
- Send a proposal (these are the invoice & contract all in one, packaged up perfectly. LOVE these! They’re so nice because your clients can view their package, sign the contract, and pay the invoice all at the same time, so there’s no more back and forth emails or awkward pricing convo’s)
- Send an invoice
- Shoot over a timeline for the wedding day
- Send a contract
- Send any attachments
- And many more!
At the top you’ll also see a pipeline, which is completely customizable; this is just how I have mine set up. You can move your client through your process manually, and some stages automatically adjust as you go along! That way, you can see exactly which clients are in which stage, and which need attention first! (Seriously LOVE the pipeline!! )
In case you guys wanted an inside peek at my pipeline, here are the stages I have set up; so you can swipe my workflow & plug ’em in when you’re setting up your account!
1. Inquiry received (automatically adjusts)
2. Responded to inquiry (automatically adjusts)
3. Follow up (if I haven’t heard back from the lead)
4. Proposal sent (this one automatically adjusts when you send a proposal)
5. Proposal signed (this one automatically adjusts when they sign the proposal/contract)
6. Retainer paid (this one automatically adjusts when they pay the retainer)
7. Planning (this is when we’re planning all the shoot details)
8. Editing (this is after I’ve shot their session and I’m in the editing phase)
9. Upload gallery (this is after their gallery has been edited & needs to be uploaded to Pic-time)
10. Send gallery (this is after I’ve sent their gallery to them & am waiting to receive their picks)
11. Finalize edits (this is when I’m finalizing their favorite images from the session)
12. Deliver finals (when the finals are ready to be sent off)
13. Blog session (when I need to blog their images)
14. Completed (when their workflow is complete)
15. Testimonial request (an email requesting a testimonial about 3 weeks after their session)
16. Archived – after they’re through the complete workflow, they’re sent to the archive
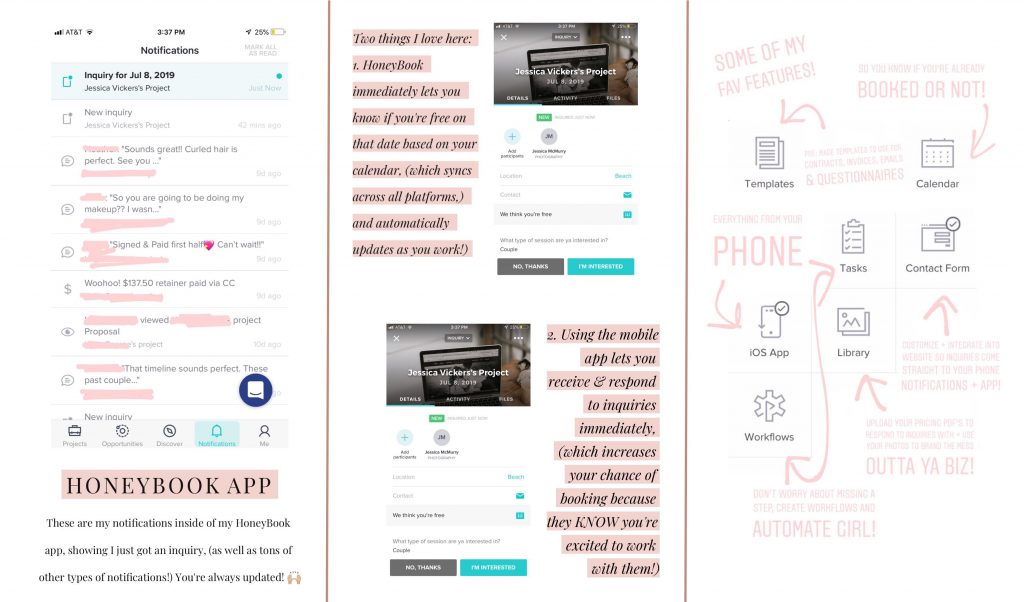
3. Honeybook App
One of the MAJOR pro’s to Honeybook vs. other CRM’s is that they have a mobile app.
And not only do they have an app; it’s beautiful and super easy to use. (I use it all the time to manage my biz when I’m traveling, which is like- all the time!)
Once you get your HB account setup, you’ll have all of your pricing info and packages saved as templates, so in order to send all of your info over, it’s literally just a few clicks, and then BAM- your info is headed straight to your potential clients without you having to skip a beat, (or stress over responding. Yeah, I know you’ve done it, too!)
Here’s a look into three different screenshots of inside the app & what it has to offer:
4. Templates
Honeybook’s templates are seriously life-savers. You can create a template for pretty much everything in HB.
Need some canned email responses? Done and done. You can easily create a template (I have one for each type of email I’m regularly sending,) and then just allot for a few paragraphs that you can customize for each specific client. Doing this saves me a TON of time. (No more chillin’ in inbox city half the day!)
(Yes. I’m embarrassed to say I used to write literally every single email from start to finish from scratch… so responding to inquiries took me literally forever. )
There’s the option for templates in more than just emails. Need a contract template you can easily plop into each project, plug a name and date into and send off? Done! Invoice templates? Got those, too! Questionnaires? Yep! You name it, it’s in there- and there’s a template for it. #winning
Here’s a few different screenshots of some options for templates, and an inside look at how you customize them:

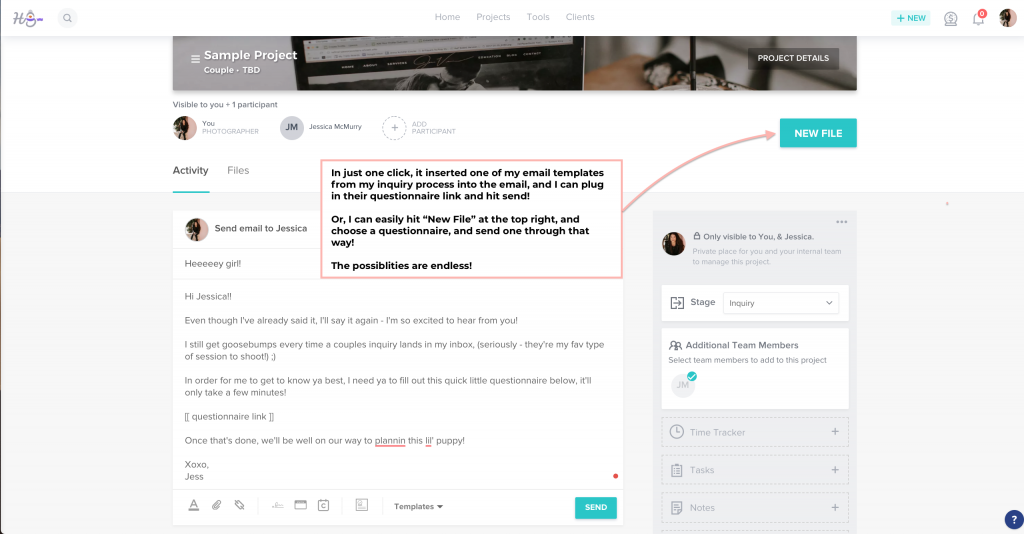
In this example, I’ll be showing you a proposal template and how easy it is to send one of those off! So I hit the “New File” button in the top right, and select “Proposal,” and then this window pops up:

Here’s a look inside an actual proposal! You’ll see three buttons on the left: 1) the proposal 2) the invoice and 3) the contract! It’s all viewed in a three-part document, so after they view they can sign and pay at the same time!
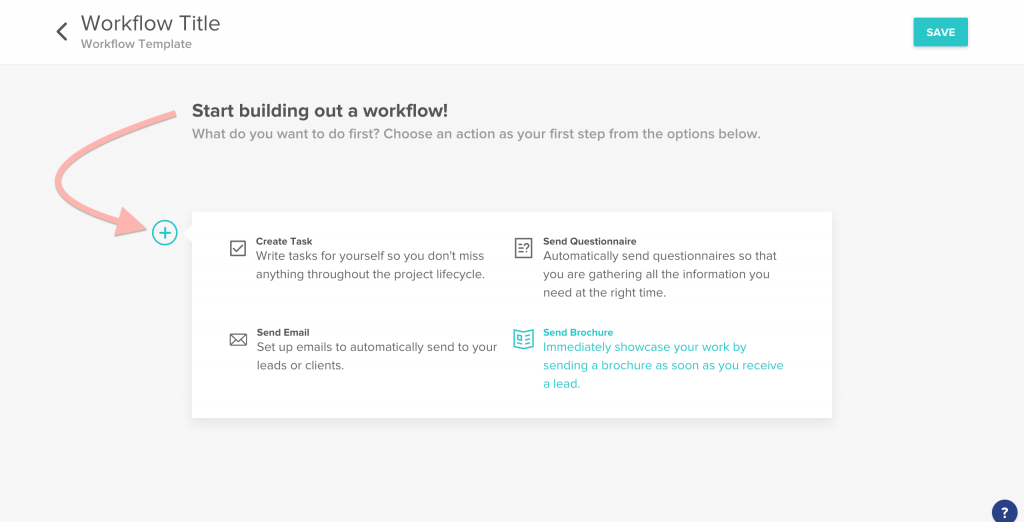
5. Workflows & Tasks
Inside each project, you can designate a workflow; which is essentially a pre-set list of tasks that will automatically be completed if/when you say so.
Think of it like this: if A happens… then B.
You can completely customize this, as well as pause your workflow whenever you need to. Most people have them set up for specific shoot types, i.e. weddings, couples, seniors, etc.
Here’s a look inside the options for setting up a workflow:
Think about it, how much time could you really be saving with an automated workflow, that actually worked?
I could honestly go on and on about how incredible Honeybook is and how much it’s changed my business and life- but you can totally see for yourself – for free!
By using the link below, you can sign up for a free trial, and at the end of the 7-day trial, if you decide you’re as addicted as I am, you can sign up for 50% off! ?

Take some time and organize the back-end of your business. Your future clients will thank you. (This is what I do EVERY year in order to take on the busy season by storm, and it’s my top tip for being as productive as possible all year long!)
Got any q’s for me? Drop ’em below in the comments below! 🙂
*Disclaimer: This post includes affiliate links, and I’d really appreciate it if you used ’em! Affiliate links help me continue to show up and serve you guys for free each week; so you really win in the end!
Wanna stick around and stay learnin’? I knew I liked ya. ?
Feel free to binge on these blog posts, or pin ’em on Pinterest for later! ??
If you’re short on time, follow me on Pinterest – and you’ll get these kinda tips delivered straight to your feed! You know… when you’re scrollin’ through Pinterest with coffee in hand, ready to take on the day… or, procrastinate.
Whatevs. Pinterest biz sesh, anybody!? ??


December 4th, 2019 at 6:11 am
[…] have an entire blog post all about how I use Honeybook to manage my photography business right here, and a discount code for you to get 50% off of your first YEAR […]
April 29th, 2021 at 6:20 pm
[…] have blog posts all about how I use it here, and here. And, I have a special button below that will get you 50% off your first year; so def […]
April 29th, 2021 at 6:38 pm
[…] you don’t have Honeybook or a CRM for your photography business yet, here’s a blog about how and why I use it, and if you already do – get to referring people! Use your insta, blog, facebook, whatever […]
April 29th, 2021 at 6:49 pm
[…] The last thing you want is to launch a site for your brand, start getting a ton of inquiries (EEK!)… and then not be able to be consistent in communicating with them, and lose them. You need a workflow to be able to always stay ahead of the game, and be organized. Once you have a website, you’re held to a different standard of business. You need to be professional and have all of your ducks in a row. The best and easiest way to do that is with a CRM (a client relationship manager.) The one I use and LOVE is Honeybook. I wrote a super in-depth blog post all about how I use and love it here. […]
June 16th, 2021 at 12:50 am
[…] I can’t explain the importance of streamlining your business systems enough; especially when it comes to your lead generation/onboarding process. Having a contact form that automatically pops your leads into a system that you manage clients from is phenomenal. (I use Honeybook as my CRM of choice, and you can find out more on that here.) […]