")


You may have noticed the term ” Honeybook smart files” surfacing around the web and throughout the community over the past year. Smart files are basically a revamped version of the “legacy files” that have been included in your Honeybook subscription. (They’re like the 2.0 version of legacy files.)
In this blog post, I’m going to touch on the following:
- What smart files are
- What smart files can do
- How you can use them
- How they’re different than Honeybook’s legacy files
- Where you should start with using smart files
- Building your first smart file in Honeybook
- Addressing gaps in your workflow
Not seeing smart files in your Honeybook account? No worries! They’re technically still in beta, so all you need to do is sign up for the waitlist to get access. (Rumor has it it takes less than a week to get them in your account once you’re approved!)
Here’s the link for the smart files waitlist: https://honeybook.typeform.com/smartfiles?typeform-source=www.google.com
Don’t have Honeybook yet, but want it? Here’s a link for 50% off of your first year! ?

1. What is a Honeybook smart file exactly? What does it do?
“HoneyBook Smart files” are simply just files that allow you to create and manage your client experience. A smart file can consist of any (or all) of the following:
- Service selections
- Contracts
- Invoices & payment
- Questionnaires
- Text
- Images
- Videos
Smart files allow you to easily create and manage every part of your client experience from onboarding, to service selection, to contracting, invoicing, making payments, and more! They’re the simplest way to create a seamless client experience and enhance your own business processes.
When using Honeybook’s legacy files, all of these steps had to be separate. (Aside from the proposal file; which had the scope of the project, the payment plan, and the contract all in one.) But with smart files, you can combine them ALL into one.
Being able to combine any, (or all) of these steps simplifies things SO much on the service provider’s end.
Honeybook’s legacy files also severely lacked when it came to customization. So not only were you unable to create a seamless flow of steps, (as everything had to be separate,) but you also couldn’t change any of the fonts, brand colors, etc. (Which is a huge pain for us as creatives, #amiright!?)
With smart files, you can add your own custom brand fonts, colors, layouts, etc.! The possibilities are endless.
2. How can I use smart files in my business?
There are so many ways you can use smart files to better optimize your business. I use smart files for all of my booking processes, whether it’s for the photography or education side of my business.
However, before getting started with actually building out any of your smart files, I HIGHLY recommend writing out every single step of your photography workflow — from inquiry to delivery of the files. Doing this not only helps you see what smart files you actually need, (so you don’t waste time building ones you don’t) — but it also helps you find the gaps in your workflow. Once you’ve identified gaps, you can create steps to fill them in and better improve your client experience.
To keep things clean, I separate my workflows into three different sections:
– Inquiry workflow
– Booked workflow
– Post-processing workflow
So for every session type I do, it has three different workflows. For example:
COUPLES:
- Inquiry workflow
- Booked workflow
- Post-session workflow
WEDDING:
- Inquiry workflow
- Booked workflow
- Post-wedding workflow
See…? Why do I separate them?
Automations are essentially workflows, which can be customized to either auto-trigger based on a trigger, (such as “send this when the first payment is made”, or “move to this next step once the previous step is completed”, etc.)
If all of my workflows (inquiry, booked, and post-session) were combined, then if someone ghosted me in the inquiry process, I’d still have a TON of tasks popping up in my task tray in honeybook, which would clog it up.
So by separating them, then only those who have actually booked me get moved to the “booked workflow.” It just keeps things much cleaner in my Honeybook!
Currently, I’m using smart files in every single one of my workflows! I have smart files for the booking process (where they pay me, sign the contract, etc.) as well as for portrait/engagement sessions, wedding questionnaires, etc.
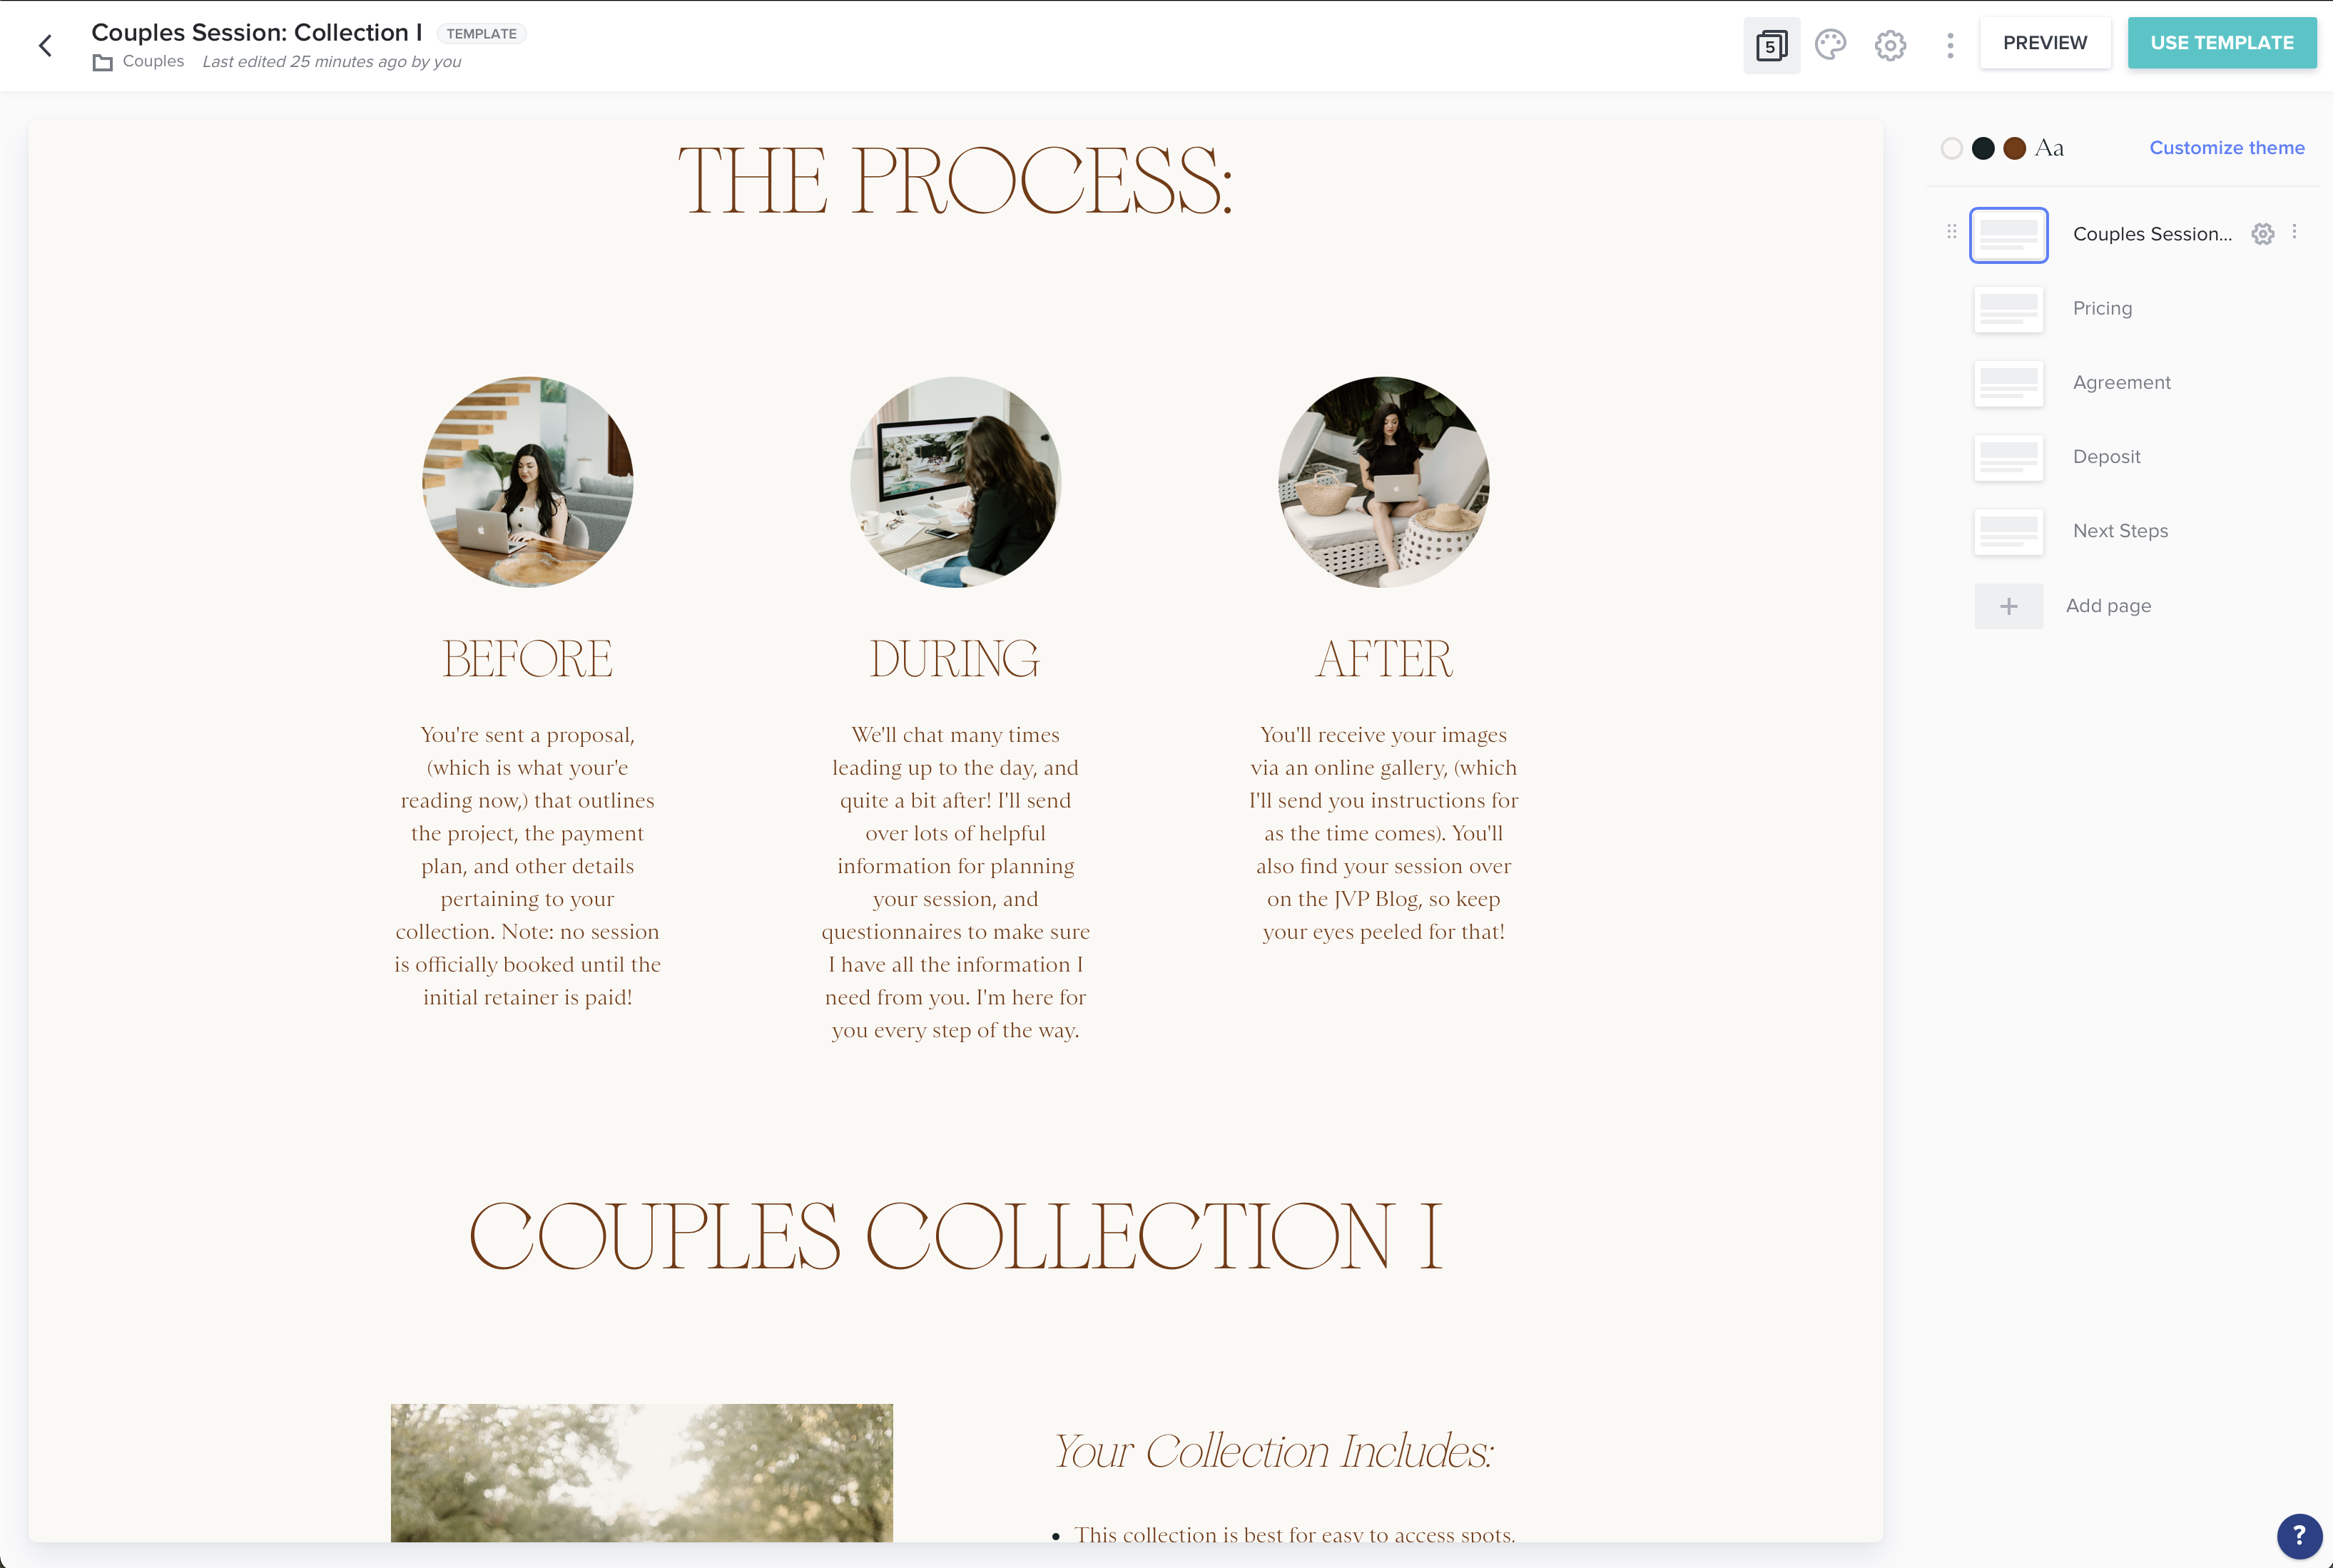
The most important smart file I’m using in my business is the Proposal smart file, which consists of the:
- Project scope (what’s included in their specific session)
- Pricing
- Deposit
- Agreement
- Next Steps
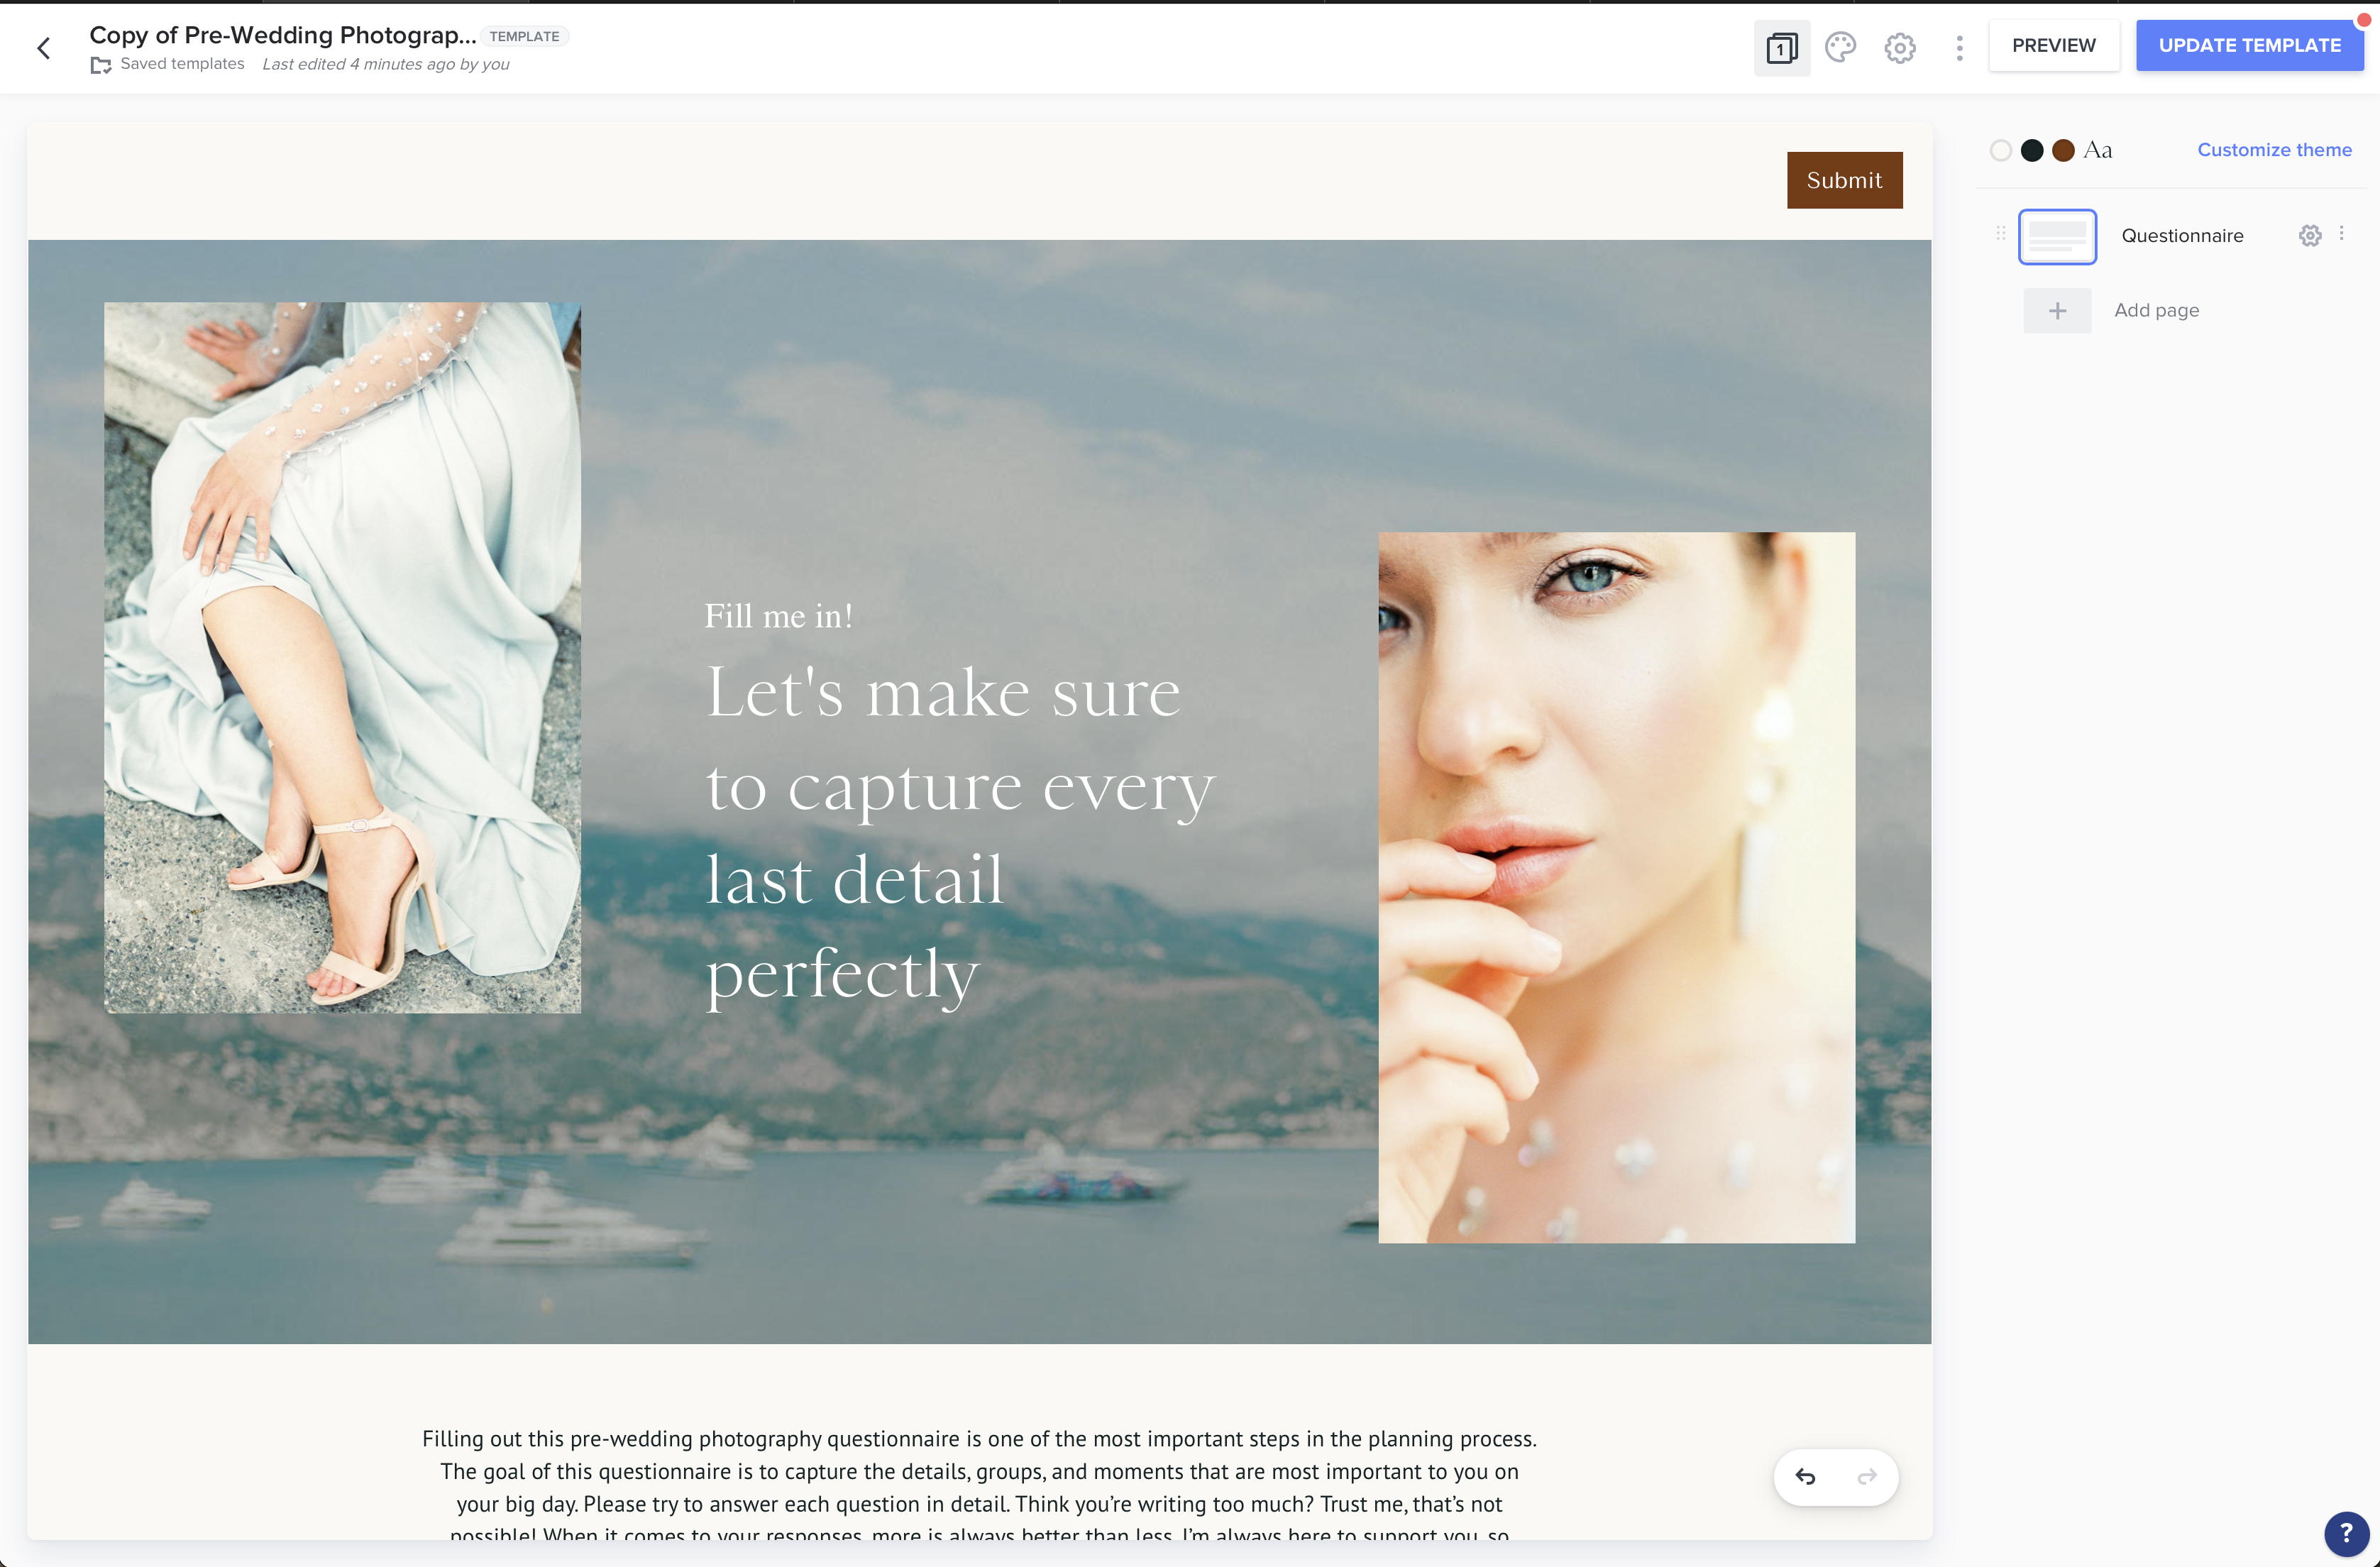
I’m currently using a tweaked version of the “Proposal” template in the Honeybook Smart Files Template Gallery. Here’s a behind the scenes look at what part of it looks like:
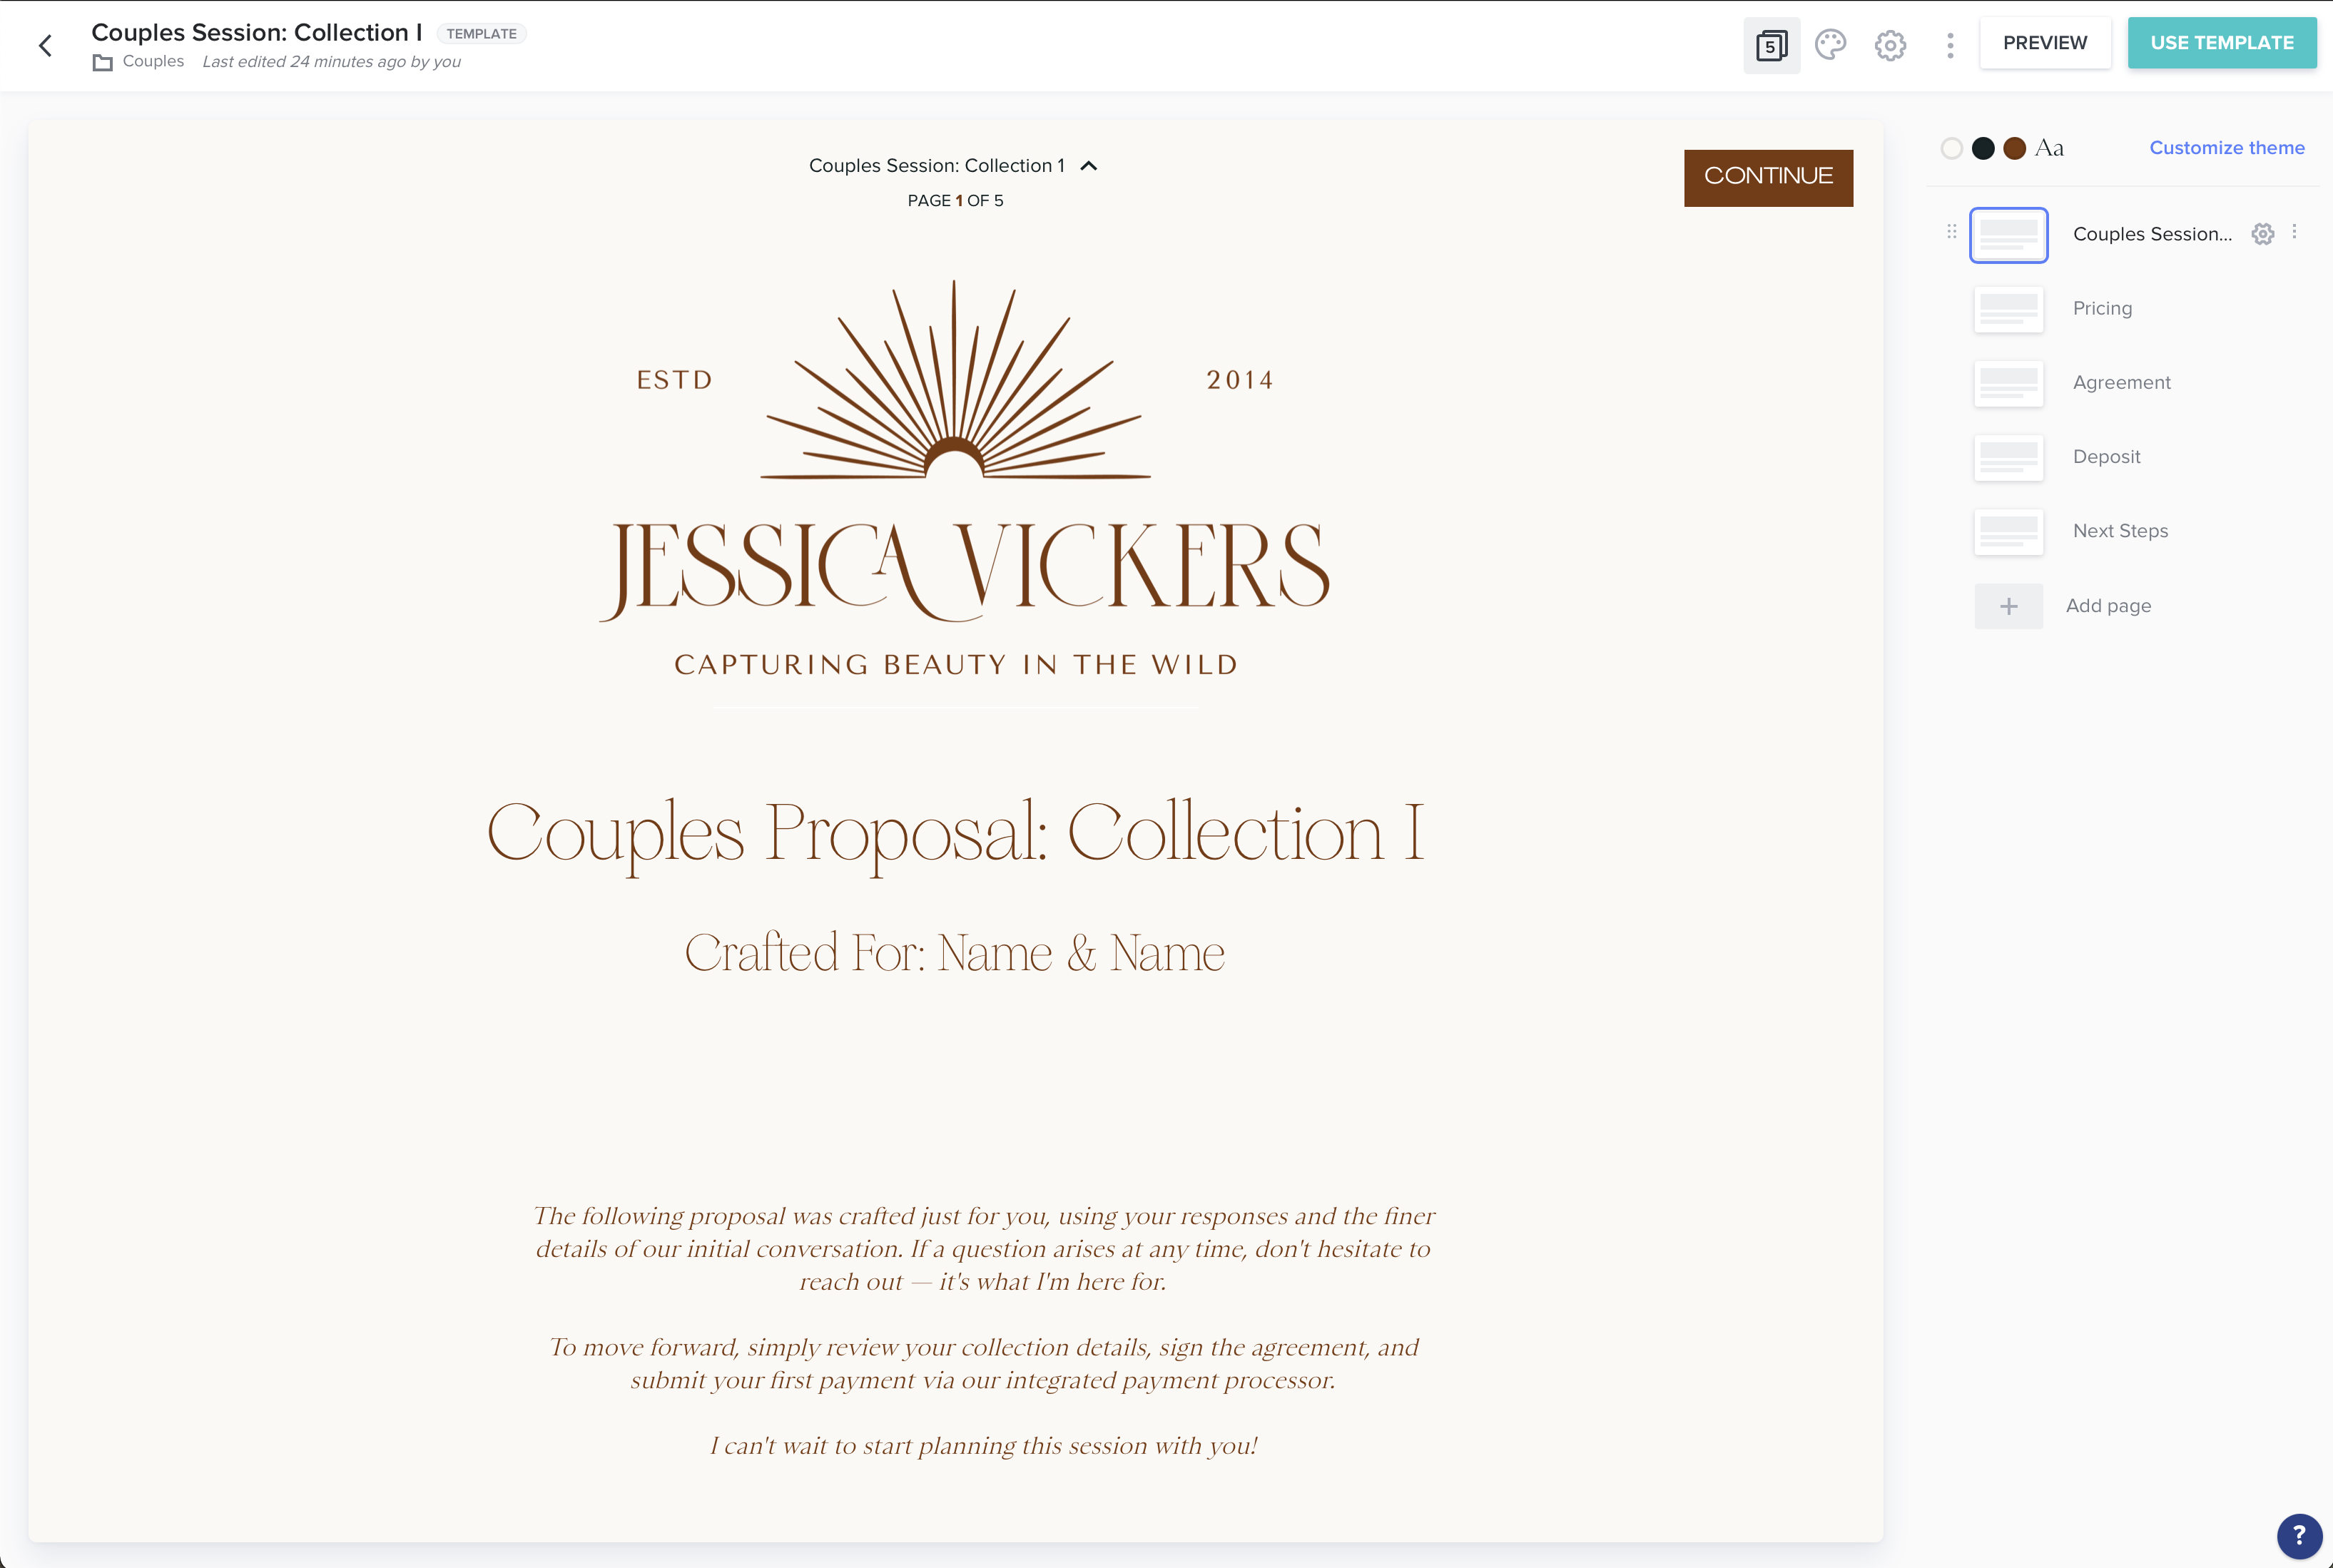
Over to the right you see a toolbar where each page is listed, “Couples Session Info, Pricing, Agreement, Deposit, Next Steps.) If you were to click on each of those, it would take you to that page in the smart file.
From there, you can edit everything you need to, and then just be sure to click the blue button in the top right that says “update template.” Once you do, you’ll see the blue button that says “use template,” and you can use it in an existing project, just have it as a template, or use it for a new project!
3. Where should I start with smart files?
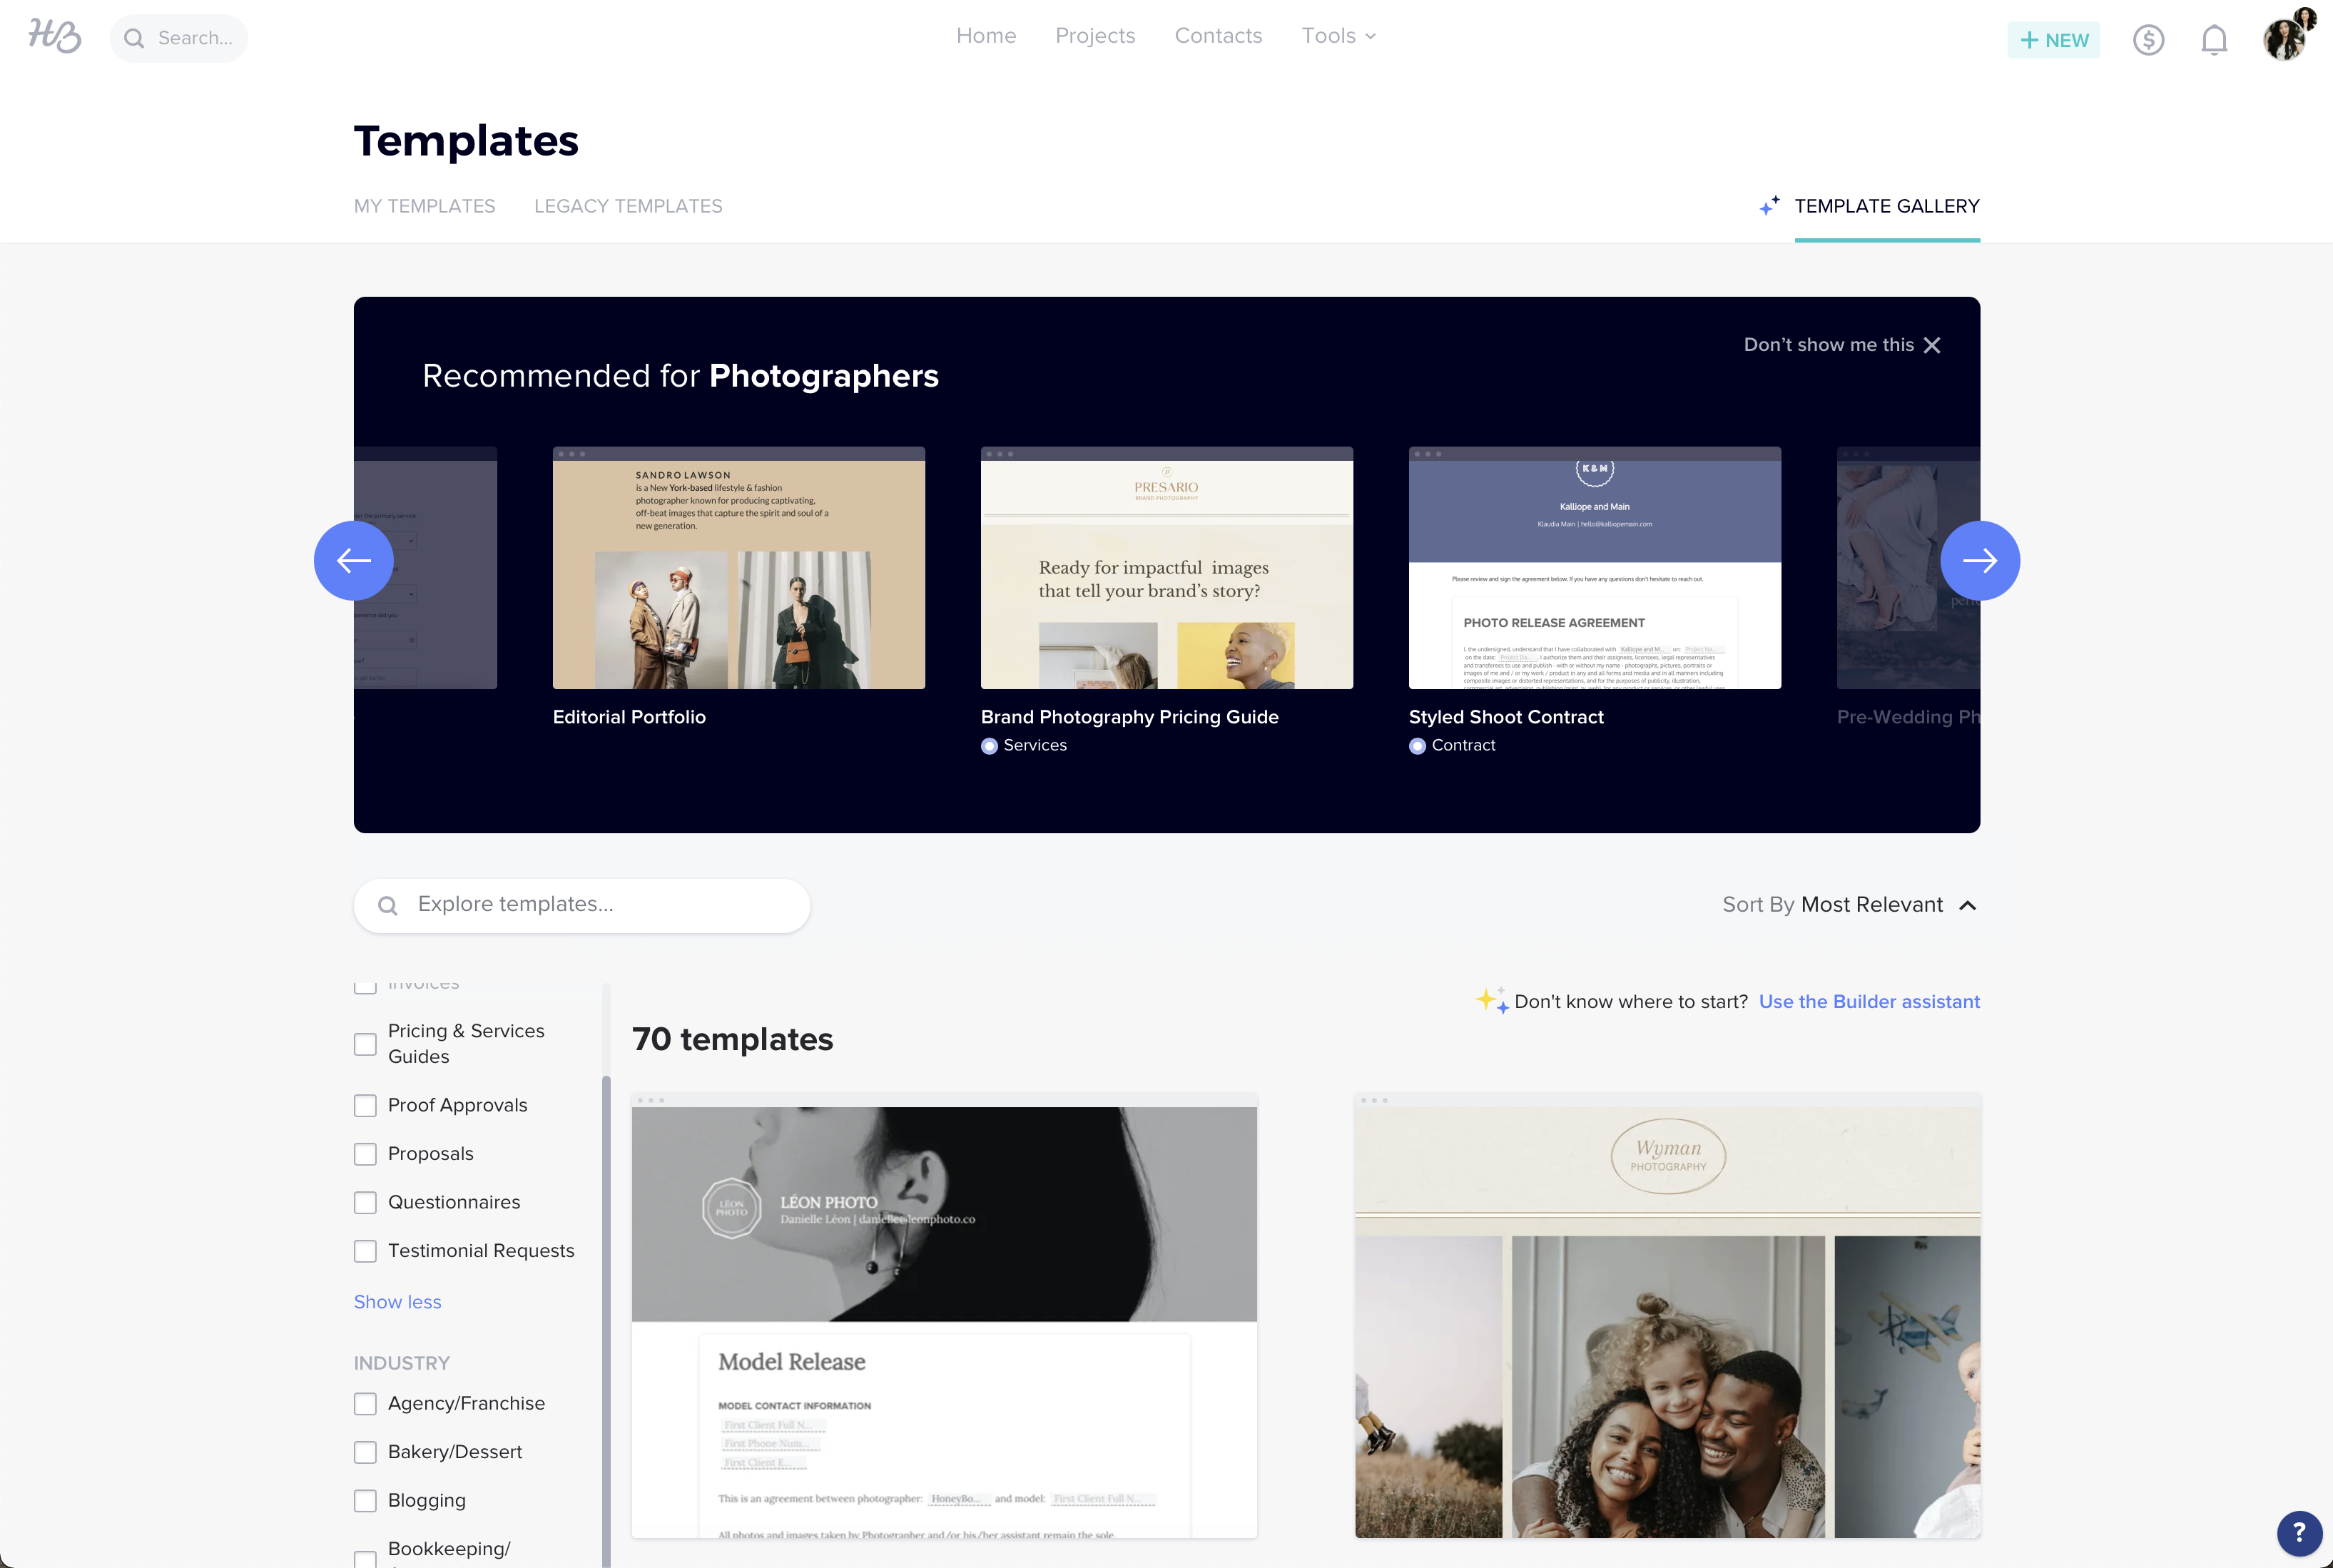
The quickest place to get started with smart files, (after you’ve written out your workflow step-by-step ?) is to utilize the smart files template gallery!
There are SO many beautiful pre-made templates that you can customize and put to work in your business fairly quickly! Here’s a BTS view at the Honeybook Template Gallery, with the preference set to “Photographers.”
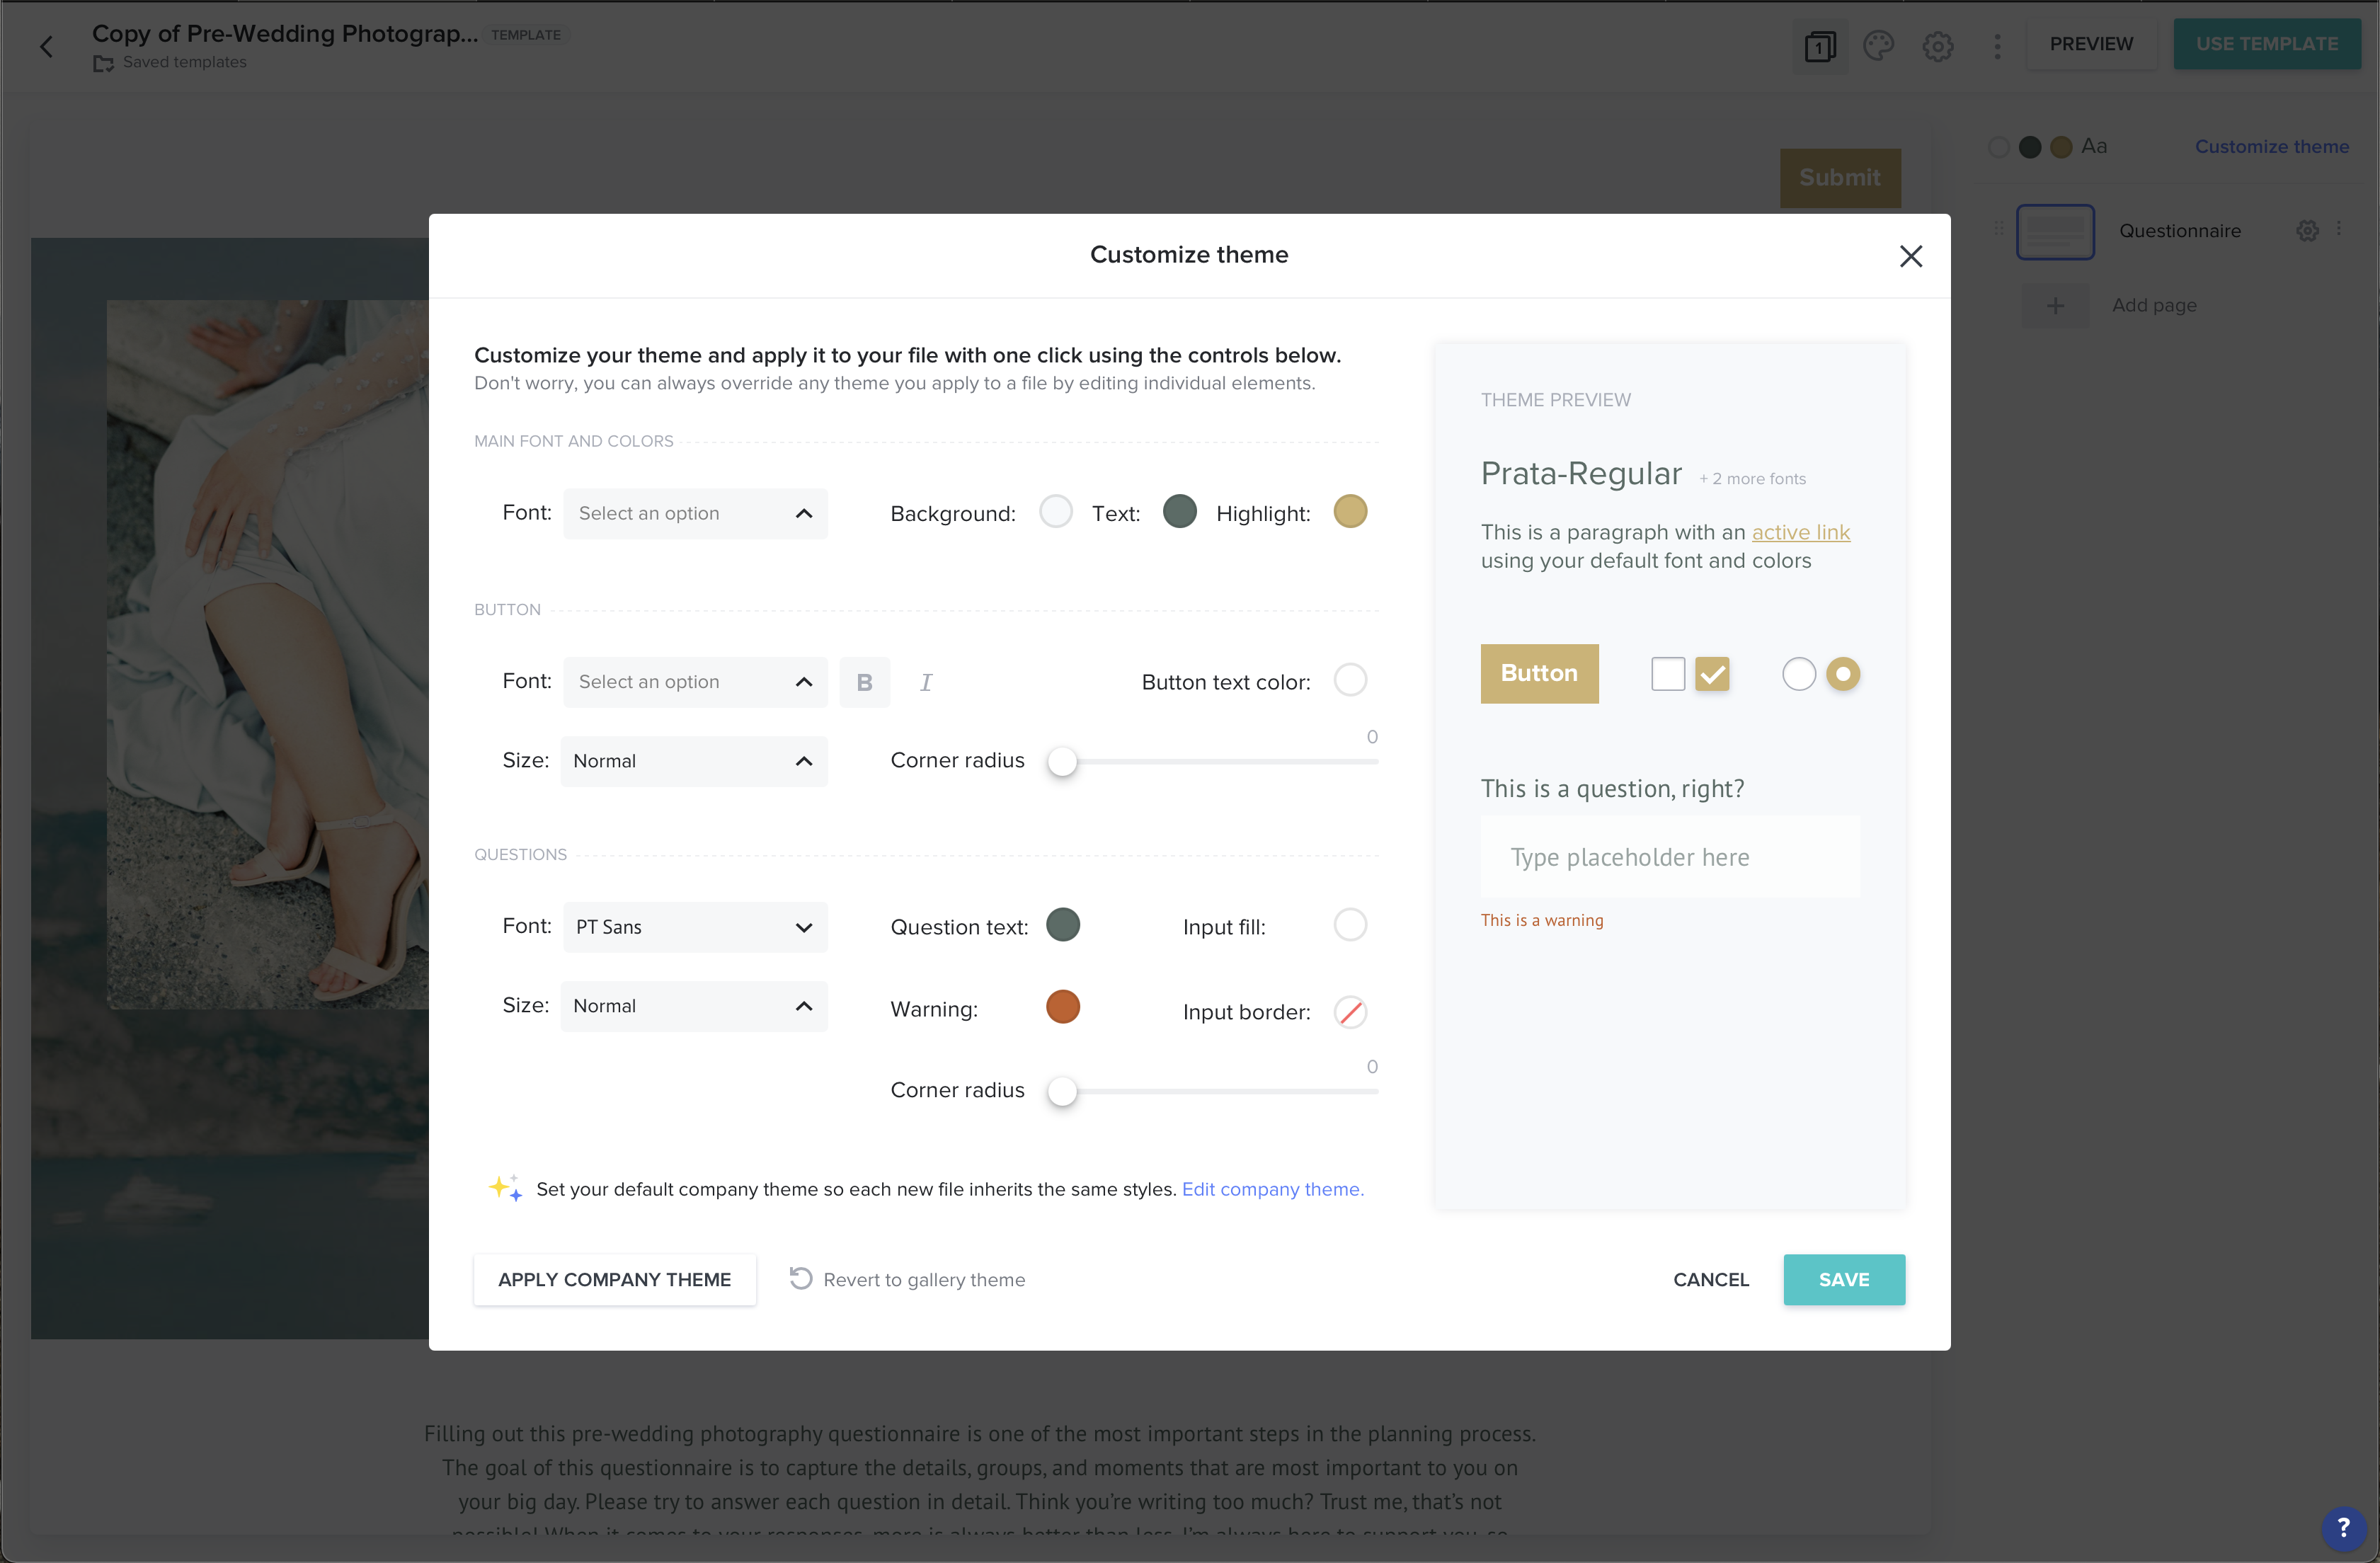
However, I highly recommend updating your Company Theme in your brand settings before customizing any smart files.
To do this, you’ll hover over your profile picture in the top right, (the little circle avatar,) and then go to settings > company brand. (Pictured below.)
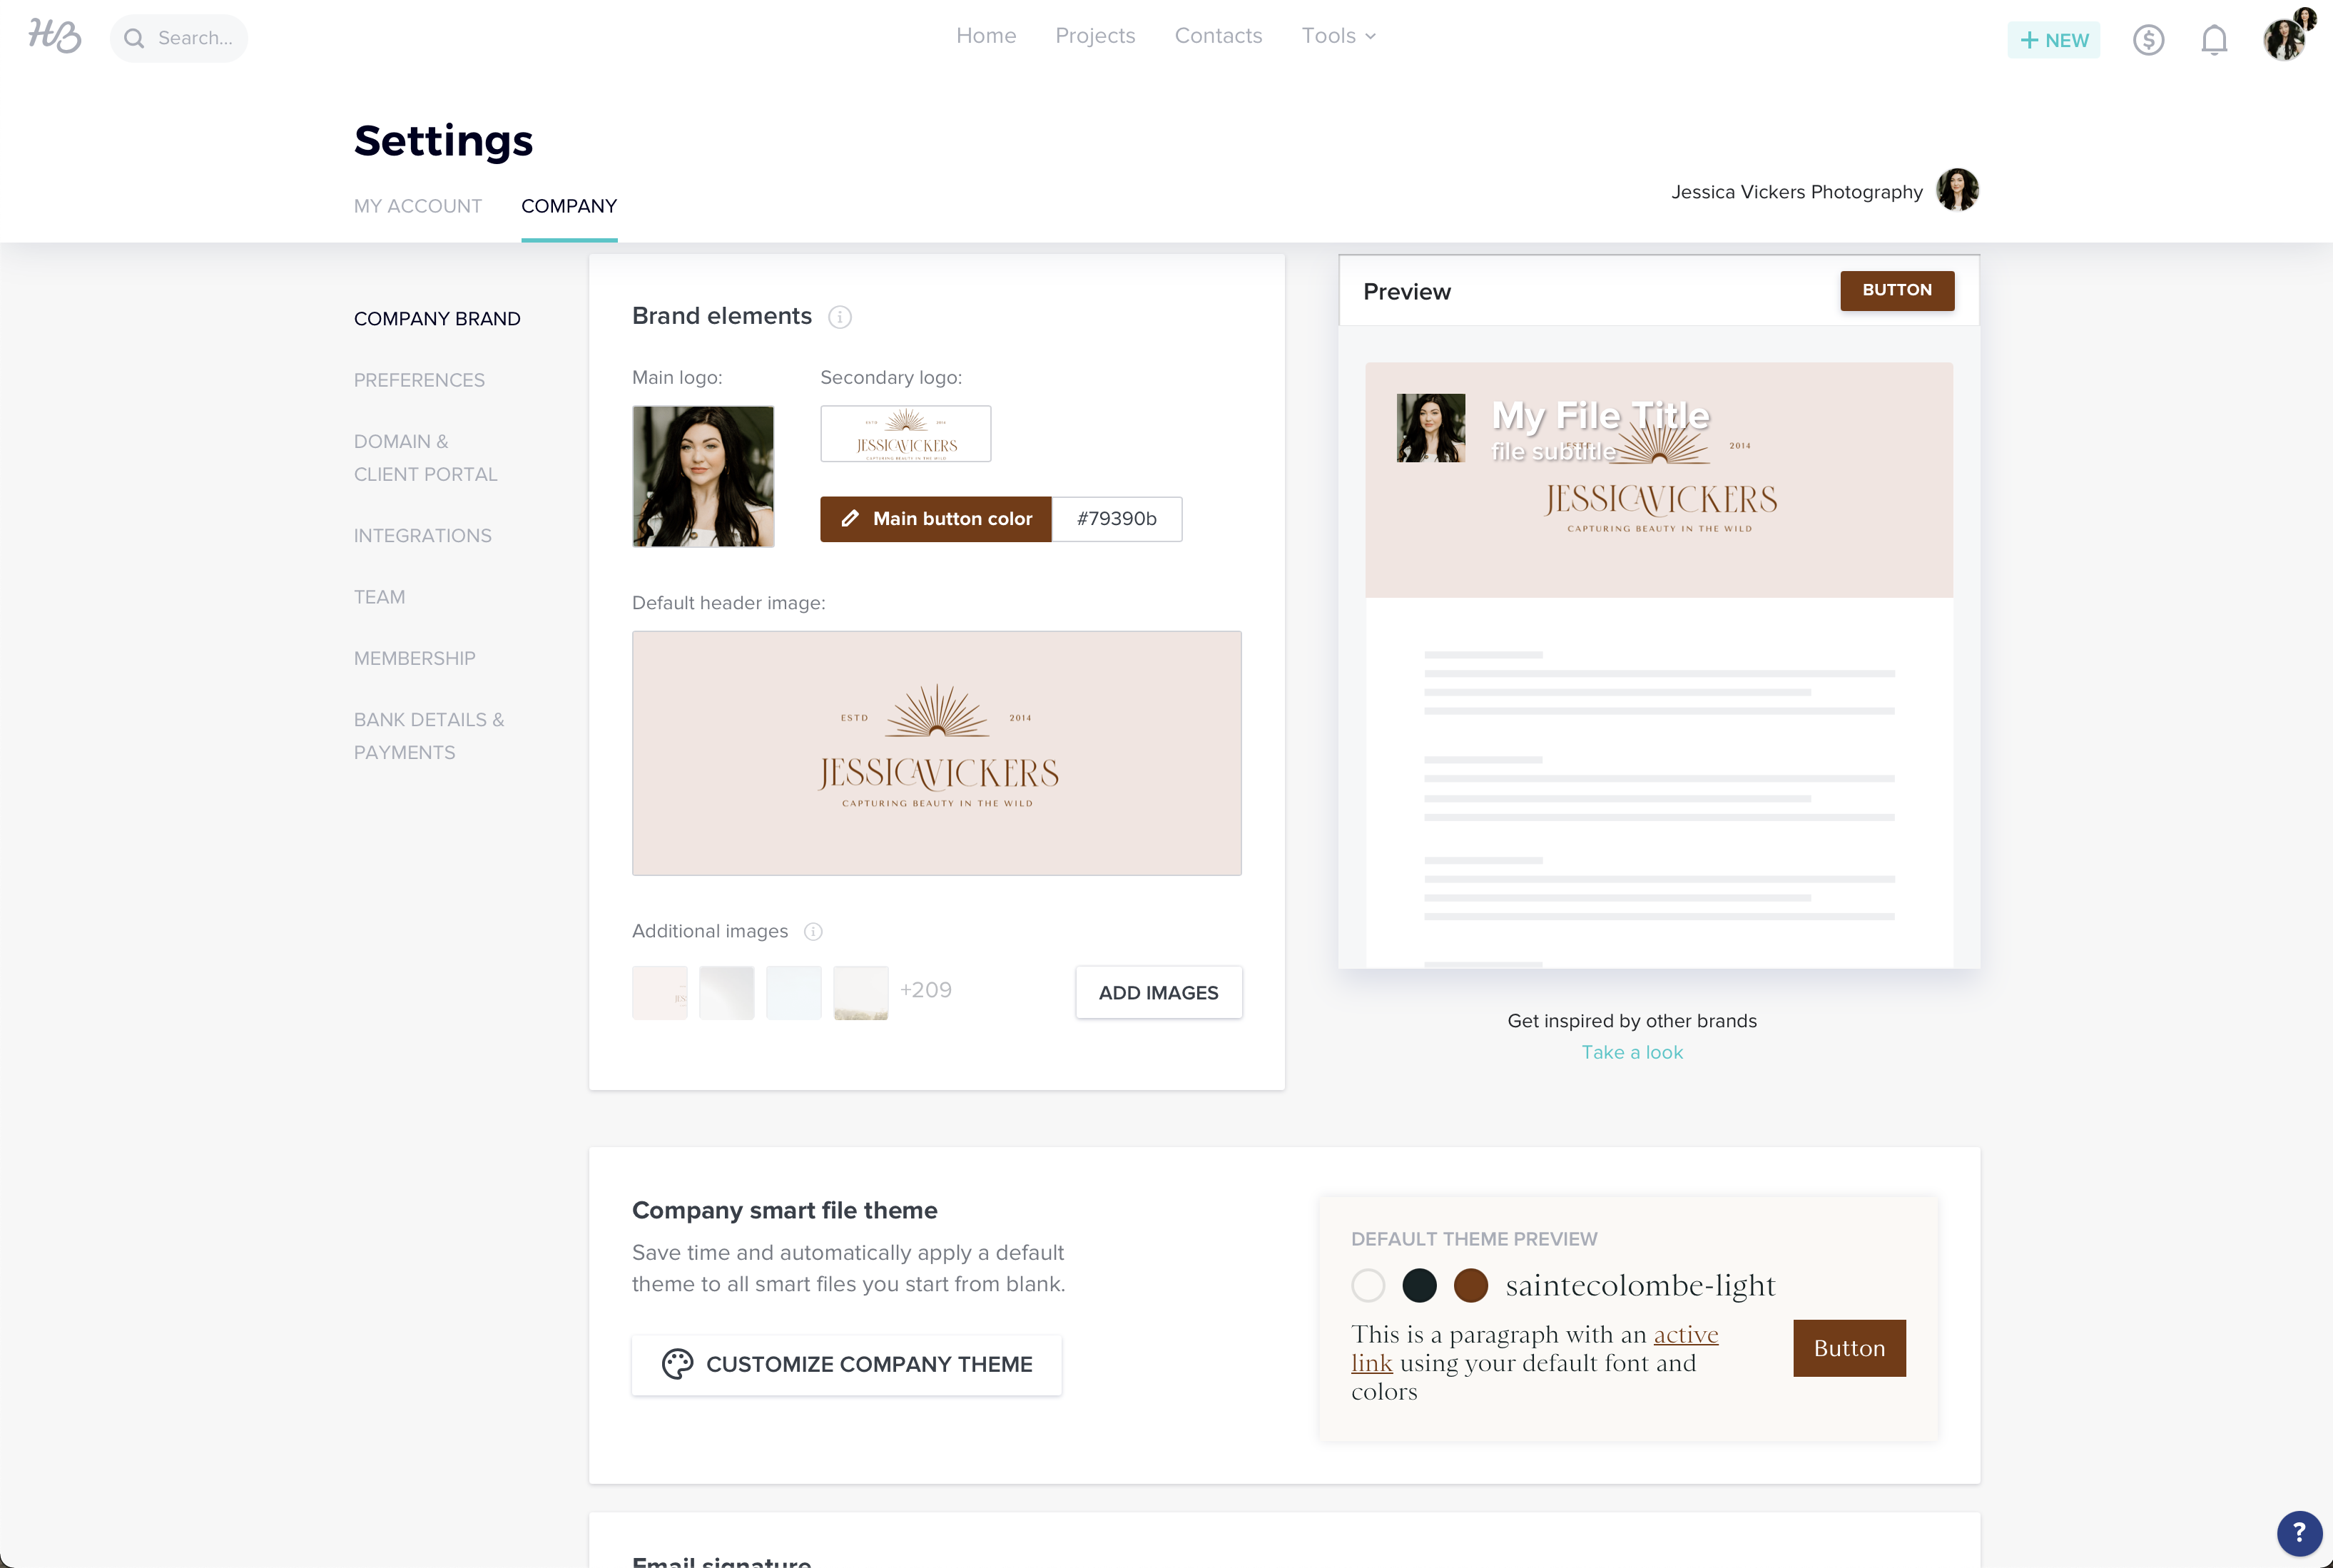
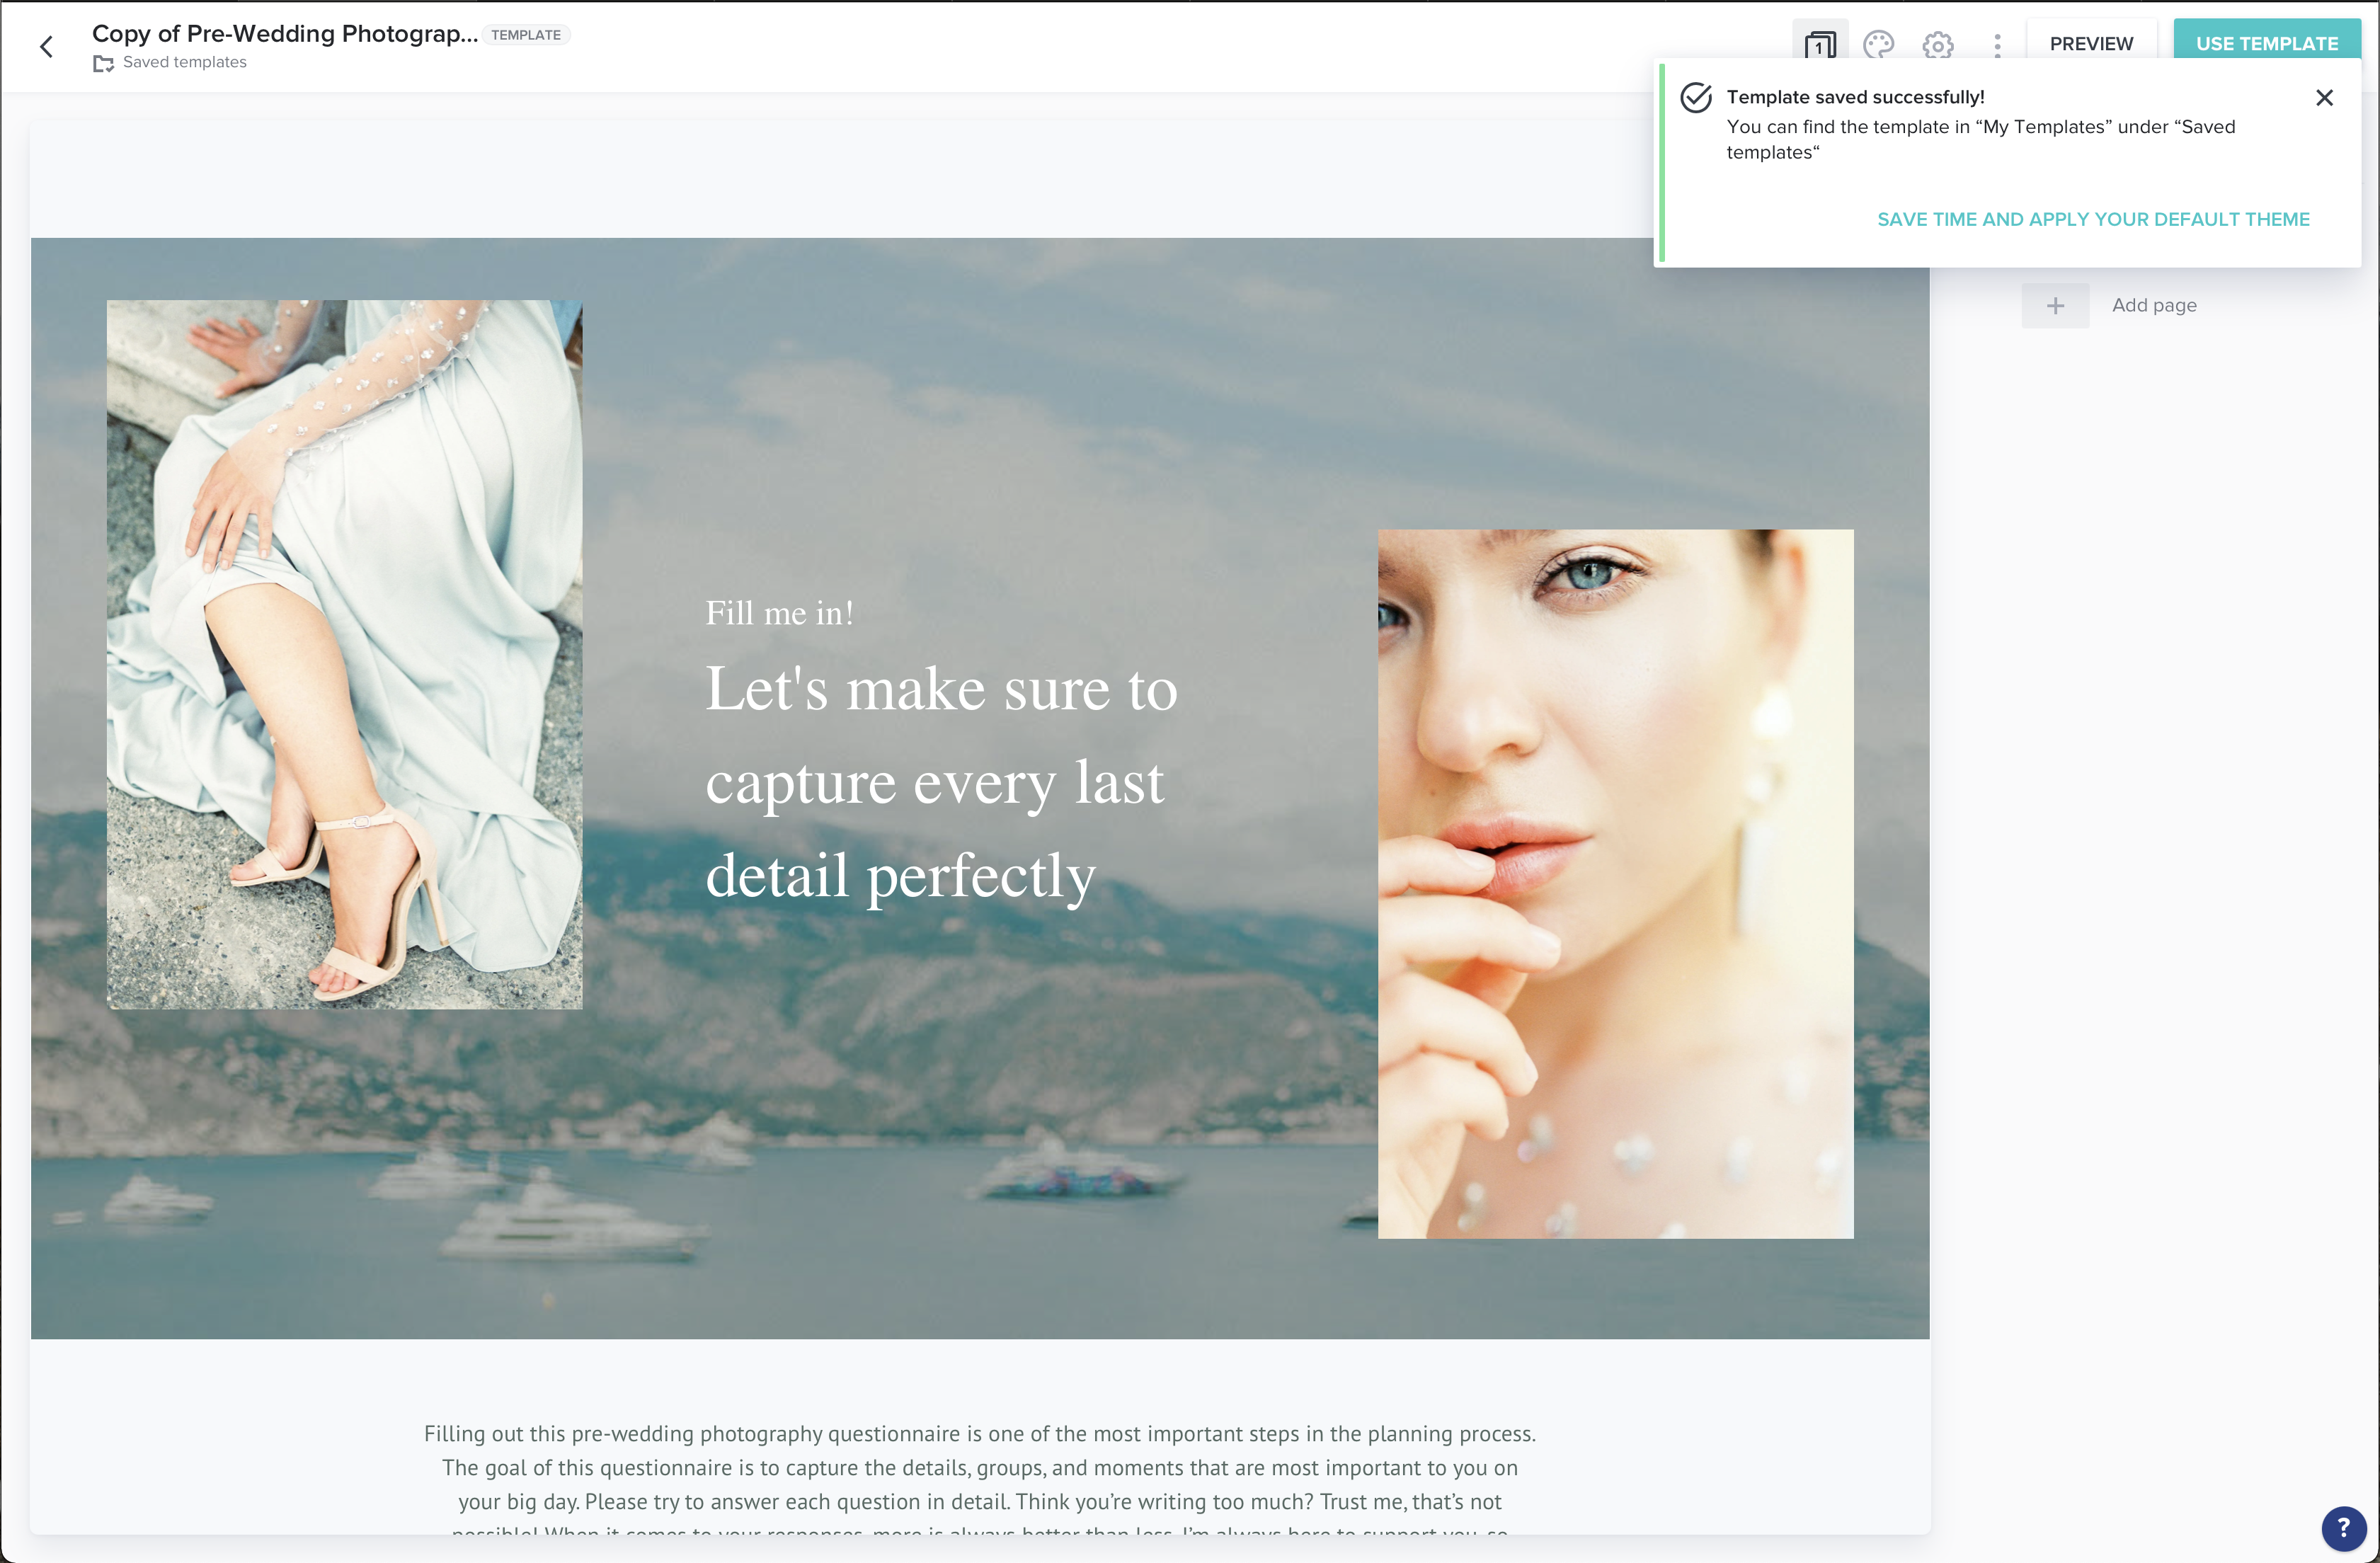
If you have your company settings updated first, then whenever you go to actually customize a smart file, a box will pop up that says “Save time and apply your default theme.” (Pictured at the top right of this image below.)
This will auto-apply your custom brand fonts, colors, etc — making it so quick to customize the smart files to work for your business!
Once you click the button that says, “Save Time And Apply Your Default Theme,” you’ll see the box below pop up.
At the bottom left of the image above, there’s a button that says “Apply Company Theme.” Once you click that, another box will pop up, you’ll then want to click “Yes, apply.”
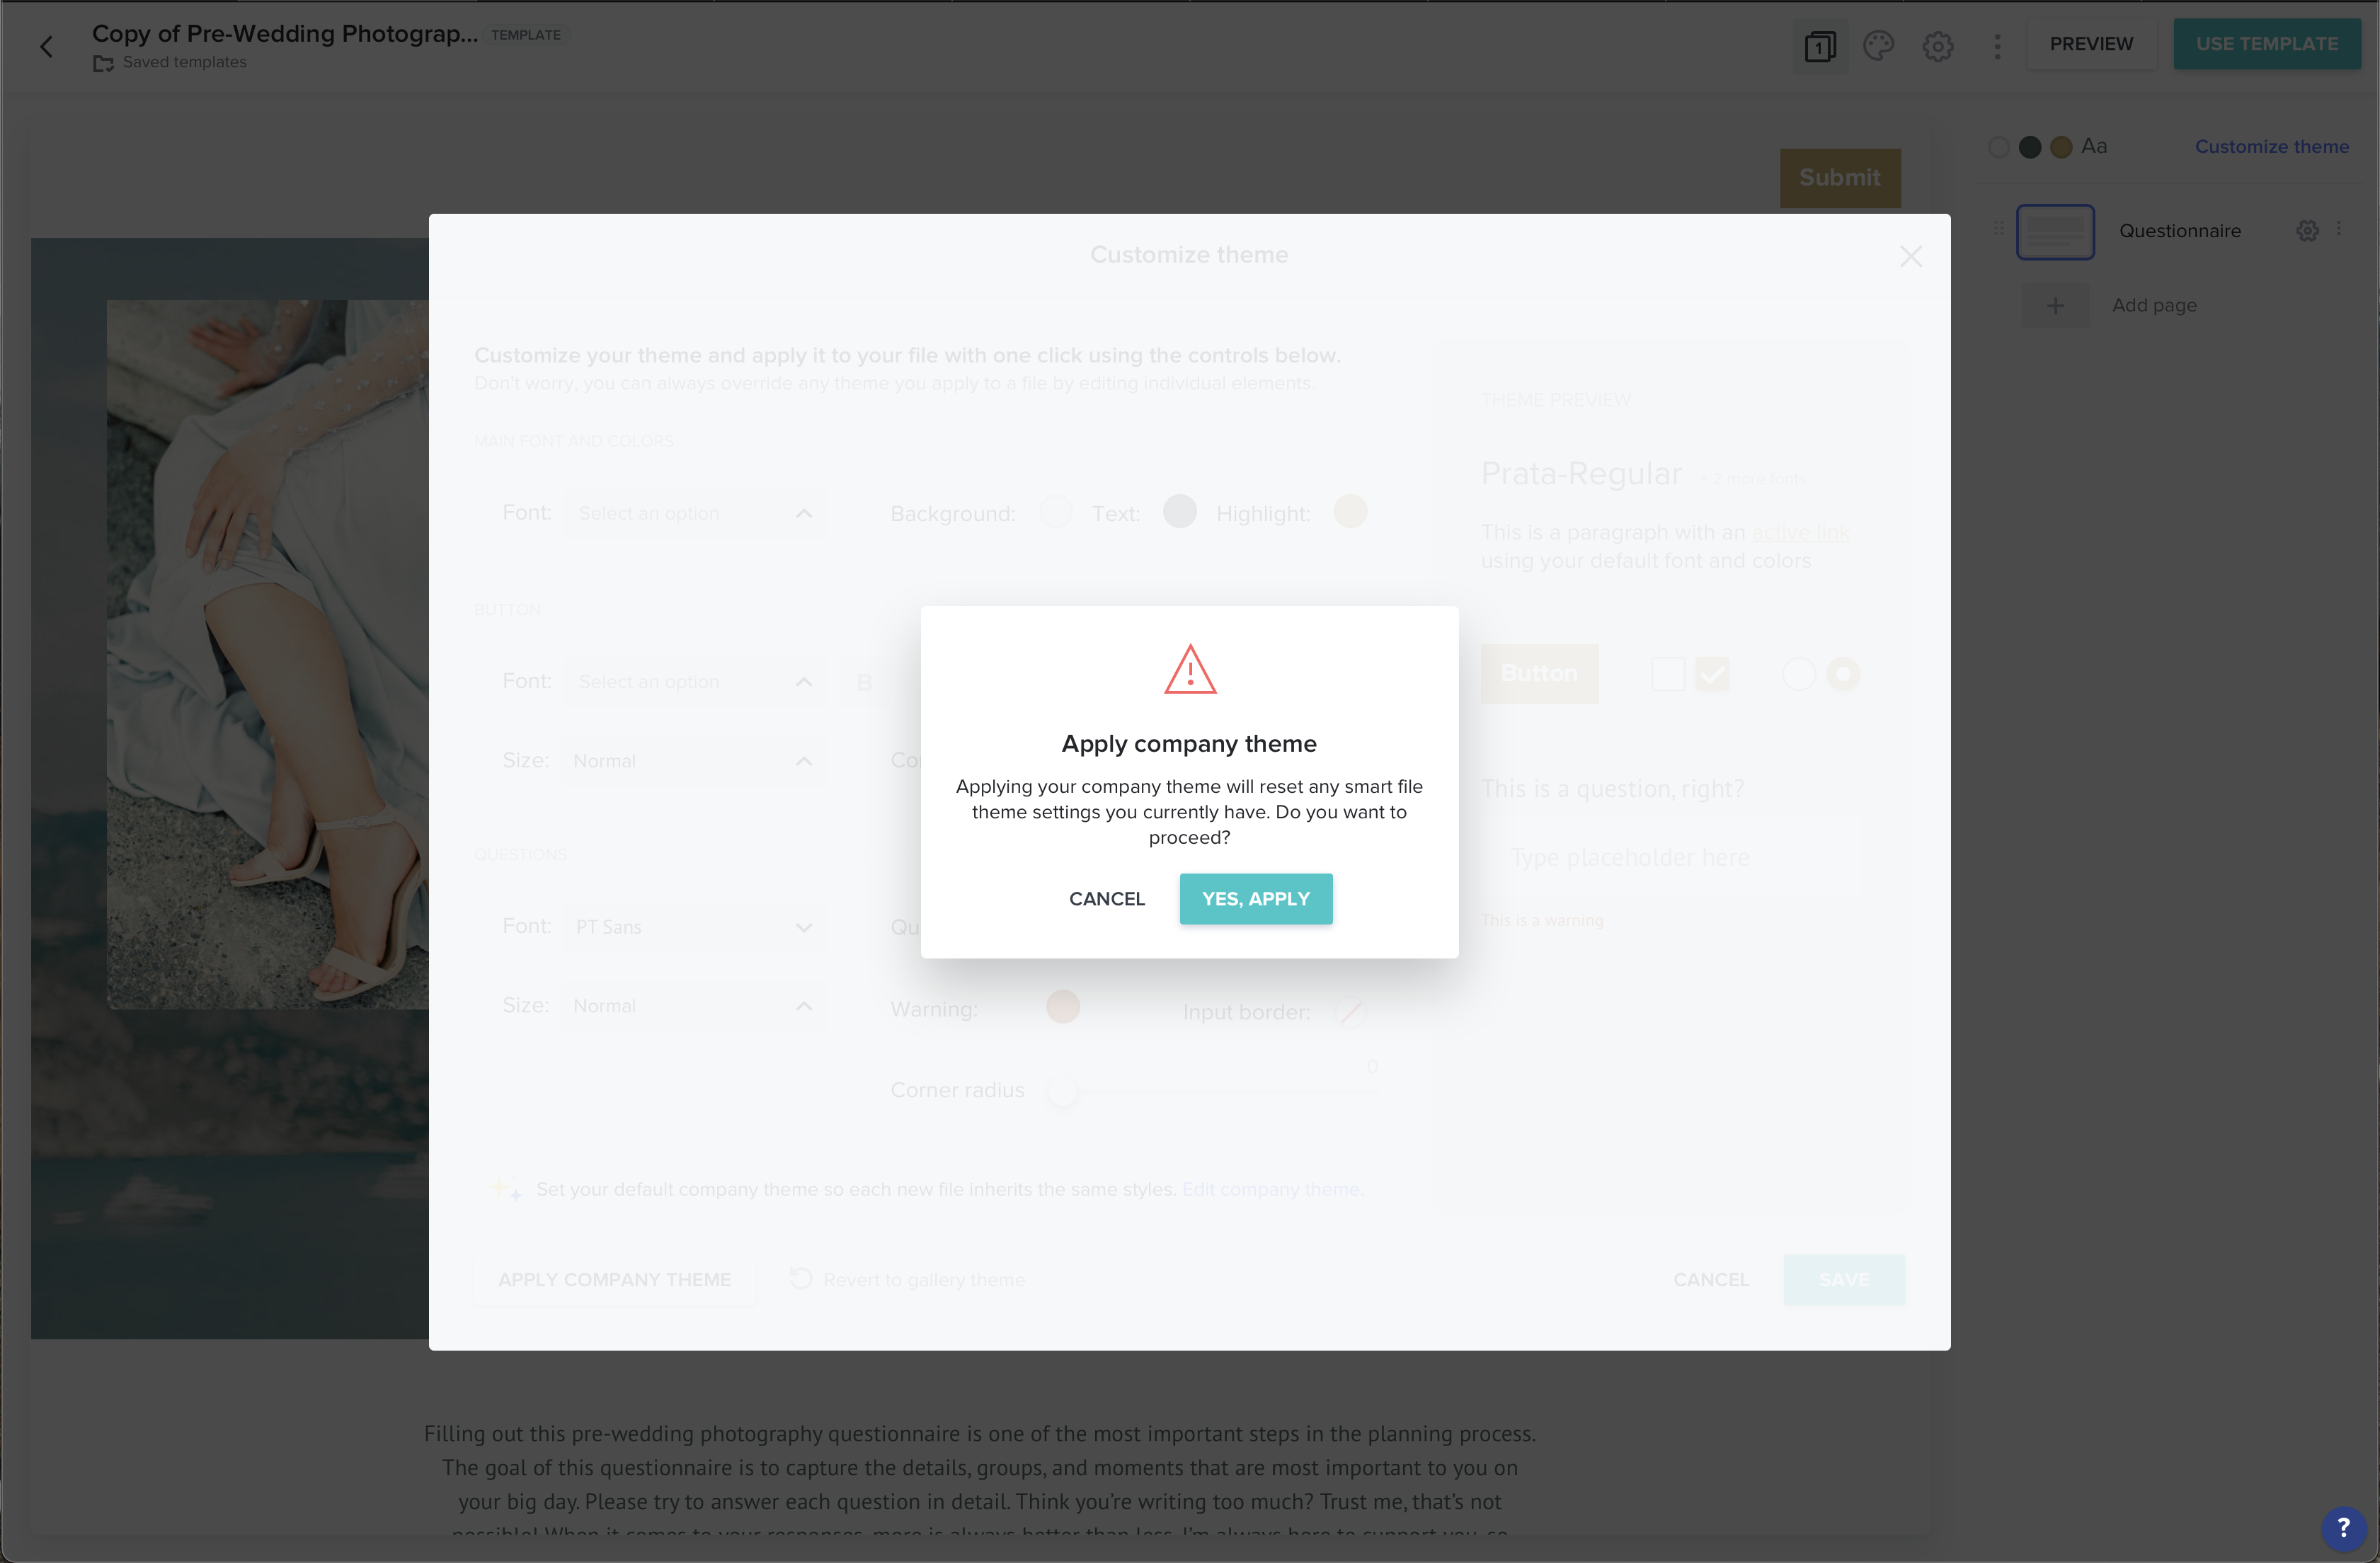
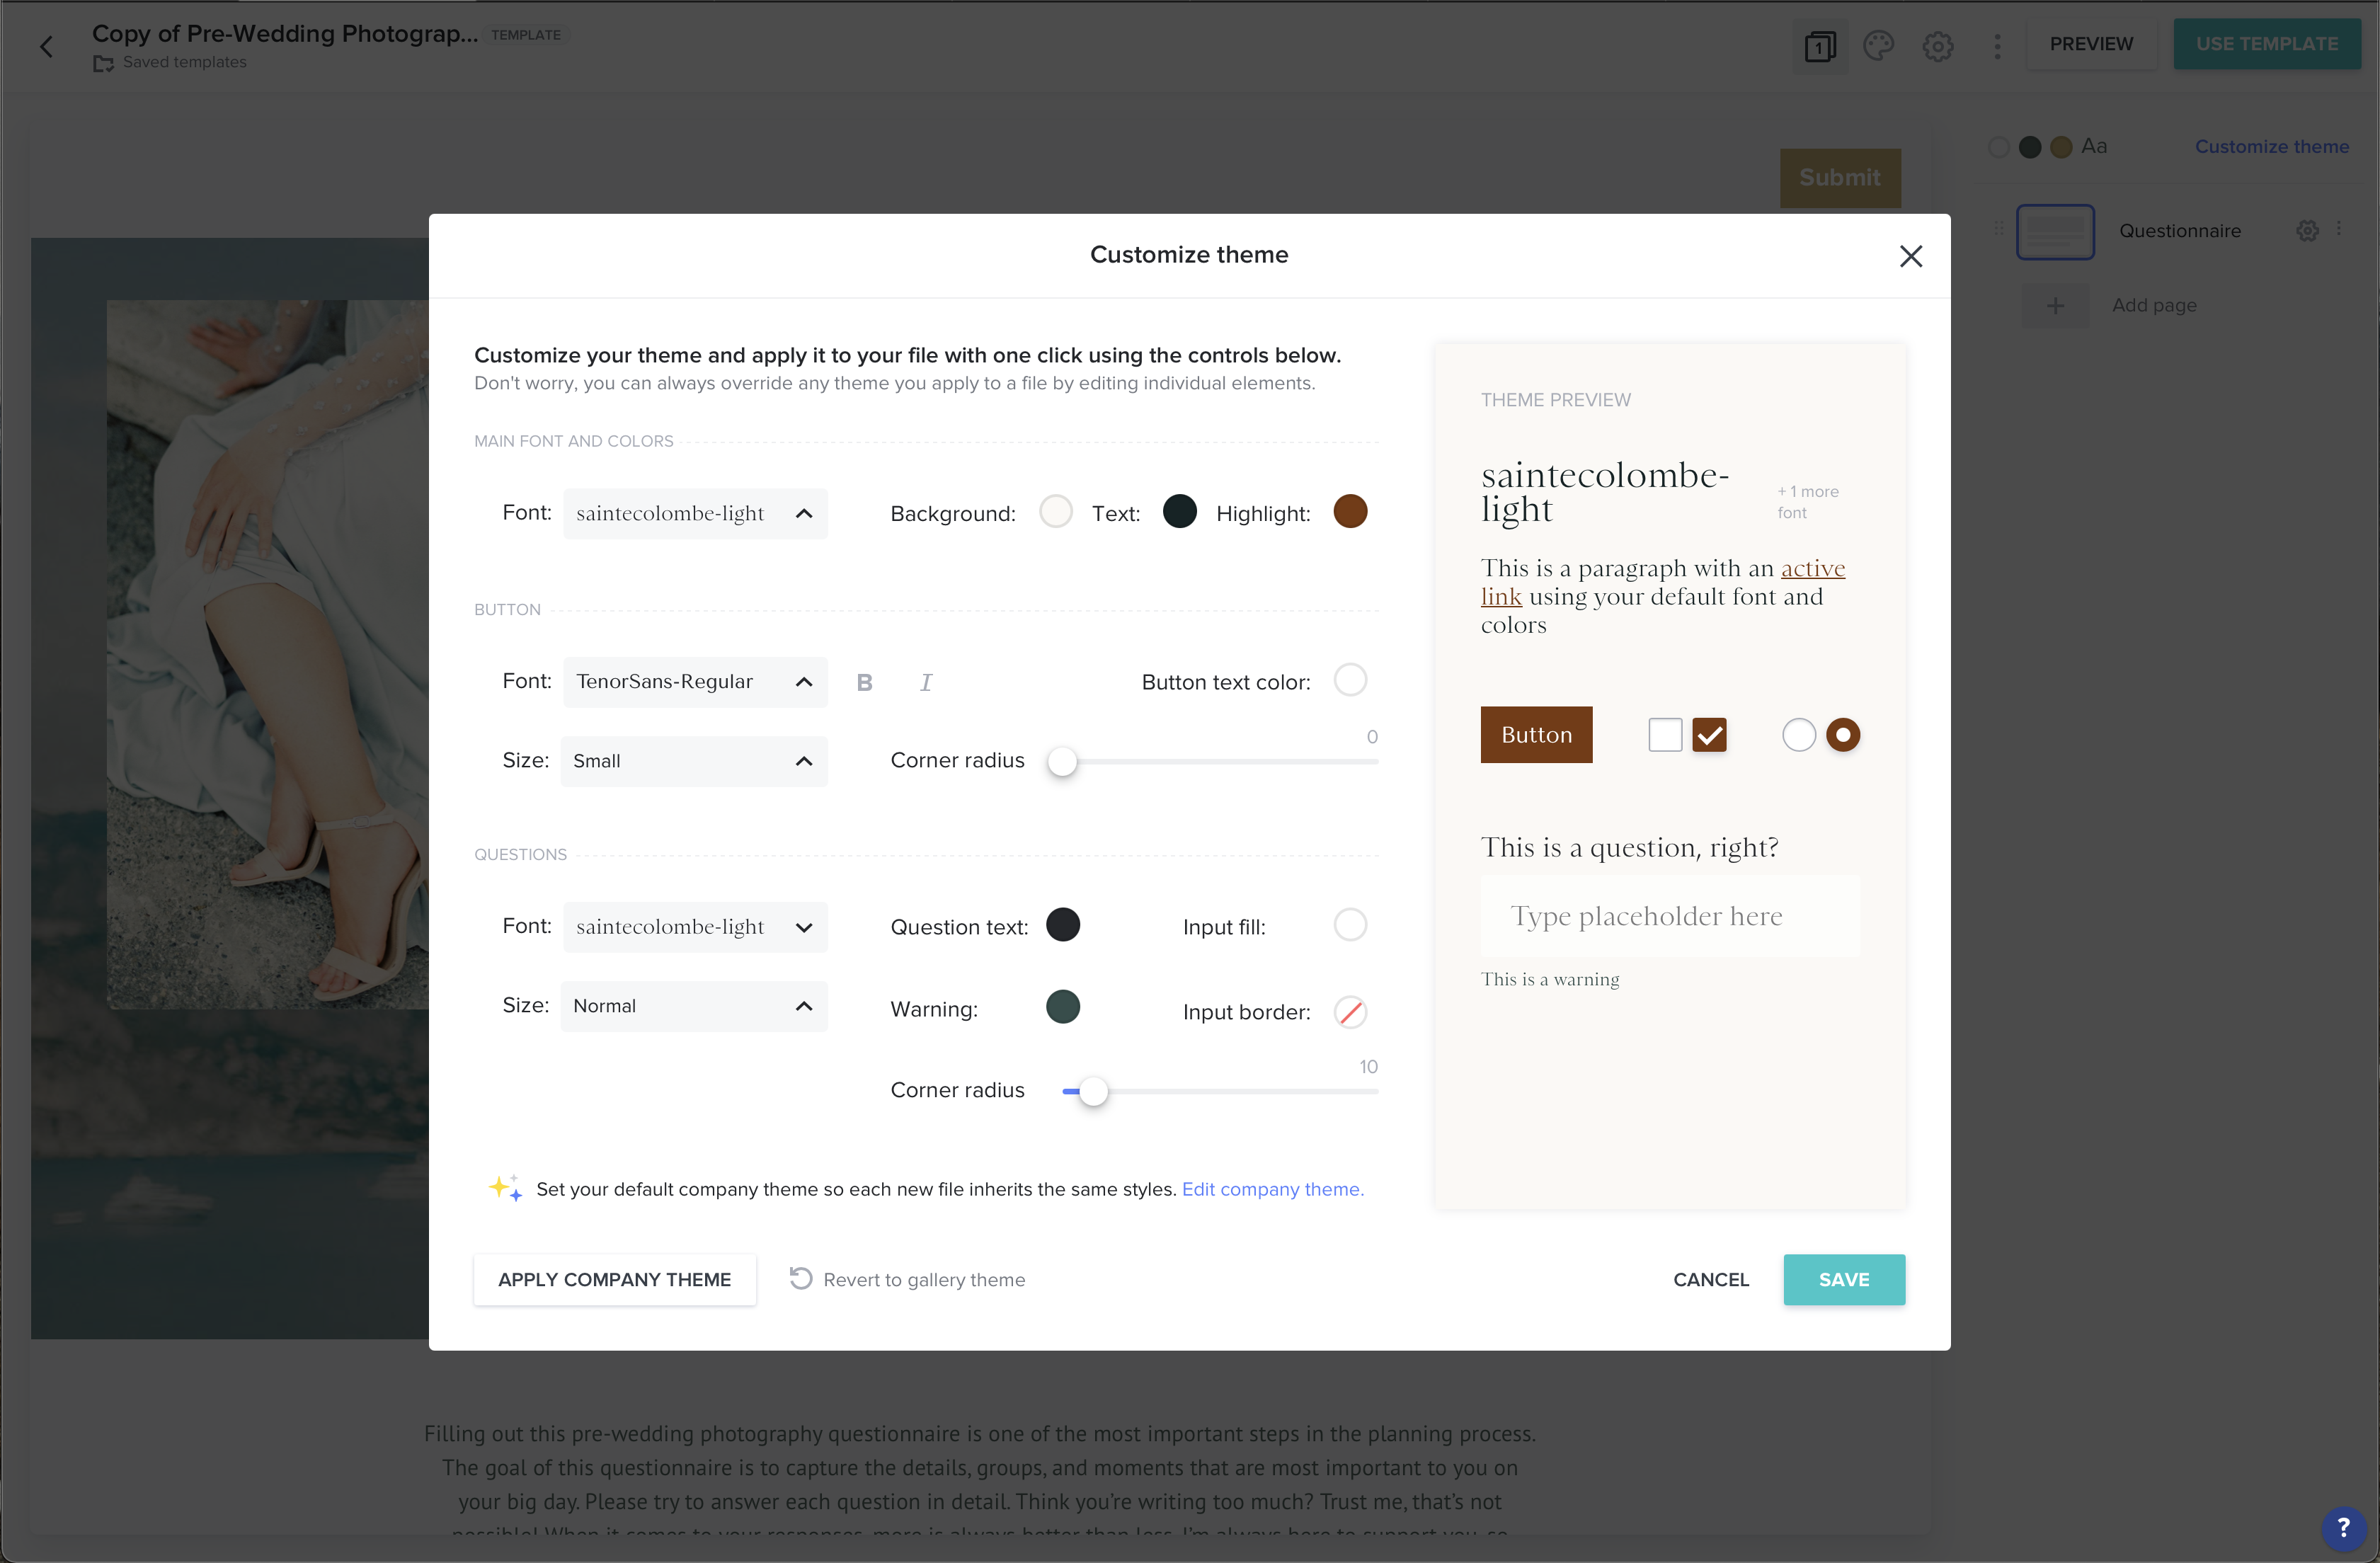
Your company theme is now applied to the file you’re trying to edit, so customizing it for your business and branding will be SO much quicker! You’ll then click “Save” and all of the changes will be applied to the smart file.
From here, you can always customize it further if you’d like to change fonts, sizes and colors of fonts, etc.
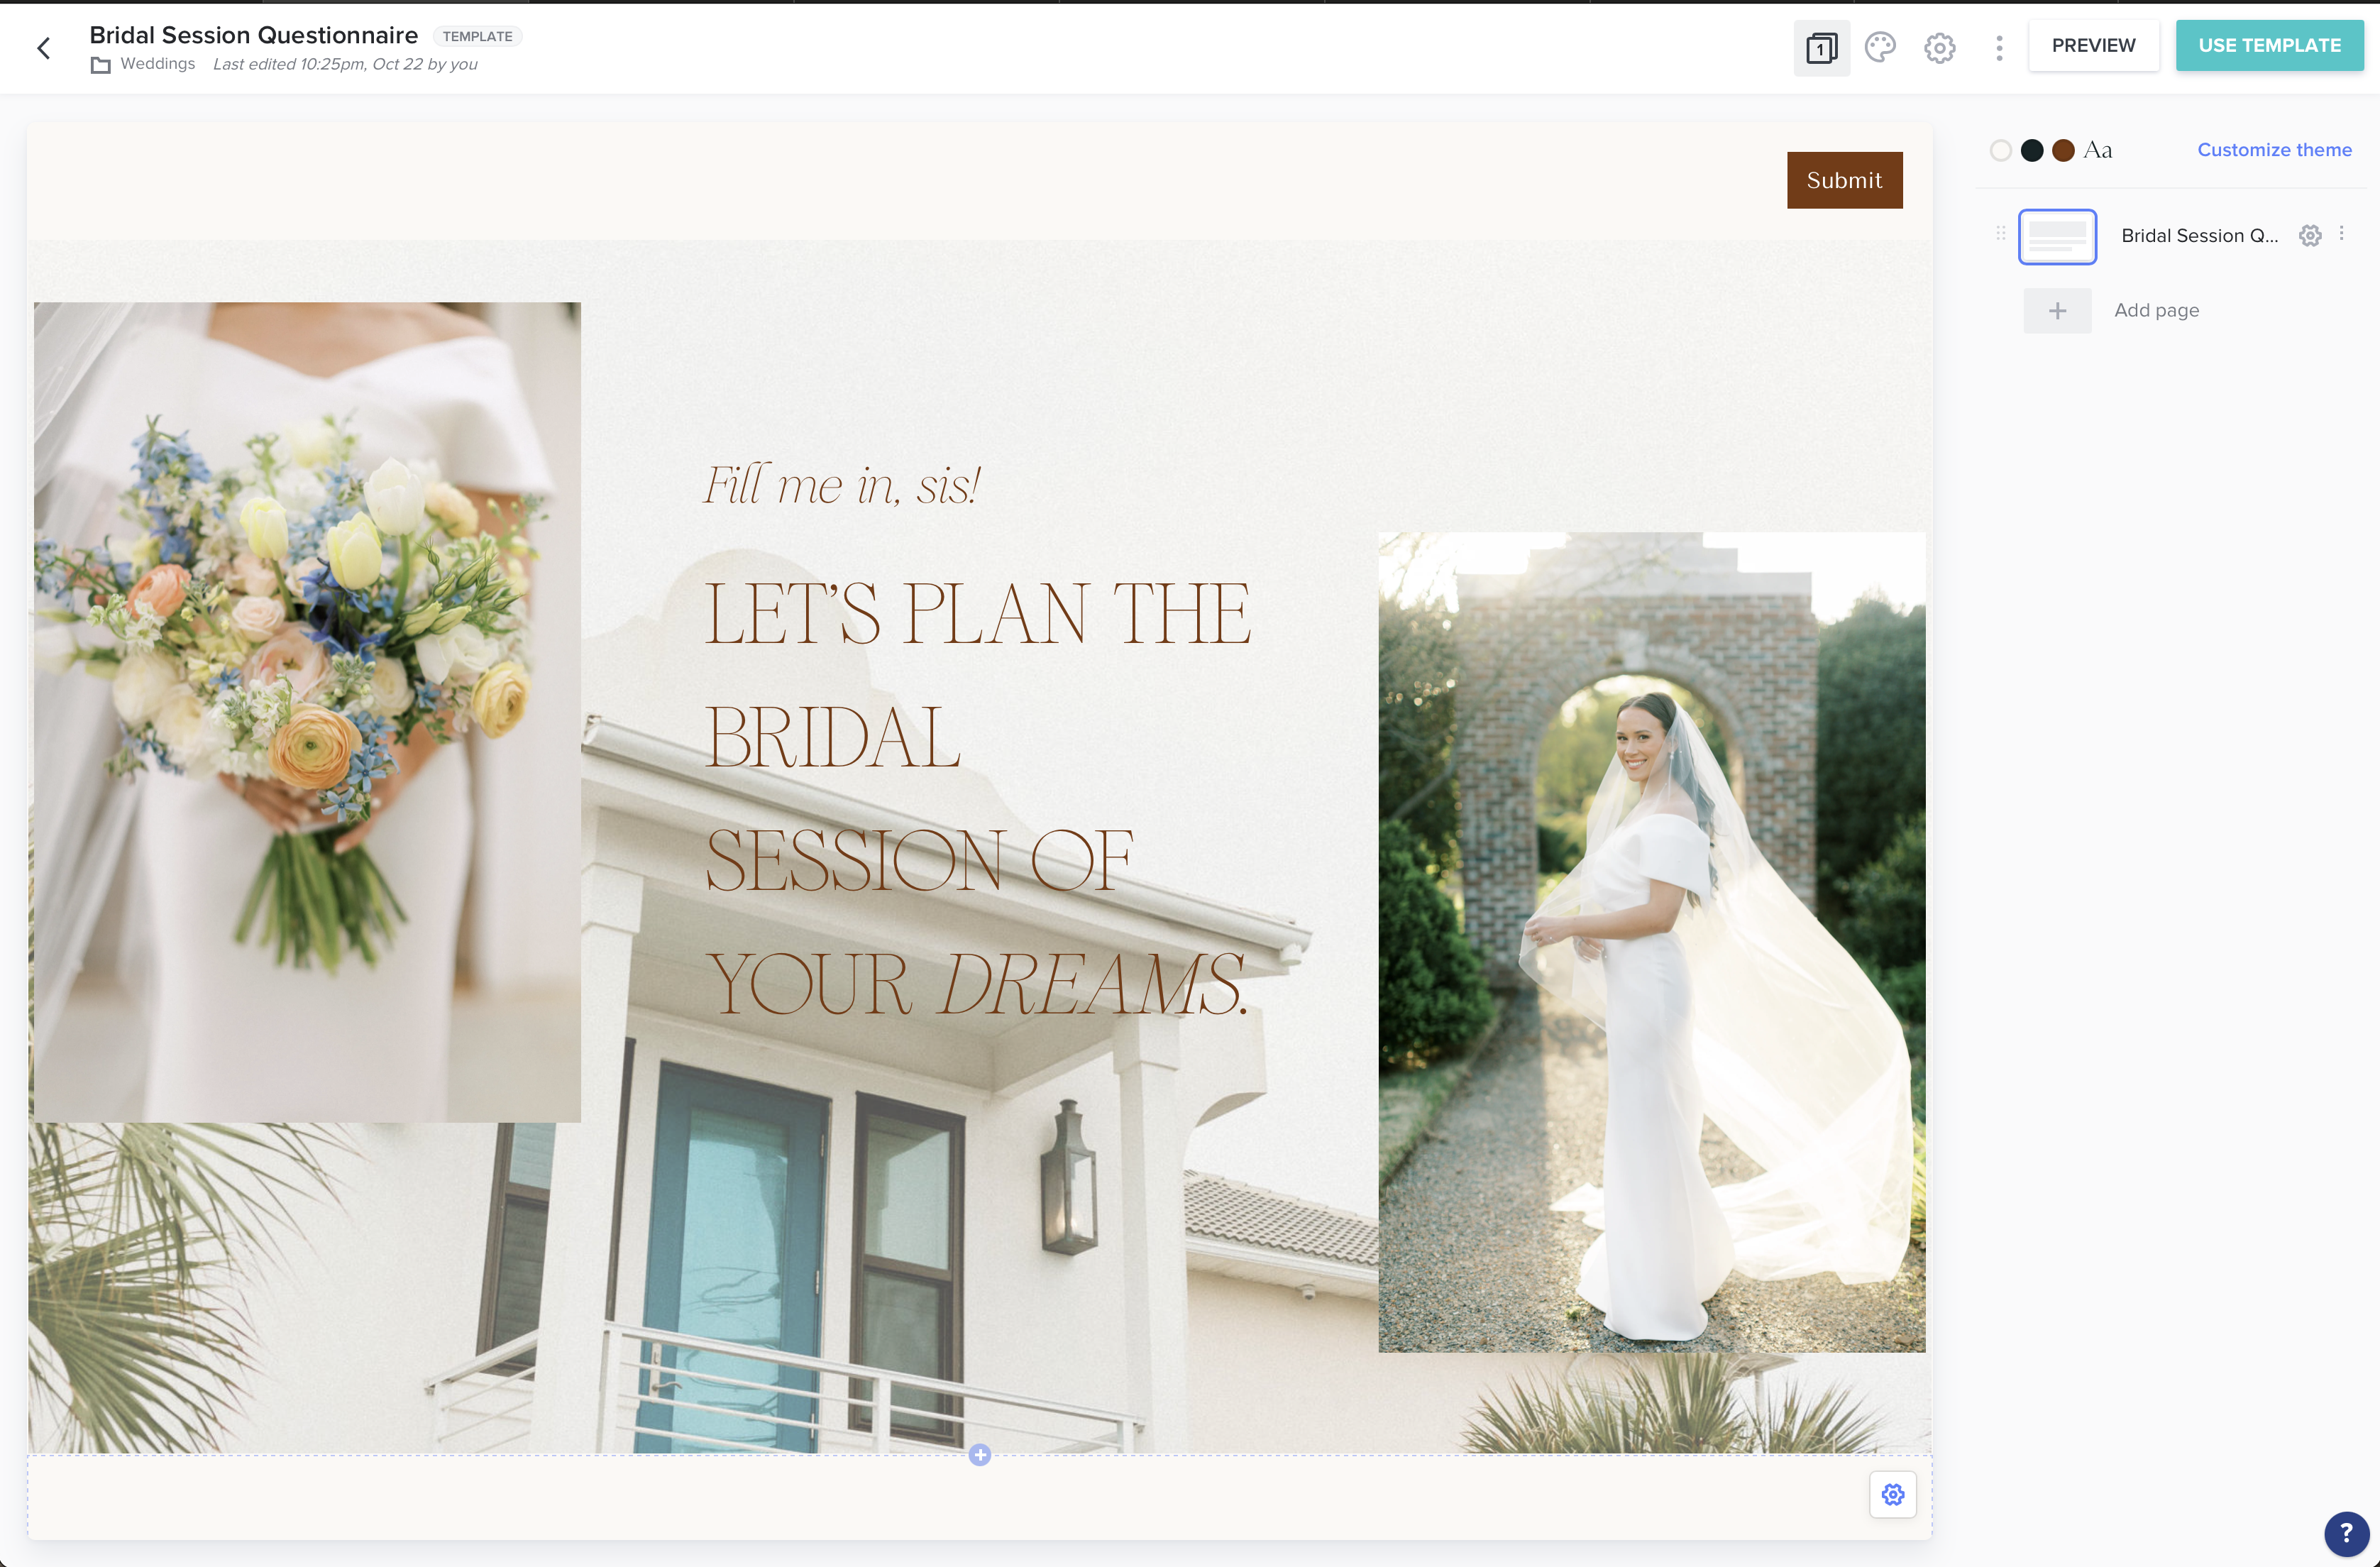
Here’s an updated version of that same questionnaire, but with my images and fonts in place of the template ones! (Unfortunately, I don’t have any photos of boats on a fancy lake. Adding that to my “to shoot” list.) ?
4. Building your first smart file in Honeybook
I highly recommend for the very first smart file you build, to focus on creating one that actually gets you paid! To do this, you’ll go to the template gallery and check the box over to the left that says “Proposals.”
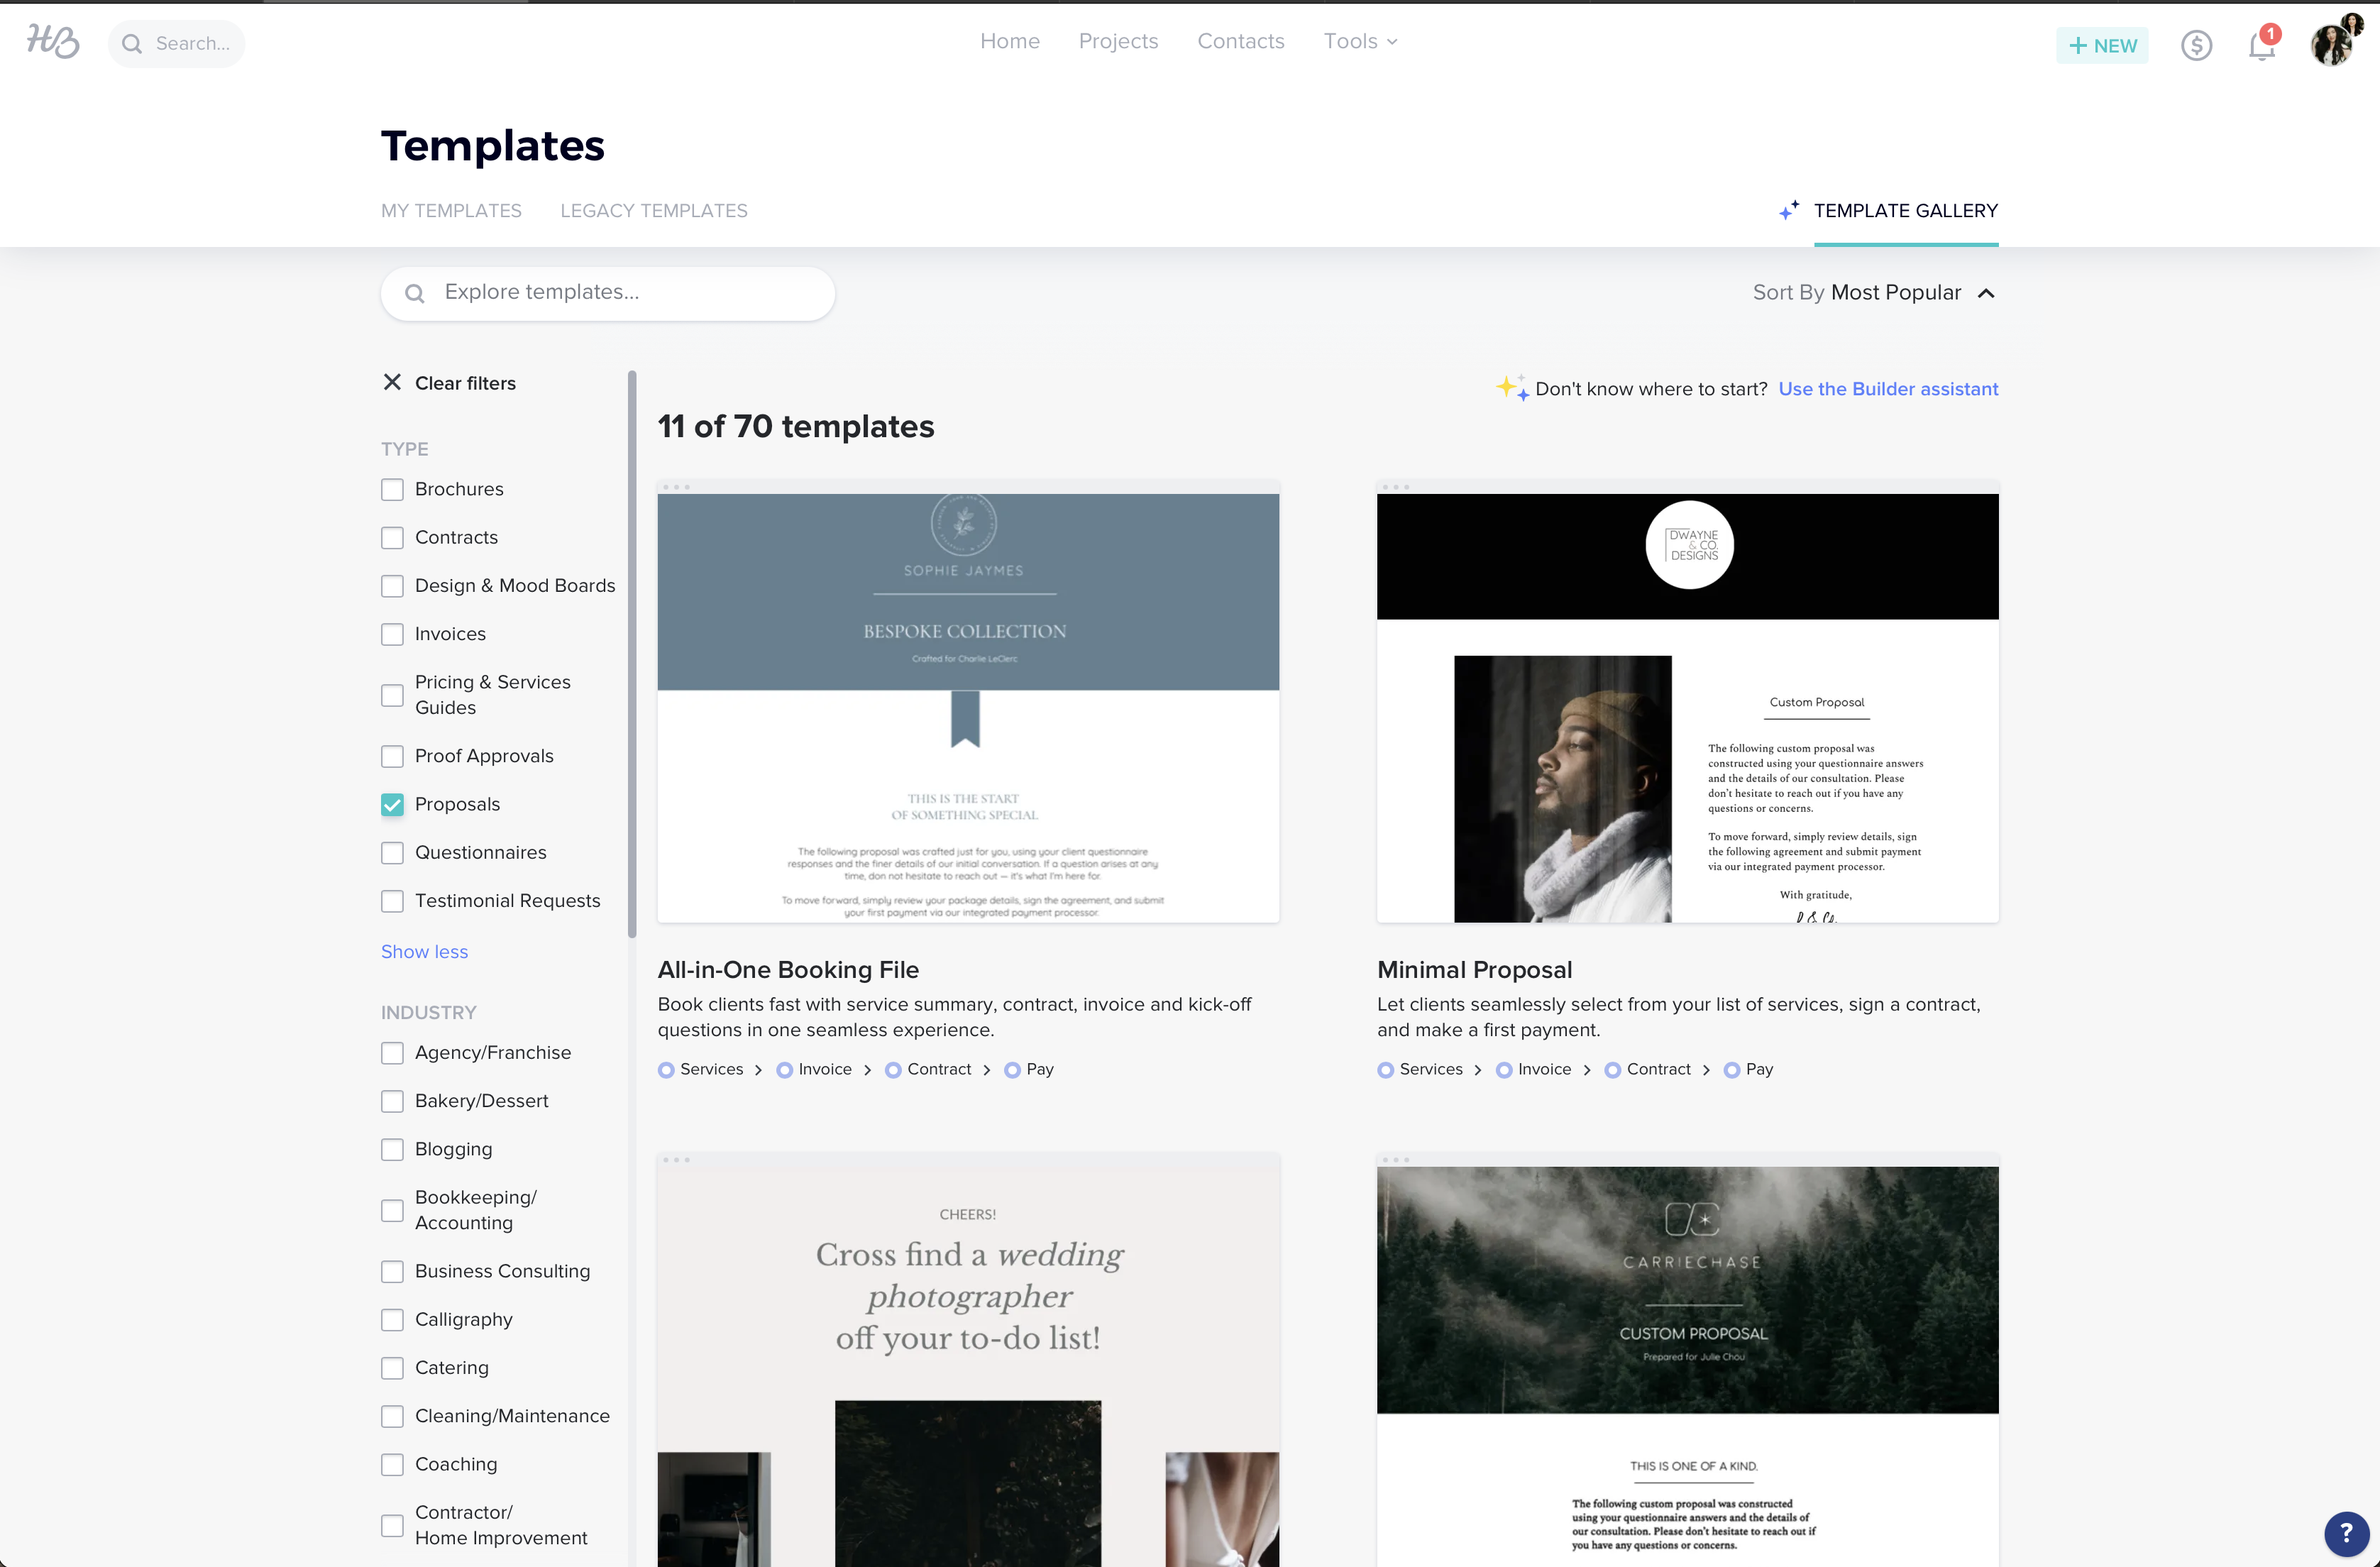
This will filter the view to where all the smart files that show up are already set up as proposals.
I personally like the ones titled “Wedding Photography Proposal”, “Simple Proposal,” “Proposal,” and “Family Photography Proposal.” These are all really great places to start!
You’ll notice some of the proposal templates have different steps, or pages, inside them. You can see which steps are included at the blue dots underneath the template. If you look underneath the Family Photography Proposal, you’ll see it has Services > Invoice > Pay, whereas the Wedding Photography Proposal has Services > Invoice > Contract > Pay.
Now, you can absolutely add a Contract page to any smart file template that doesn’t currently have one included, but choosing one that already has one just makes it quicker. For the “Family session proposal” they’re choosing from a few options, then a contract is likely being created based upon their selection after they choose and pay.
I prefer to send a custom proposal over to the client, where they then choose the collection they want, and then I send a smart file with the services > invoice > contract > pay) steps all still included. But my “services” page in the smart file, instead of consisting of multiple collections they choose from, just consists of the scope of the project.
This brings me to my next point: Determine how you want to present your services to potential clients.
You can do this in a few ways:
a) Use the brochure/service selection feature inside of the honeybook smart file – (this option would mean you’d be presenting more than one collection, and they could actually make a selection from the presented options, and then they’d progress to the next step in the smart file.)
b) Use a custom proposal via a hidden link (This is how I send over my service information, I use this showit add-on template from Tonic Site Shop. It’s a hidden pricing page that I send out to each of my inquiries when they ask for pricing info, where they then choose the collection they want and THEN I send over the honeybook smart file that pertains to the session they chose! If you like this route, you can snag that template and use the code: JESSICASENTME for 15% off! ?)
c) Upload a custom pdf of your services to an email and send it that way
So, why do I use option b?
Well, I like to create custom proposals for each of my clients. For example, for my wedding inquiries, I take the Showit add-on template that I linked above and duplicate it, then swap out the info for that potential client’s name, venue, etc, and record a video alongside it. I then send that to my client via email. Therefore, using the brochure selection feature doesn’t work well for me for my wedding onboarding process. However, I can see how for maternity or family or things like that, it could work great!
Once you’ve decided on how you want to present your services, you’ll then choose the smart file that best suits your workflow.
Now, you can easily delete any of the pages inside the smart file that you don’t want or need. So if one of the smart files has the service selection option, but you don’t want them to choose from more than one service, then you can delete those options or even the entire page. Smart files are completely customizable in that aspect too!
If you’re needing a super detailed step-by-step on creating a smart file, here’s an amazing resource from the Honeybook help desk: https://help.honeybook.com/en/articles/5259476-start-building-your-smart-file
5. I’m now realizing there are “gaps” in my workflow. What do I do!?
Maybe you’ve read through this and discovered that there’s a LOT of gaps in your workflow. And by that, I just mean a lot of areas you could better your client experience. Maybe you’re realizing you could be utilizing Honeybook and it’s features much better. If that’s the case, I’m here to help! ?
Me and my team offer completely custom Honeybook setups, where we give the EXACT templates I use in my photography business to you, and help fill in those gaps!
Interested in learning more about what a Honeybook Setup with me looks like? Just click the image below! We’d LOVE to serve you and your business! ?
LOOKING FOR MORE HELPFUL PHOTOGRAPHY TIPS? FEEL FREE TO BINGE ON THESE BLOG POSTS, OR PIN ’EM ON PINTEREST FOR LATER!
If you’re short on time, follow me on Pinterest – and you’ll get these kinda tips delivered straight to your feed! You know… when you’re scrollin’ through Pinterest with coffee in hand, ready to take on the day… or, procrastinate.
Whatevs. Pinterest biz sesh, anybody!? 


Read the Comments +