")


Prior to using Lightroom, I was doing ALL of my image editing, one by one, in Photoshop. It would take me literally FOREVER to get images to my clients. The culling process, editing process, and delivery process would take me at least two weeks non-stop, and that’s if I didn’t do anything else – at all. I had no life during that time. ?
I’d heard a bunch of clamor surrounding the topic of Lightroom, and I figured it’d be worth a shot to dive in and play around with it – especially since it was supposed to be a LOT quicker than working in Photoshop. (And that sounded too good to be true to me back then.)
But before we jump into all that, let’s chat a bit about what Lightroom really is, why it’s helpful, and why you should be using it over anything else to edit your images!

Lightroom For Beginners:
What is Lightroom?
Lightroom is both a post-processing (or editing) tool used to edit images – and an organizational tool. The best thing about Lightroom is that it’s non-destructive, meaning it doesn’t actually alter the original image file while you’re working on it, whereas other editing programs DO alter the file each time you make a change to it – reducing the overall quality.
You can take your images from drab to fab pretty easily using Lightroom. (It’s safe to say it’s definitely my post-processing tool of choice when it comes to my photography business.)
The only downside? There’s a bit of a learning curve, (though nowhere near as much as Photoshop.) But that’s why we’re here today, to get you right on over that speedbump – and onto experiencing all that Lightroom has to offer you and your business, (or personal images!)
A Brief Introduction to Using Lightroom
When you first open Lightroom on your computer, a default Lightroom catalog will be created for you (but you probably won’t want to use this one.) If you’ve opened Lightroom before, you may be prompted to first create, or choose, a catalog. Lightroom works in catalogs, it’s like its “operating system” – if you will. Basically, you can’t use Lightroom without operating inside of a catalog – so you definitely need to choose or create that first.
Catalogs are basically “databases” for your photos, and whenever you make any changes to them (cropping, editing, rating and adding keywords, etc,) all of that information is stored in the Lightroom catalog, not in/on the native image files themselves. (I know, kinda confusing – but it’s all gonna start to make sense soon!)
Creating a Catalog
So, go ahead and create a new catalog and title it whatever you please, (something like – “Lightroom Test”, or if it’s a shoot you’re about to cull and edit, you can title the catalog after that shoot.)
When I create catalogs, they’re named after the shoot. So if it’s a couples shoot, it’d be something like “Chelsea & Taylor – LR Catalog.” Then, I’d save that catalog inside of another folder titled “Chelsea & Taylor” (which is essentially that shoots “master folder” – where there would be a few other folders, like “Backups” “Blog Images,” “SEO Export,” and “Sneak Peeks.”
Some people organize their catalog’s by dates/months/etc., but I’m an advocate for only having ONE catalog per shoot. Too many images inside of a catalog will cause Lightroom to run slowly; (which is super frustrating when you’re trying to edit.) You can take the time to figure out what organizational system works best for you later, we’re just going to focus on actually using Lightroom today!
Importing Images – Part I
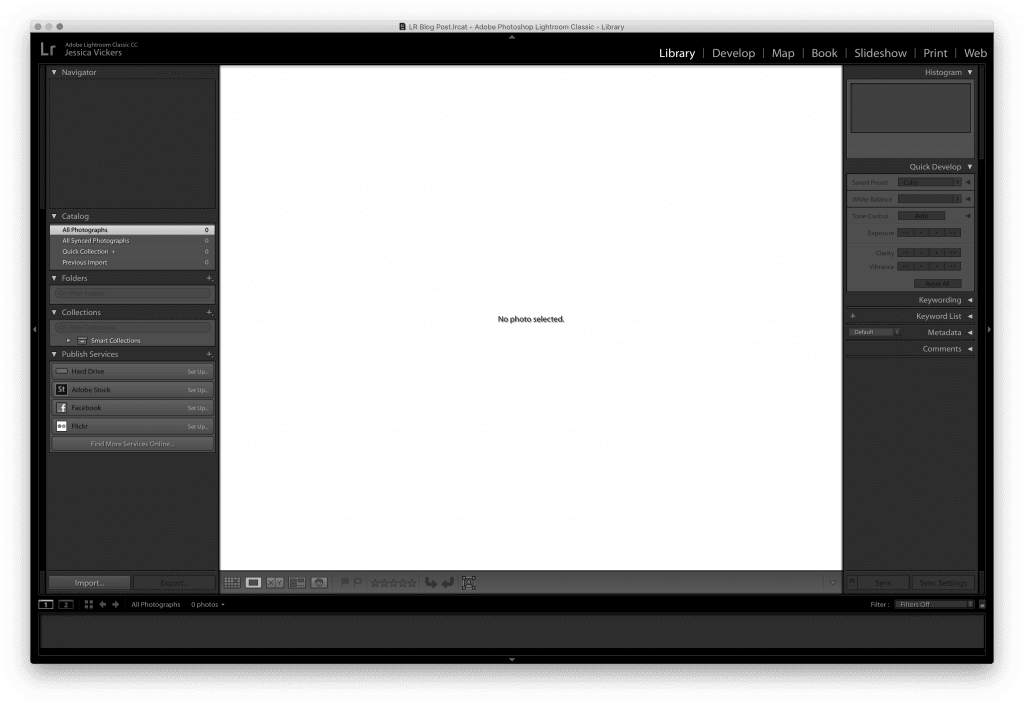
Now we have a blank catalog, which looks something like this!
At the bottom left, you’ll see the button that says “Import” – and we need to click that so we can get some images in here to edit. So, we’re going to click Import and then we’ll navigate to the folder where the images are that we want to be working with.
After clicking Import, it will prompt you to select a source to import from – it looks like this!
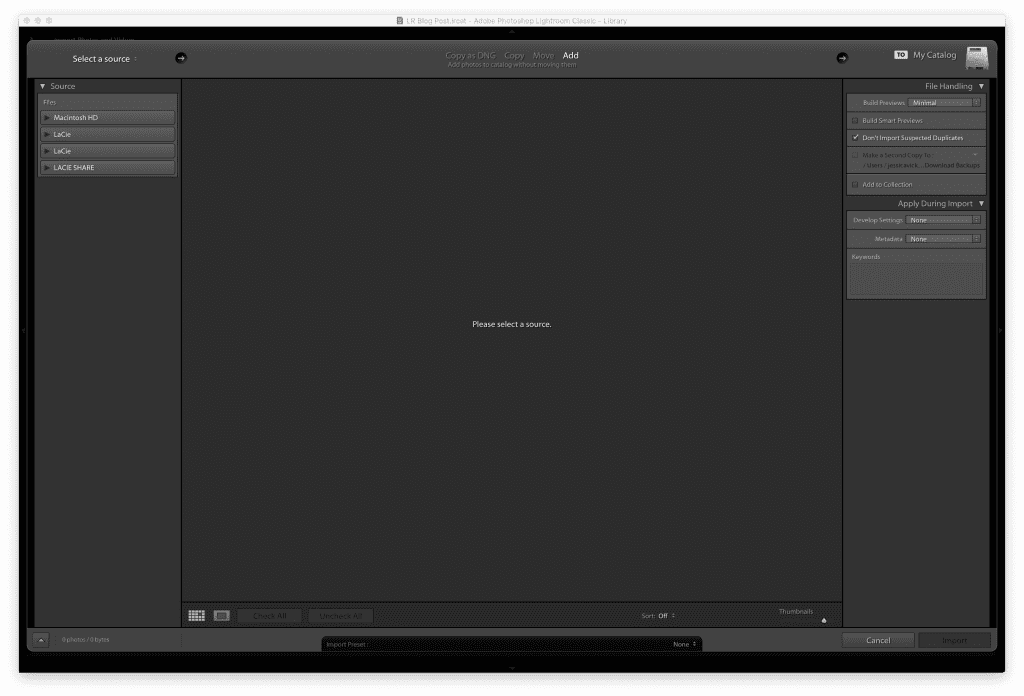 NOTE: If you currently have an SD or CF card inserted into your computer, you’ll see all of the images on the card instead of the blank area that says “Please select a source.”
If you plan to import images from an SD/CF card onto another location on your computer, you’ll want to select “copy” at the top, and then at the right panel you’ll select where you want the images copied to. You’ll also want to check the box that says “build smart previews” – because if you don’t, you won’t be able to edit the images if you remove the card from your computer.
I actually ALWAYS copy the images from the SD or CF card to a “Backups” file on my computer before I ever open Lightroom, (which is located inside of the master shoot folder I was referencing earlier in this post.)
This “Backups” folder contains all of the raw images from the card, and these images remain untouched inside this folder. However, this “Backups” folder is what I import into Lightroom because it isn’t going to be getting “unplugged” or removed from my computer, (unless I’m working off of an external hard-drive.)
Now, keep in mind the images inside this folder won’t actually be altered, because Lightroom is going to build a “preview. A preview is a copy of the file, so that’s why we’re able to edit it non-destructively – because it’s not the real thing!
Importing Images – Pt. II
Once you’ve navigated to the folder that contains the images you want to edit, you’ll see something along the lines of this! On the left side is the location from which you’re importing images, and on the right would be the location you’d be copying or moving them to.
On this example below, I have “Add” selected at the top, so I’m just “adding” these images into Lightroom, but not copying them anywhere else, (because I’ve already manually done this by copying them from the SD/CF card to the “Backups” folder on my computer.) I chose to build 1:1 previews for my images, but you can decide which style of preview works best for you by reading about them here!

You may notice that each image is pre-selected with a checkmark at the top left. If I were to click the check mark at the top left of an image, it would de-select that image and it would be “greyed out,” which means that particular image wouldn’t import.
I actually cull (or choose the images I want and discard those I don’t want,) through a program called Photo Mechanic before I import any of the images into Lightroom. Therefore, I don’t have to go through this process again in Lightroom. You can read more about what that workflow process looks like over here!
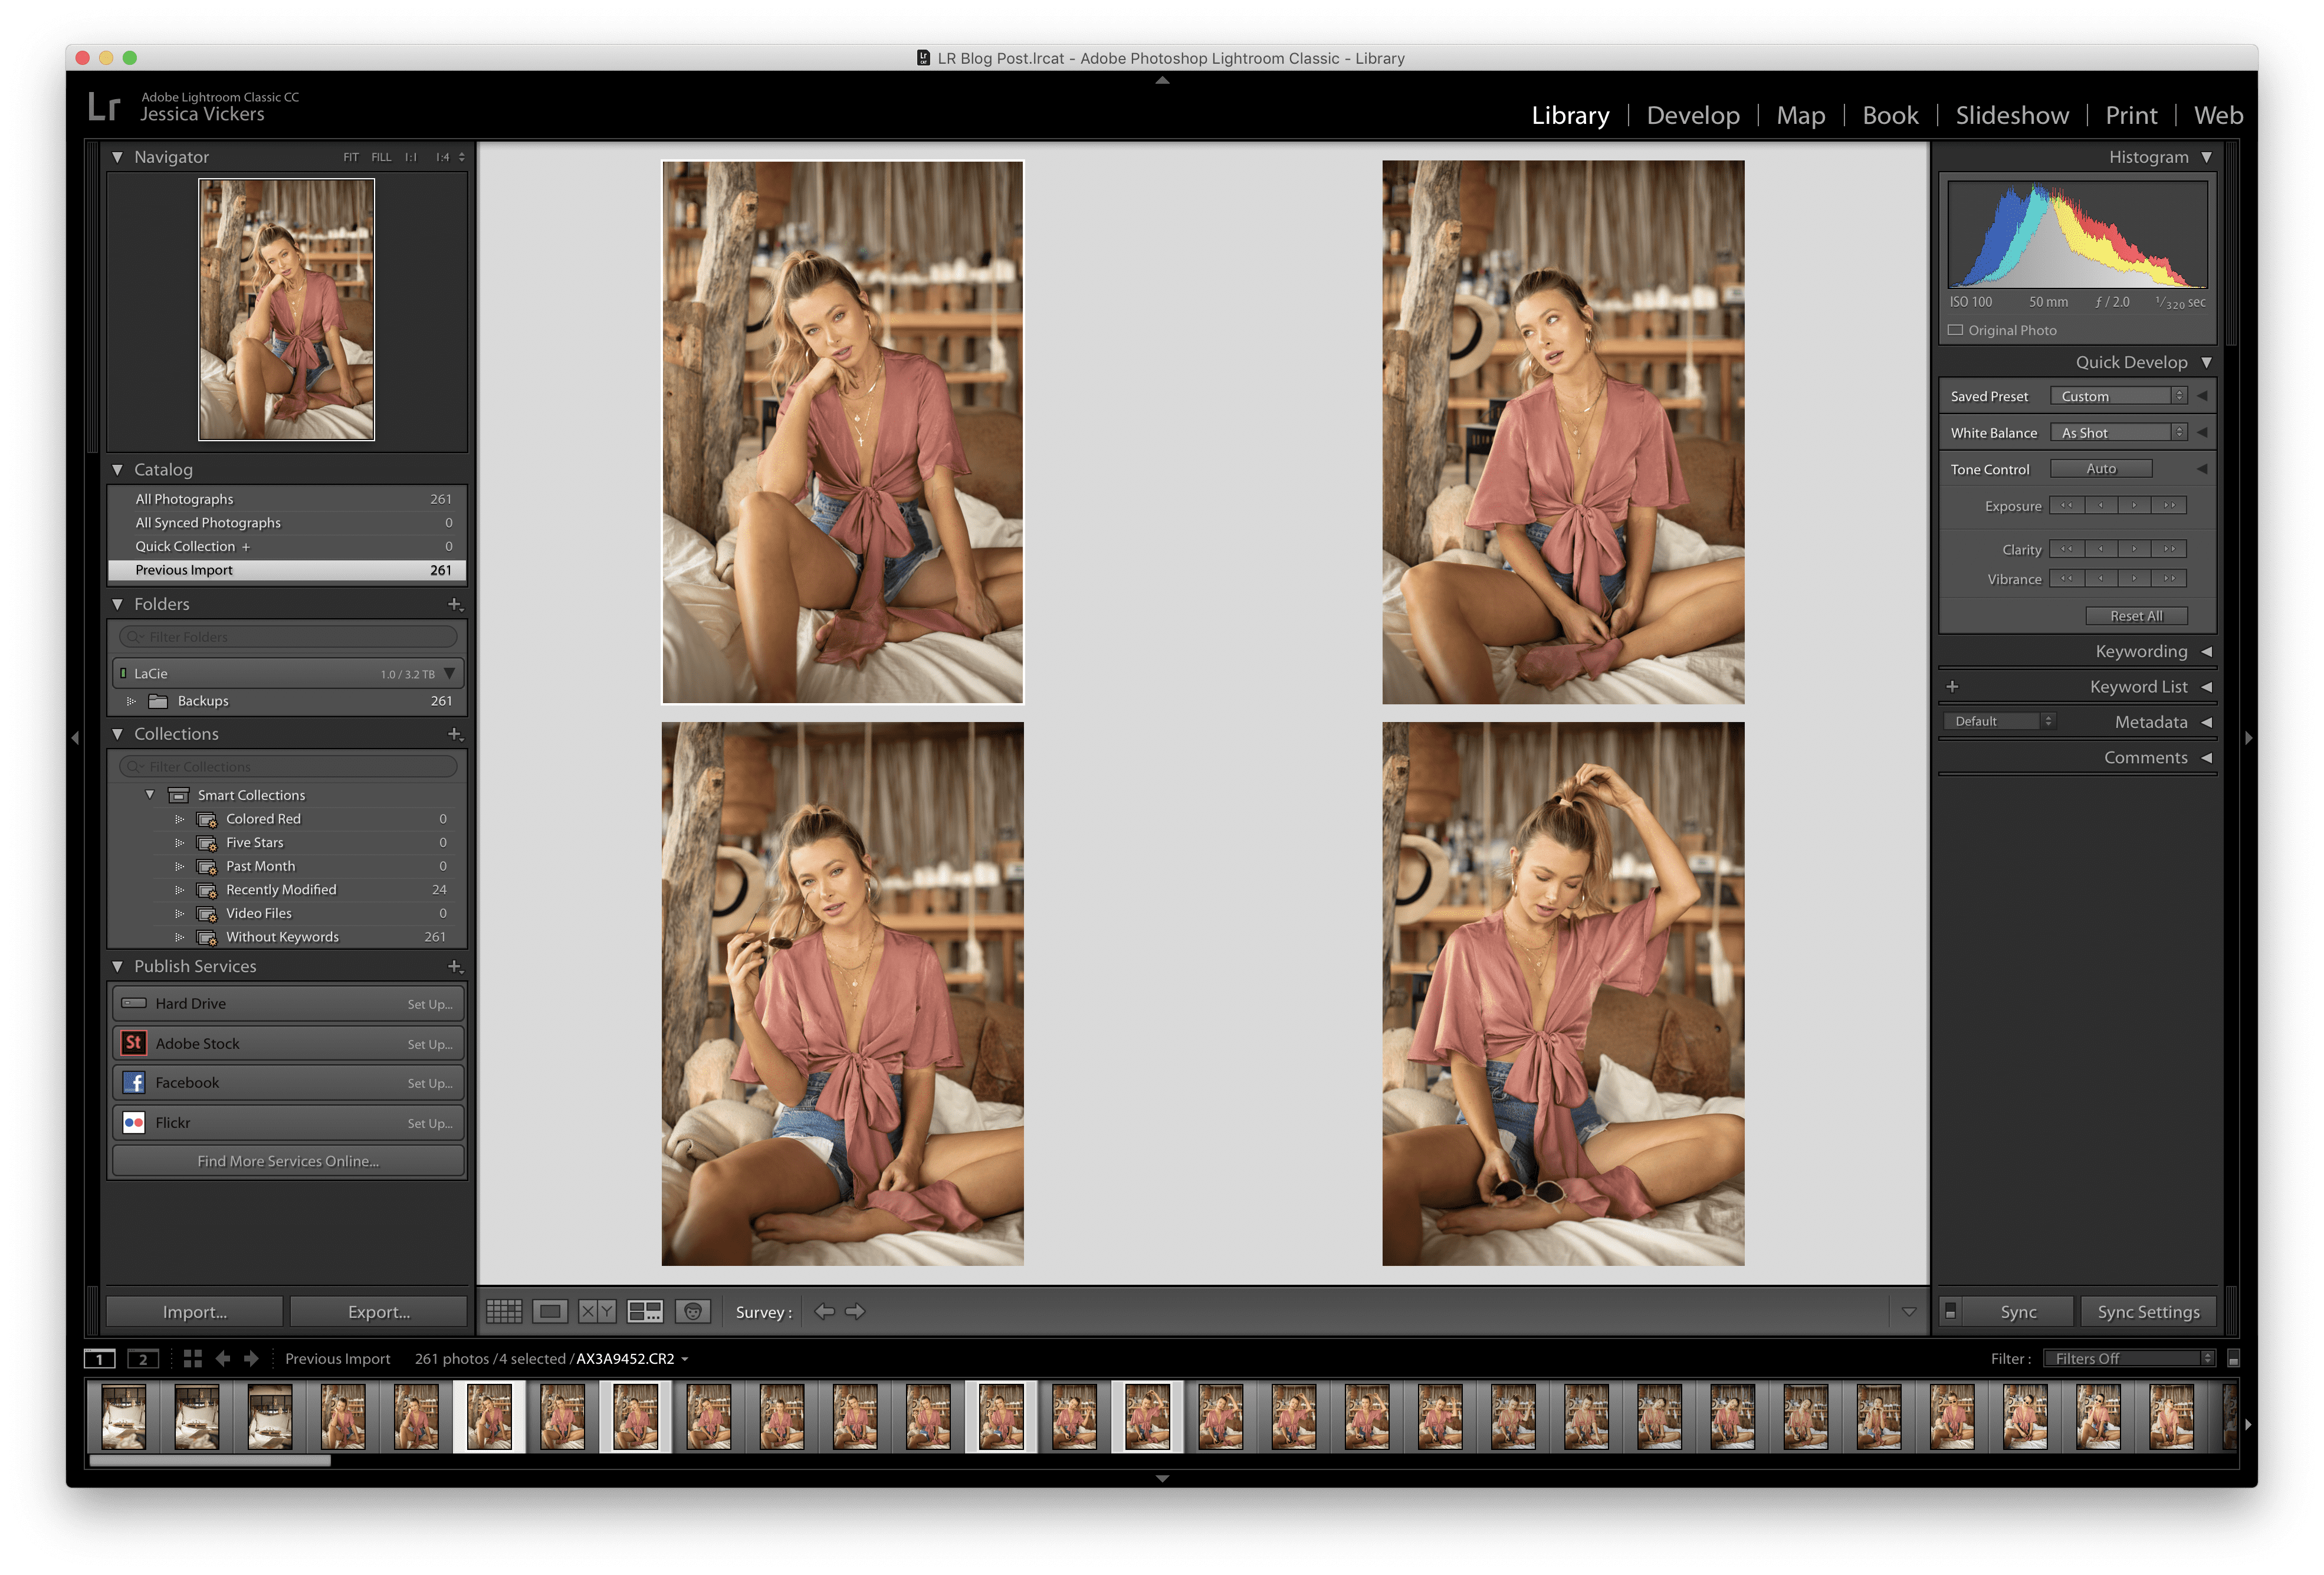
The Library Module:
Once you import your images, you’ll be able to view them in the Library module. The Library module is where you’ll do your culling, if you’re not using another software like Photomechanic. This is what you’ll see!
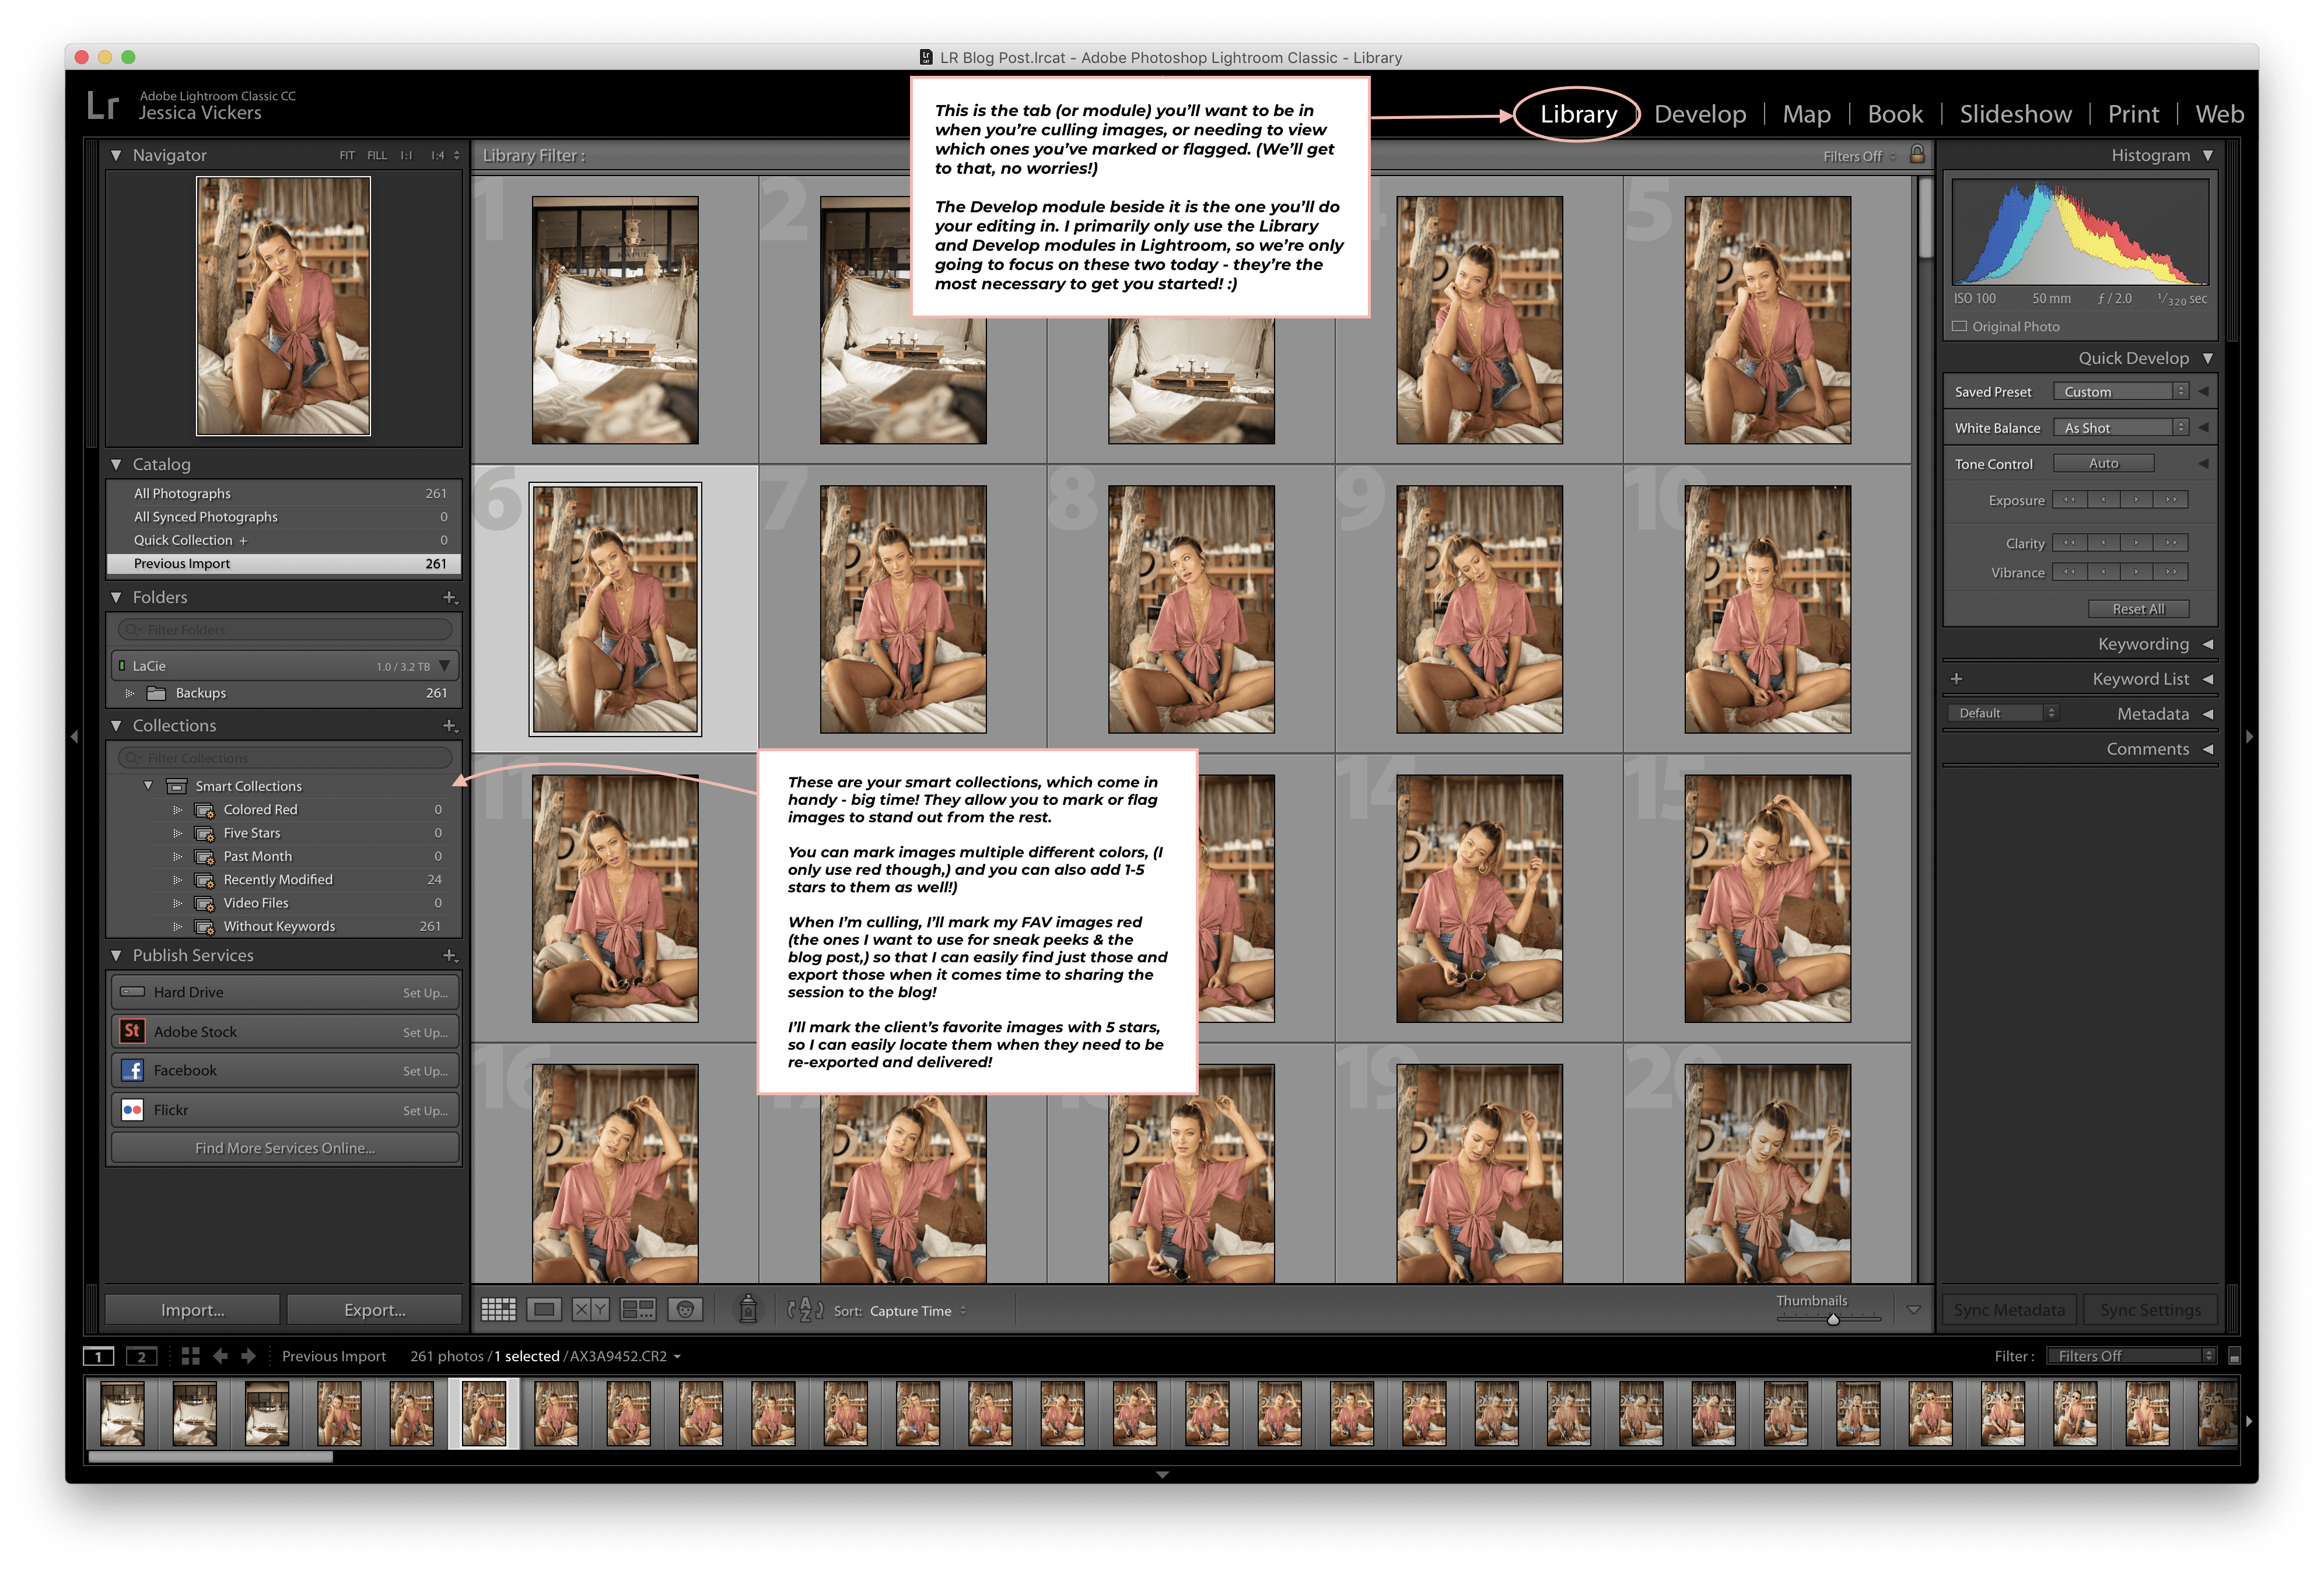
The Library module is where you’ll want to be when you’re culling images, or needing to view which ones you’ve marked or flagged.
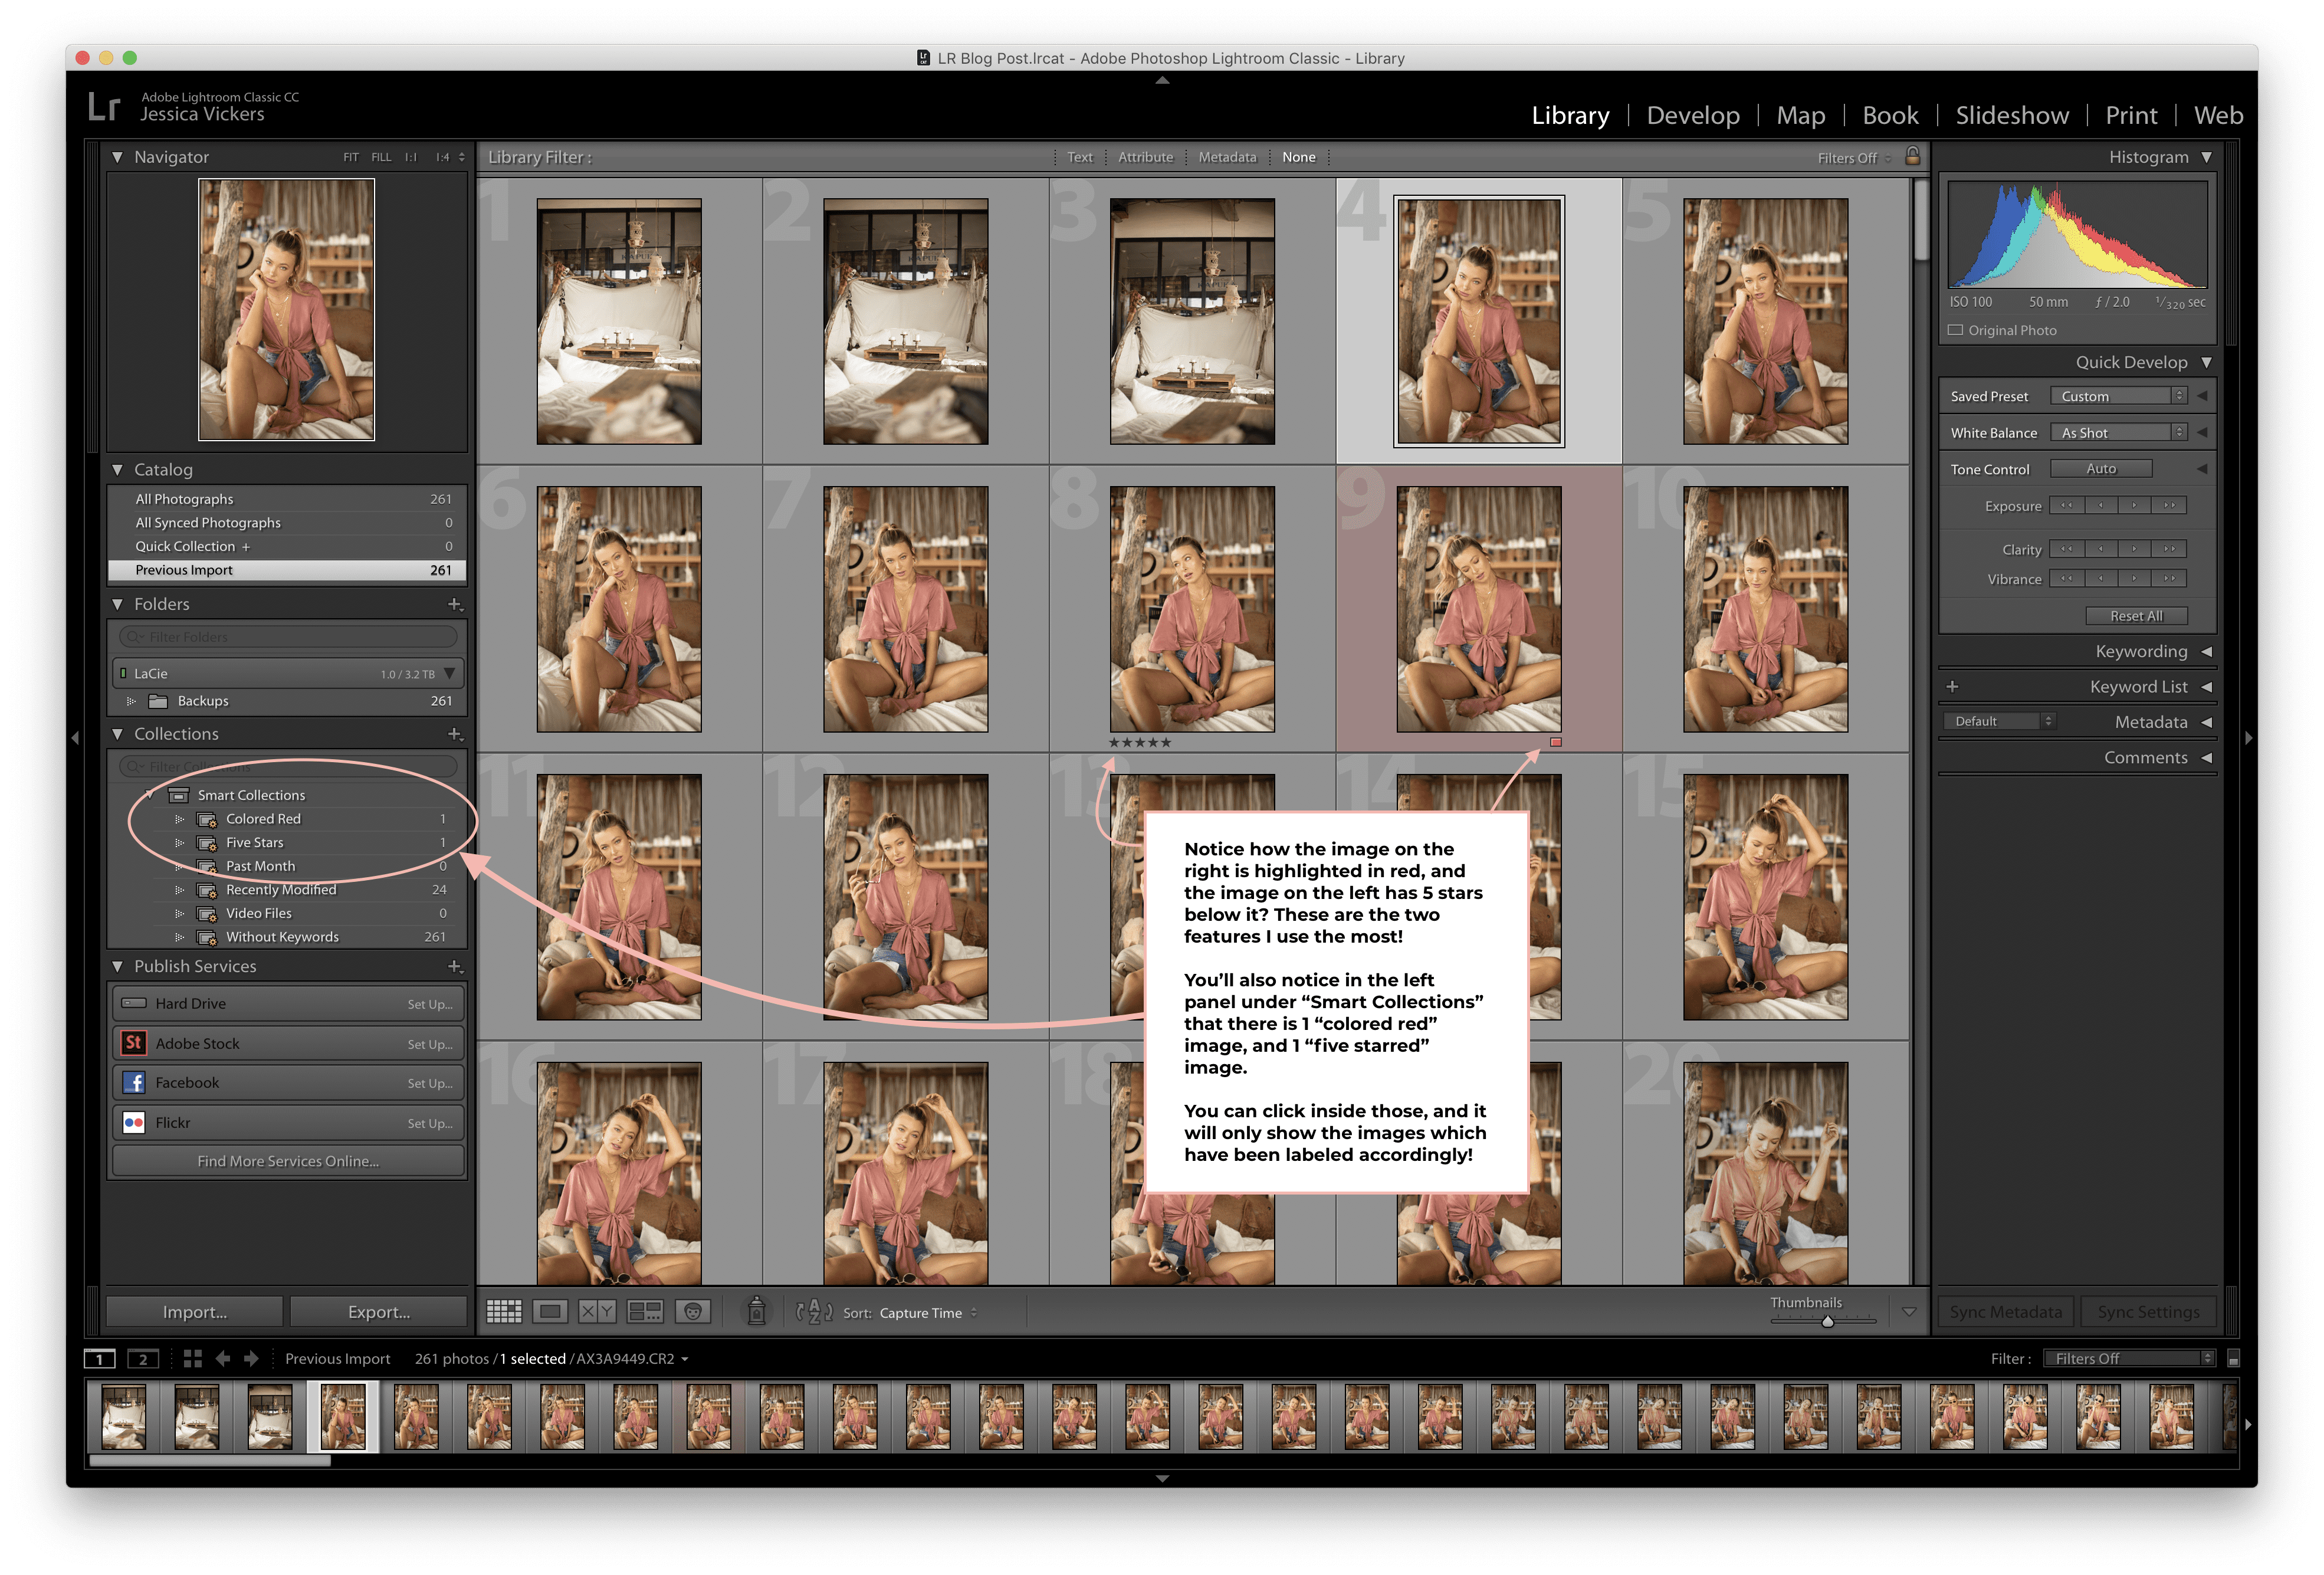
1. Smart Collections
To the left, you’ll see a section titled “Smart Collections.” These are extremely useful when sorting images or selecting ones you want to stand out from the rest. You can mark them a color, or flag them or add a star rating to them.
For example, I mark my favorite images red (the ones I want to use for sneak peeks, or for the blog post,) and I will rate the client’s favorite images (the ones they selected from their proofing gallery) with 5 stars, so that I can easily find them and make the final adjustments, then re-export and deliver! You’ll see what it looks like when I do this below!
2. Viewing Modes
There are four different ways to view your images when you’re in the Library module. Let’s walk though them together!
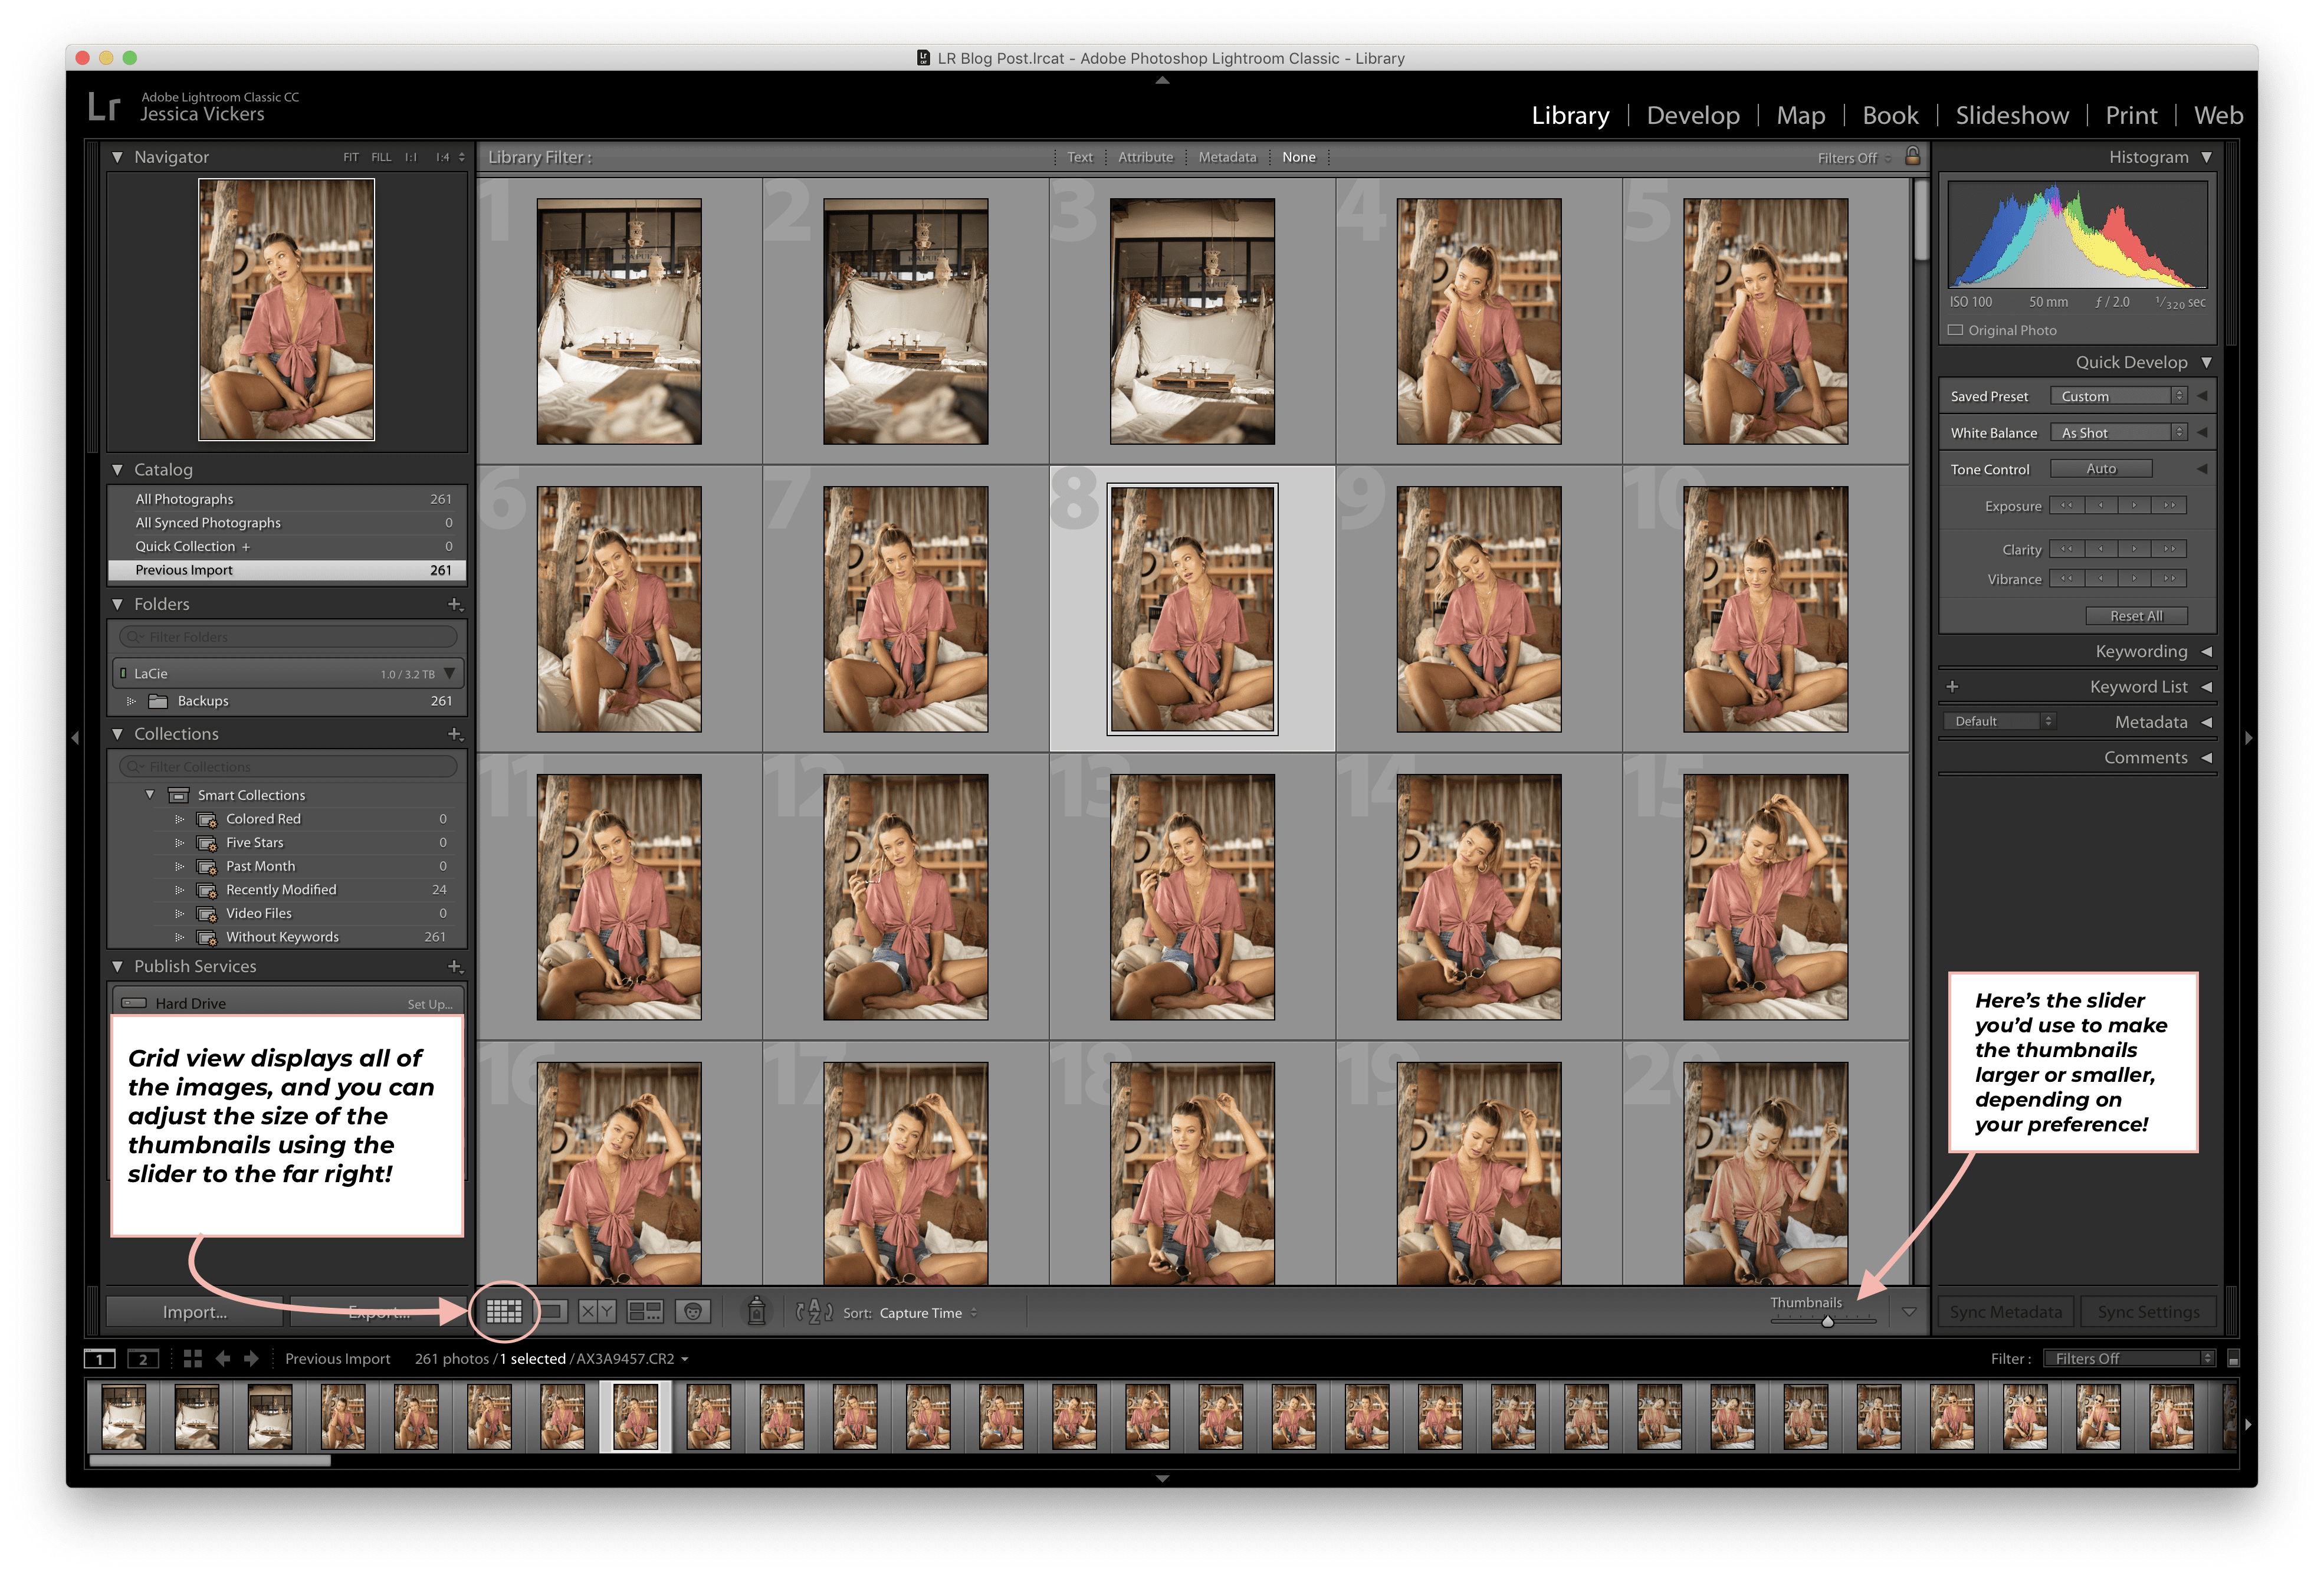
Grid view
- (the view you’re seeing below) – this is useful when needing to view multiple images at once, and you can change the size of your thumbnails using the thumbnail size slider at the bottom right!
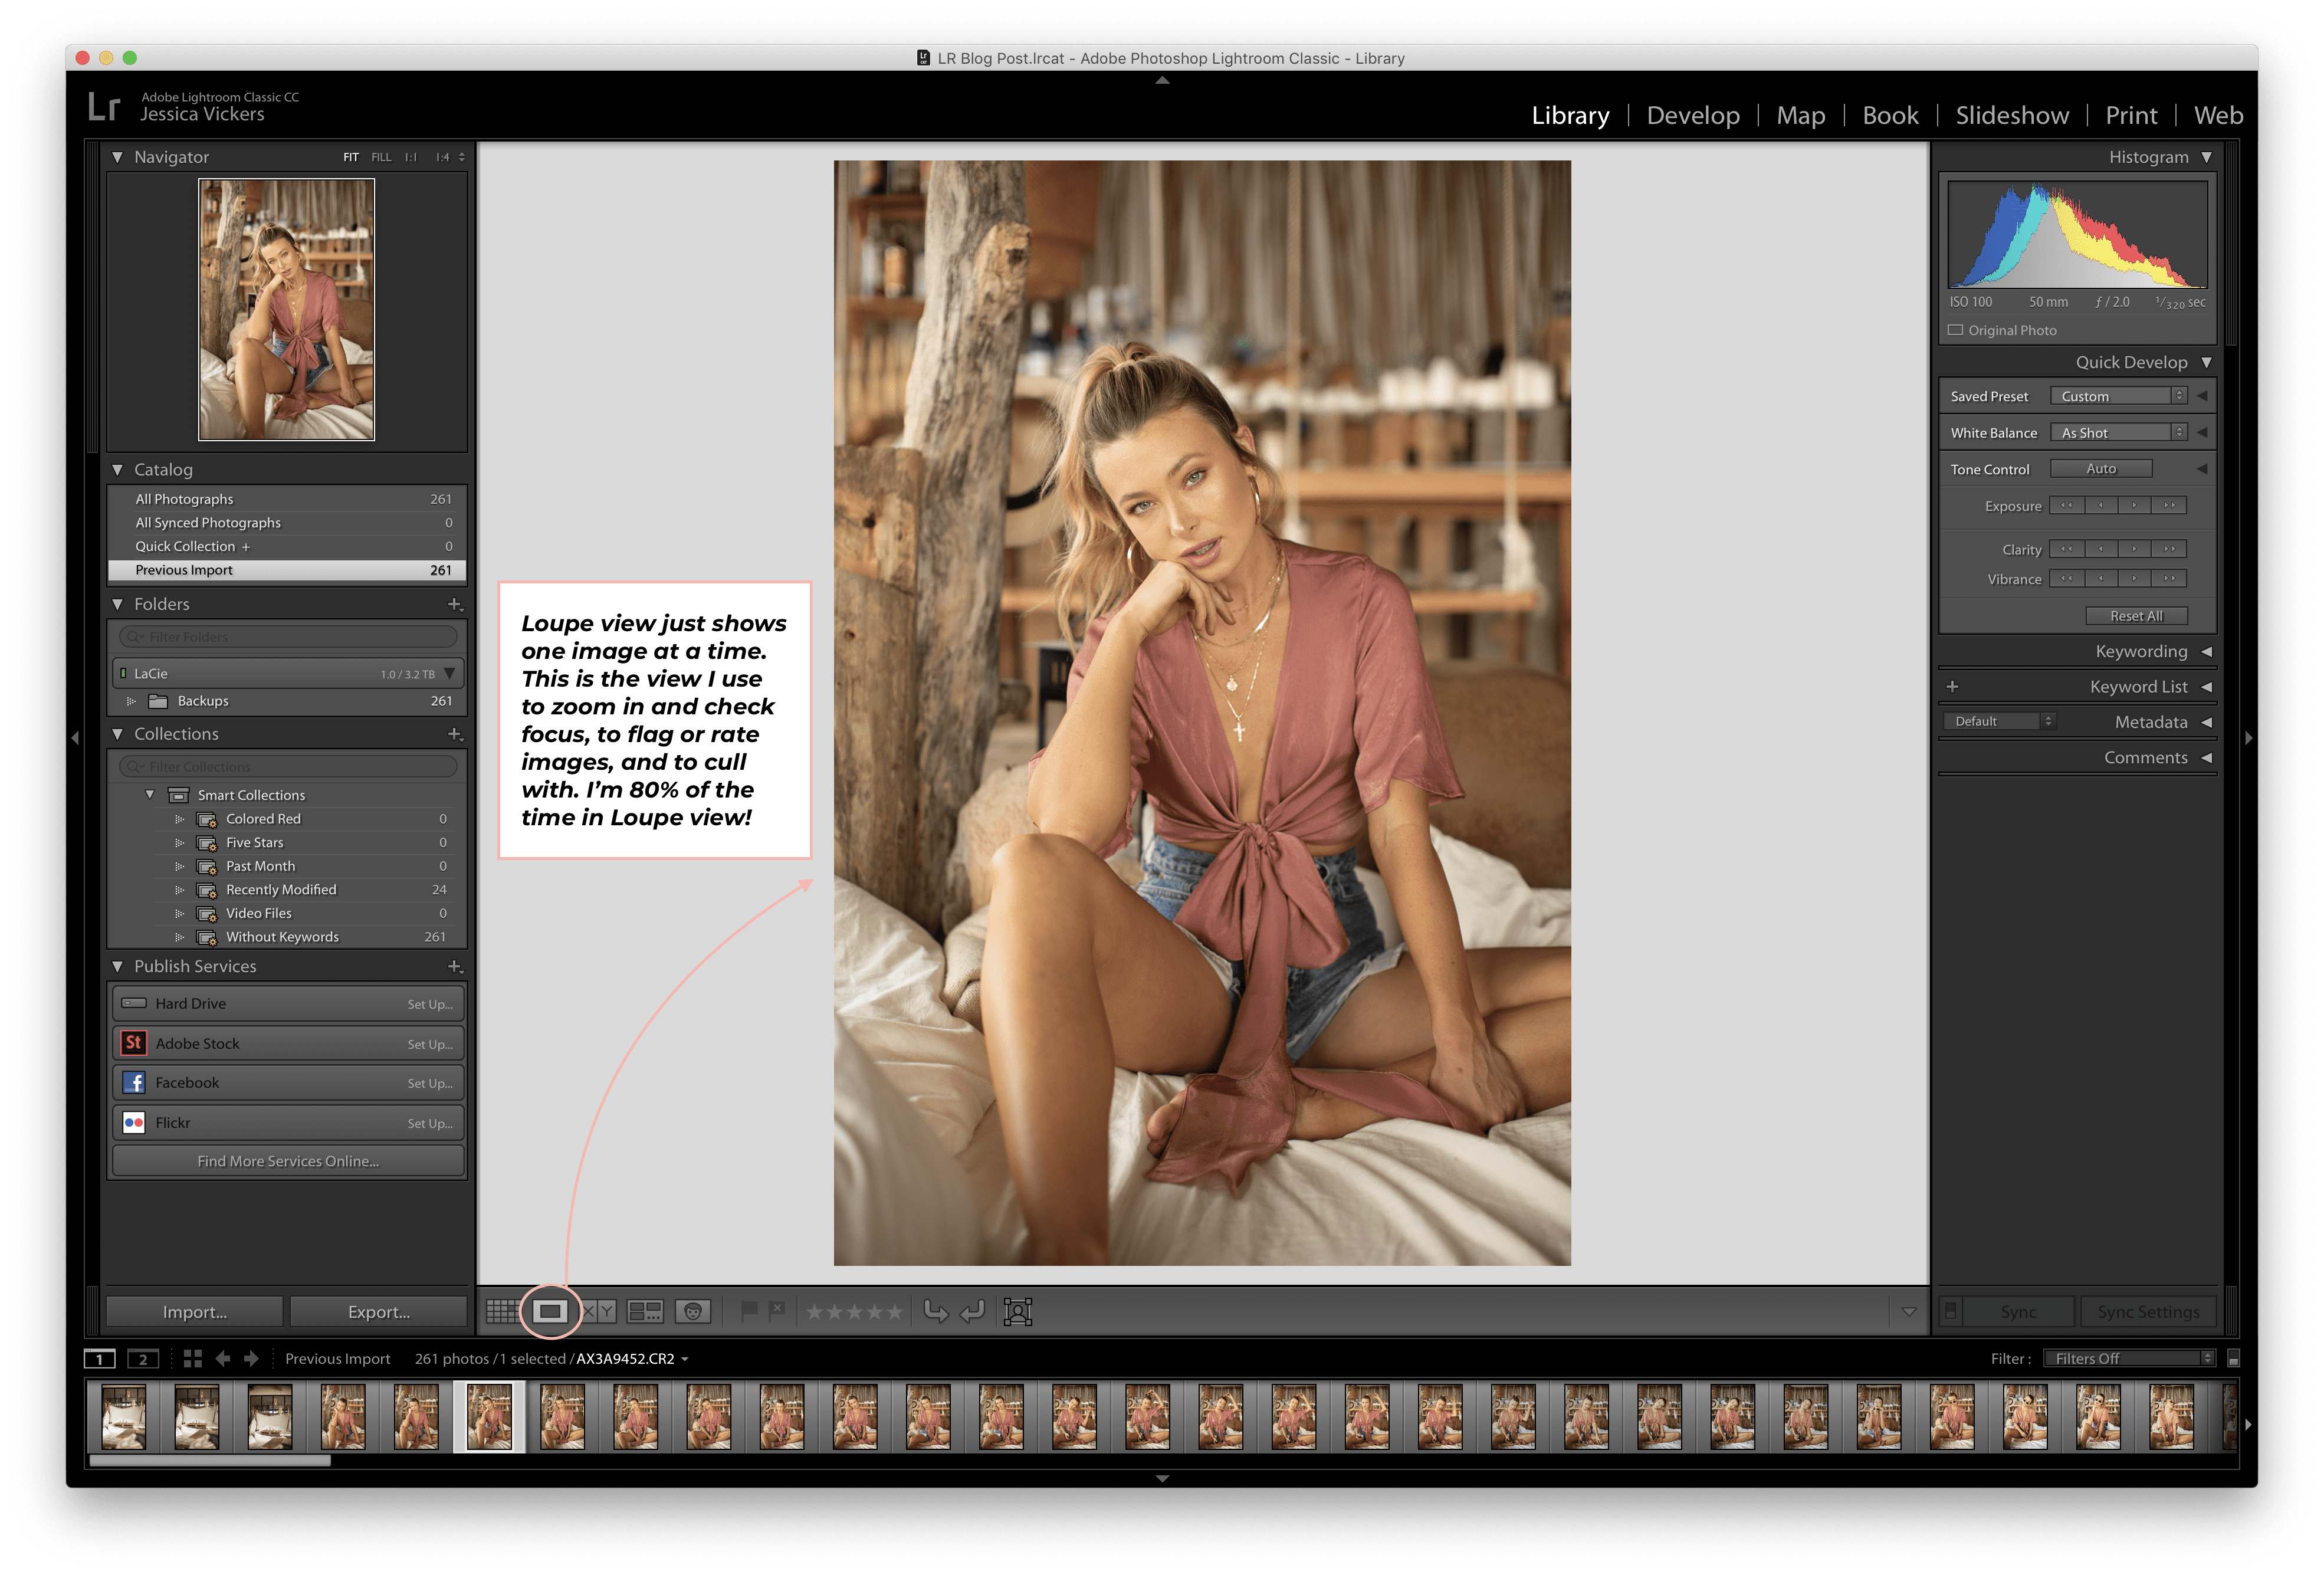
Loupe view:
- in this mode you’ll be able to view the images one at a time, and can navigate through them using the right and left arrow keys on your keyboard!
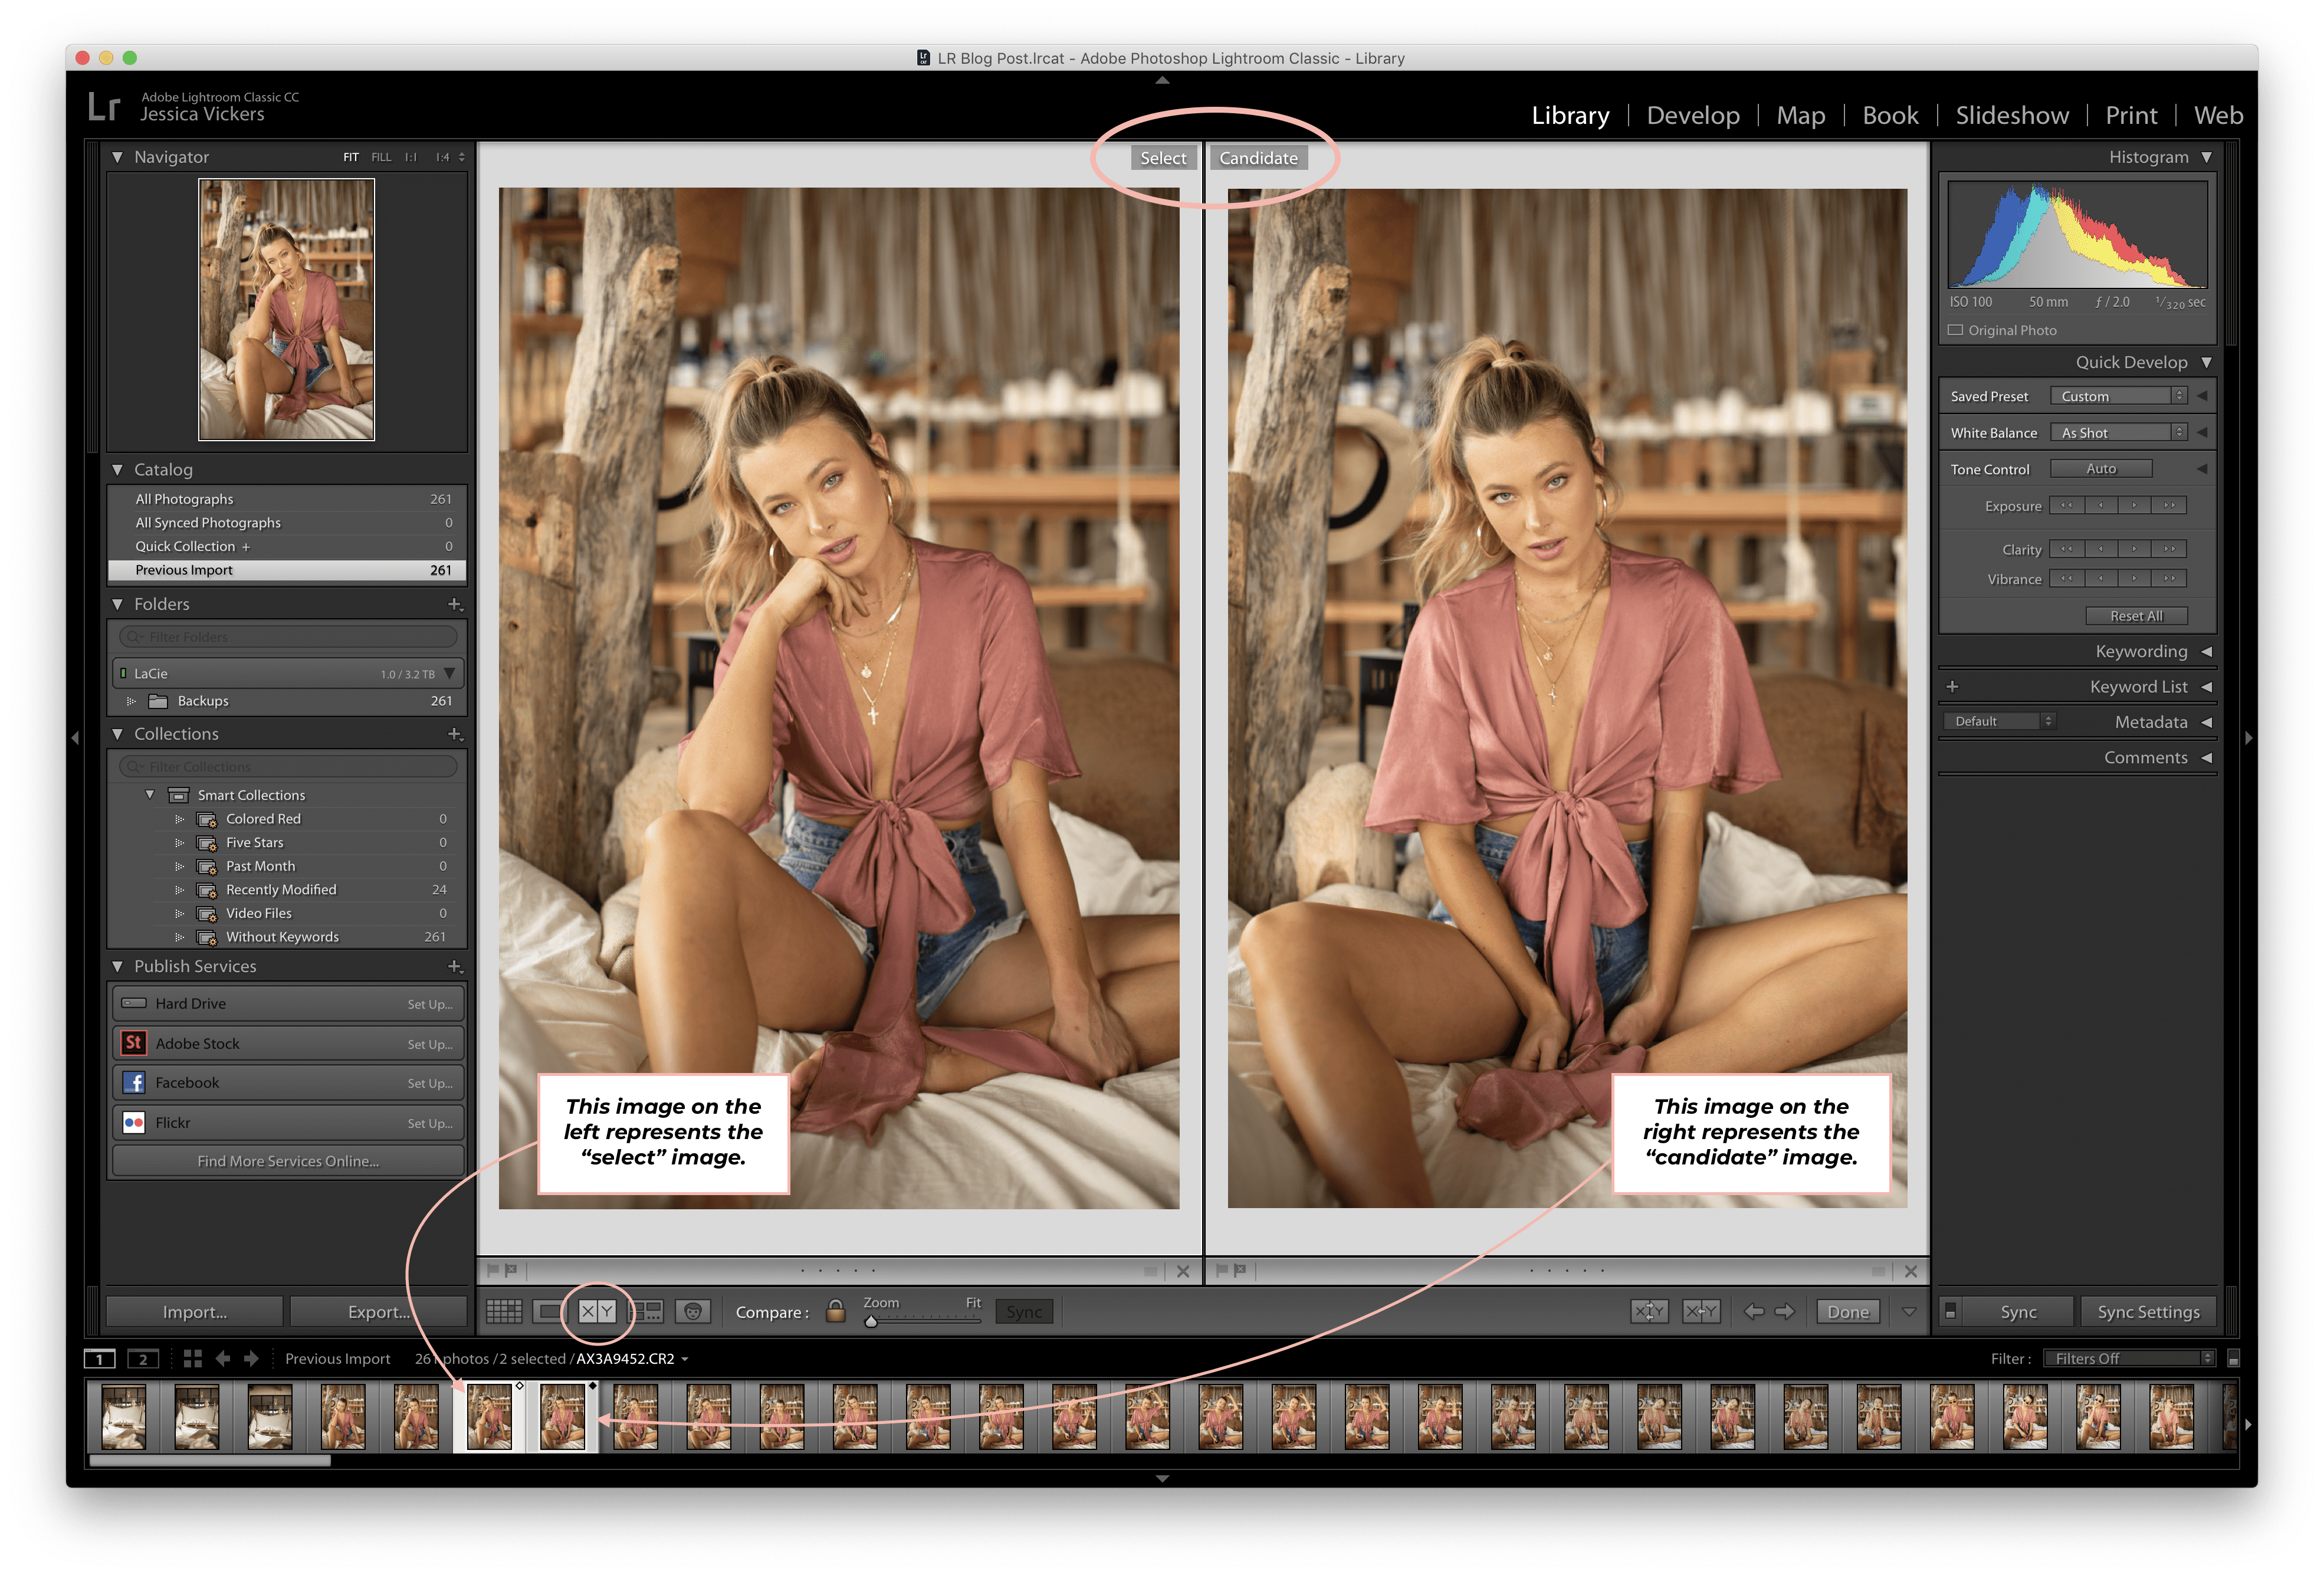
Compare View:
- this mode lets you compare images side by side, so you can choose which you like more! There will be a select and a candidate, and the images you’re comparing don’t actually have to be side by side in the filmstrip at the bottom, you can choose one for the candidate, and then for the select you can use your arrow keys to move the other selected image right and left.
Survey View:
– this allows you to compare multiple images. Hop into the grid view and just select all of the images you want to compare in survey view by either clicking on the first image, and then “shift + click on the last” (if they’re all in order,) or simply hold the Control key (or Command on a mac,) and click all of the images you want to compare. This is the process I’m walking you through below!
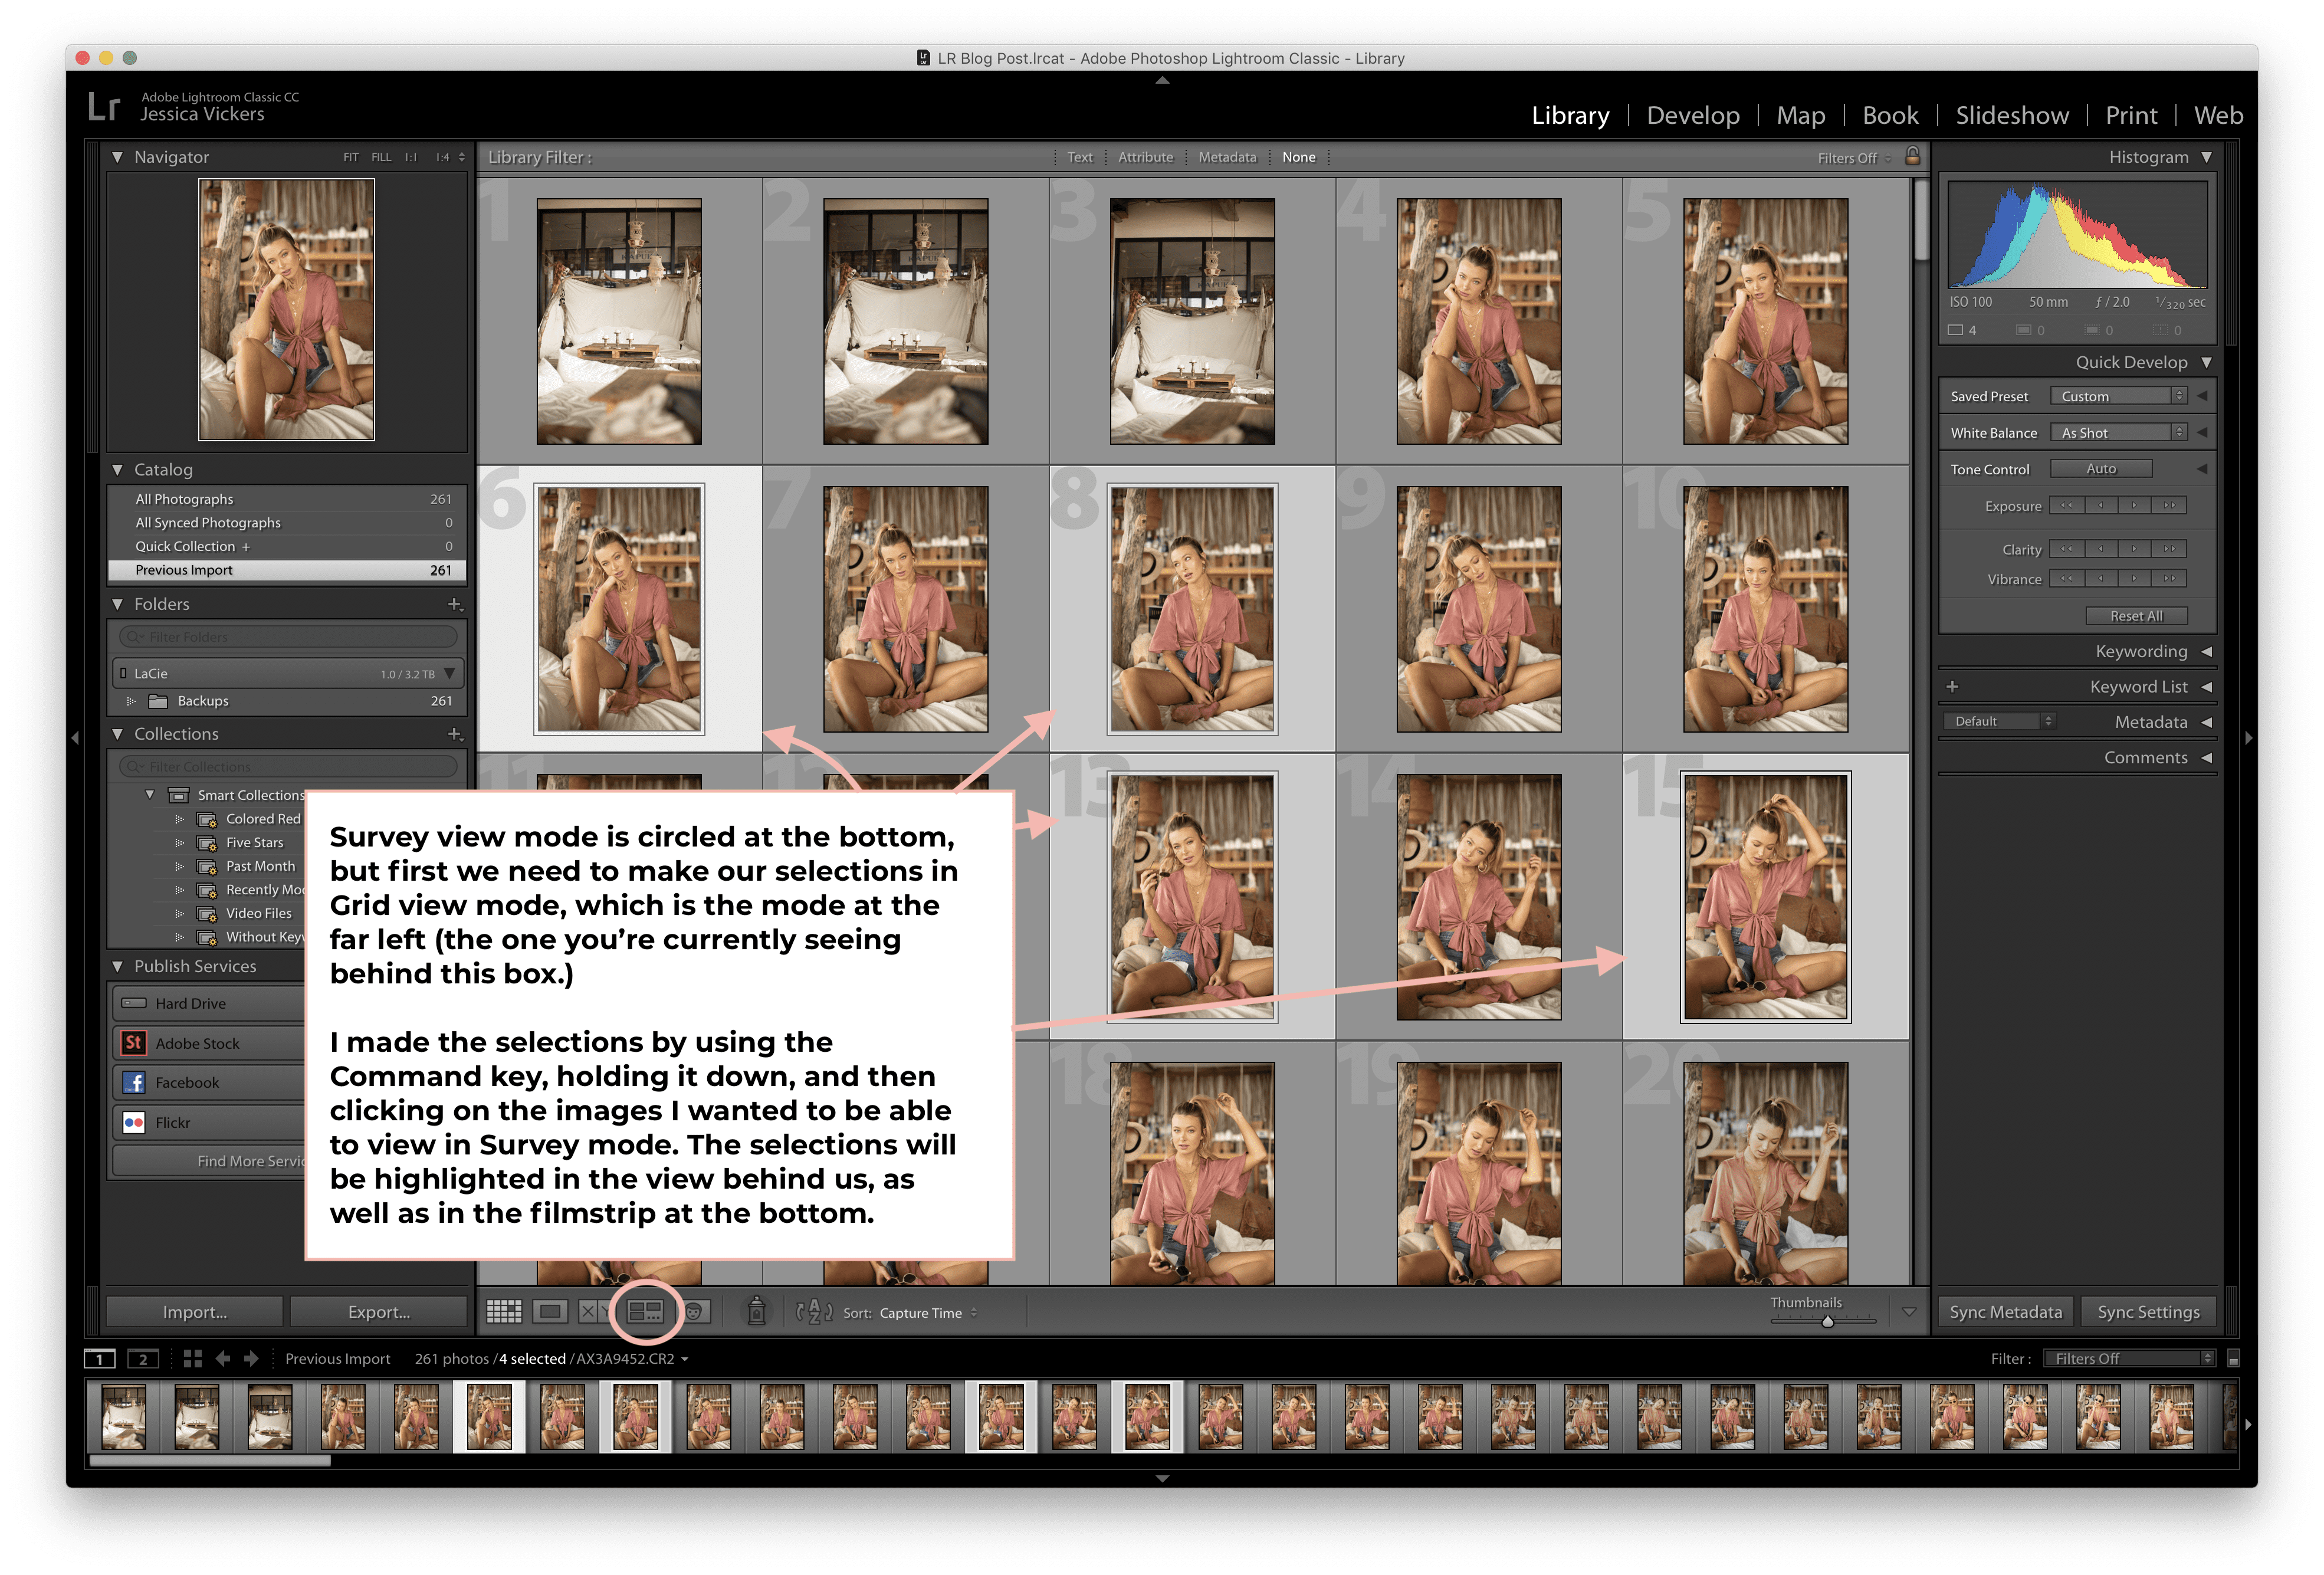
Once you’ve made your selections, click the survey view mode at the bottom (the one circled in the image above,) and your images will then show up in Survey mode! (pictured below.)
From here, you can decide which of the images you like! Need to remove an image from the survey view? No problem, you can hover over the selected image and press the X at the bottom right, and it will remove it. But it won’t remove the image from Lightroom!
If you want to mark one of the images in survey view, you can hover over it and mark it 5 stars easily by clicking the 5th dot at the bottom upon hovering. Looking for a more robust set of features? Just simply right click on the image, and you can do a lot more! If you want to remove it from Lightroom completely, that option is at the very bottom of the list when you right click.
In an effort to not bombard you with too much info at once, I’m going to split this blog post up into a series!
This post will be Part 1: An Introduction to Lightroom, with the focus being on the Library module. The next one will be Part II – where we’ll cover the Develop module, and actually get into the fun part: editing!
Until then, feel free to drop all your editing questions below in the comments section. Yes – I actually check those! 😉
Xoxo,
Jess
Already using Lightroom and want to next-level your photos with the Mina Marlena Preset Masterclass? All of the info is waiting and ready for ya to put to work on your images! ??
Wanna stick around and stay learnin’? I knew I liked ya. ?
Feel free to binge on these blog posts, or pin ’em on Pinterest for later! ??
If you’re short on time, follow me on Pinterest – and you’ll get these kinda tips delivered straight to your feed! You know… when you’re scrollin’ through Pinterest with coffee in hand, ready to take on the day… or, procrastinate.
Whatevs. Pinterest biz sesh, anybody!? ??


Read the Comments +