When I first started using Lightroom, it was honestly pretty overwhelming. (I’m one of the few people who actually started in Photoshop before ever using Lightroom.) But, switching my workflow from Photoshop to Lightroom was easily the greatest decision I made when it came to developing a solid, fast, and easy editing workflow— especially when it comes to these 5 Lightroom tools, (that yes, I meant it– you SHOULD be using.)
Along the way, I found little tools, tips, and tricks that were hidden throughout the program– (and one in particular that changed my LIFE.) So let’s dive in, and if you aren’t already implementing these tools in your editing workflow– you’re gonna be happy dancing before the end of this post. Promise! 😉
The lineup of tools you should be using:
1. HSL Sliders
2. Batch Editing (Using the Sync tool)
3. Radial filters
4. Transform tool
5. Presets
1. HSL Sliders
These little babies save my LIFE when I’m editing. HSL stands for hue, saturation, and luminance – and they basically hold the magic wand when it comes to color correction.
The HSL sliders are particularly useful when you want to adjust just one specific color in an image (or multiple colors, but want to single them out instead of adjusting something that could affect the entire photo (like temperature or tint would.)
The sliders are located in the develop module (where all editing is done in LR,) under the HSL/Color tab. Here’s a quick visual reference:
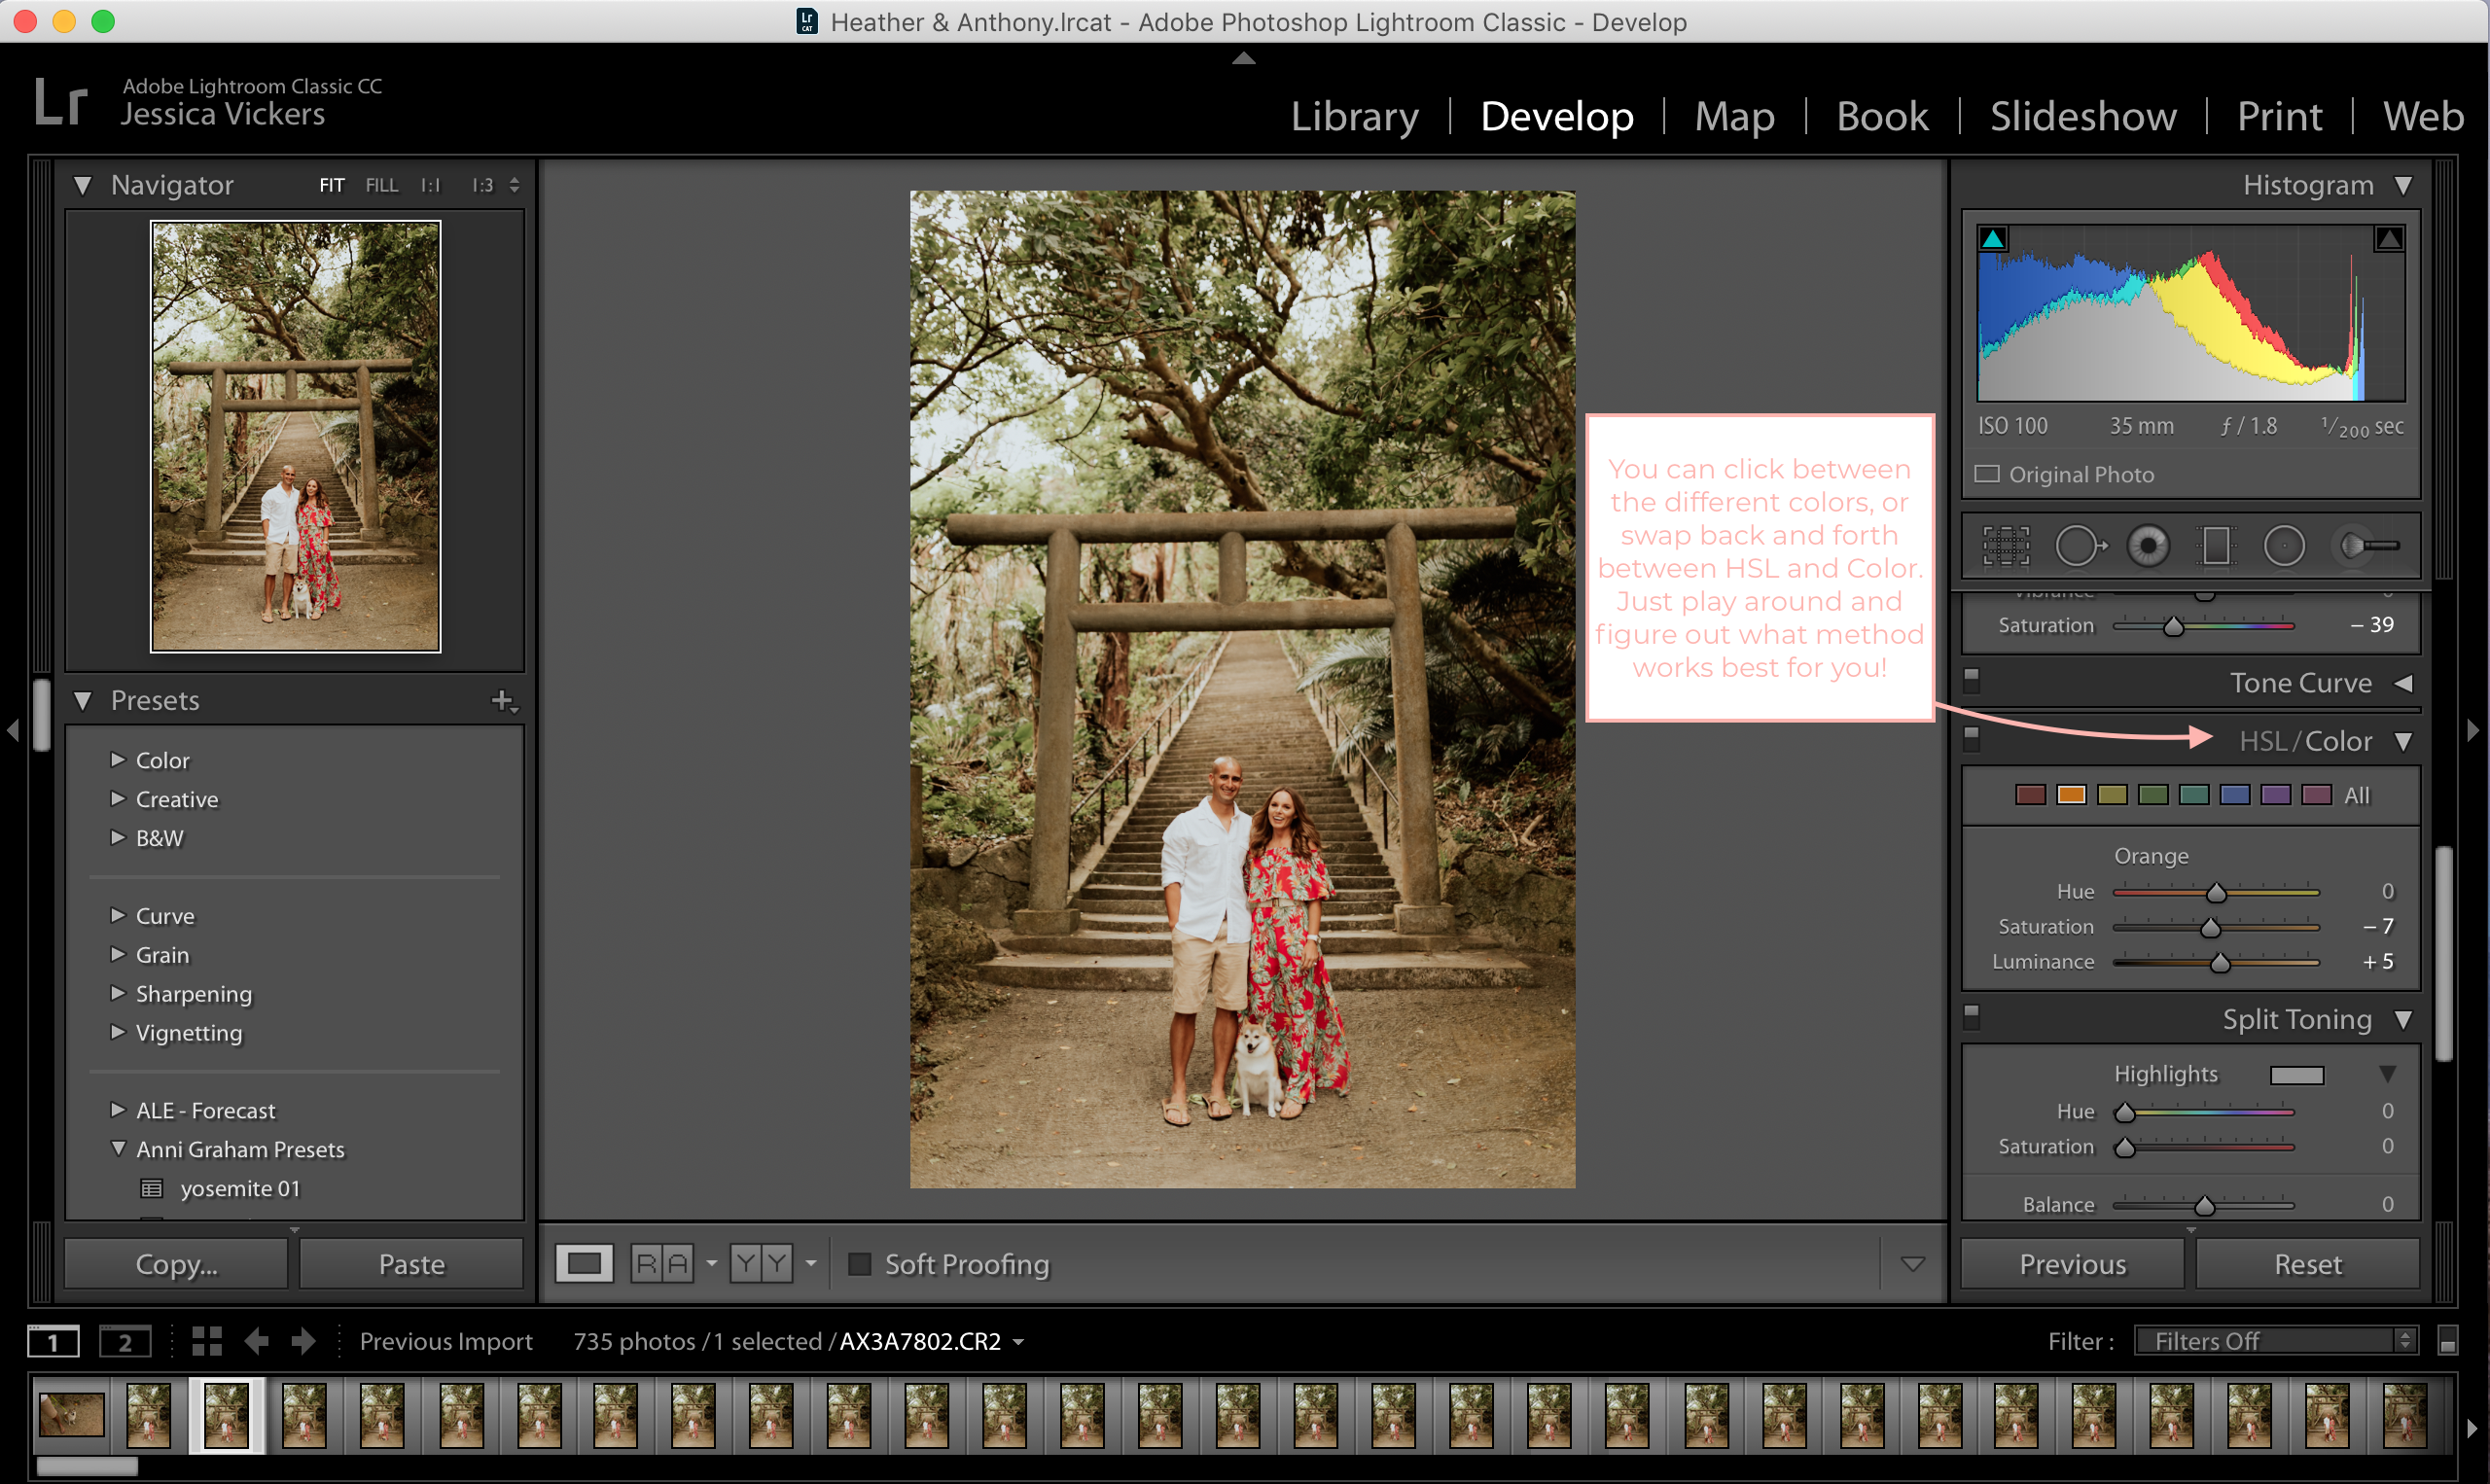
Here’s an IGTV video that shows me actually editing and working with the HSL sliders on one of my images. (For my visual learners out there, I see you and I gotchu!) ???
https://www.instagram.com/tv/BkolfsqHS5q/
2. Batch Editing (Using the Sync tool)
Y’all… I’m straight up embarrassed about how long this took me to learn. I was probably an entire 1-2 years into my biz before I learned it. #somuchwastedtimeitmakesmesick
I sincerely hope you already know about this, because if you don’t– you’re gonna trip.
Just promise me you won’t throw your computer when you realize how much time it would’ve saved you… k? K. ?
So, once you’ve gotten an image edited to your liking, you can actually “copy & paste” the edits onto your next image. And the next one. And the next one. You can either do just one image at a time or sync the edits across as many images as you want. Need to do 30 at a time? Yep. It’ll automatically paste the edits onto every. single. one.
Here’s a play-by-play on how to copy & paste your edits onto each image, one at a time:
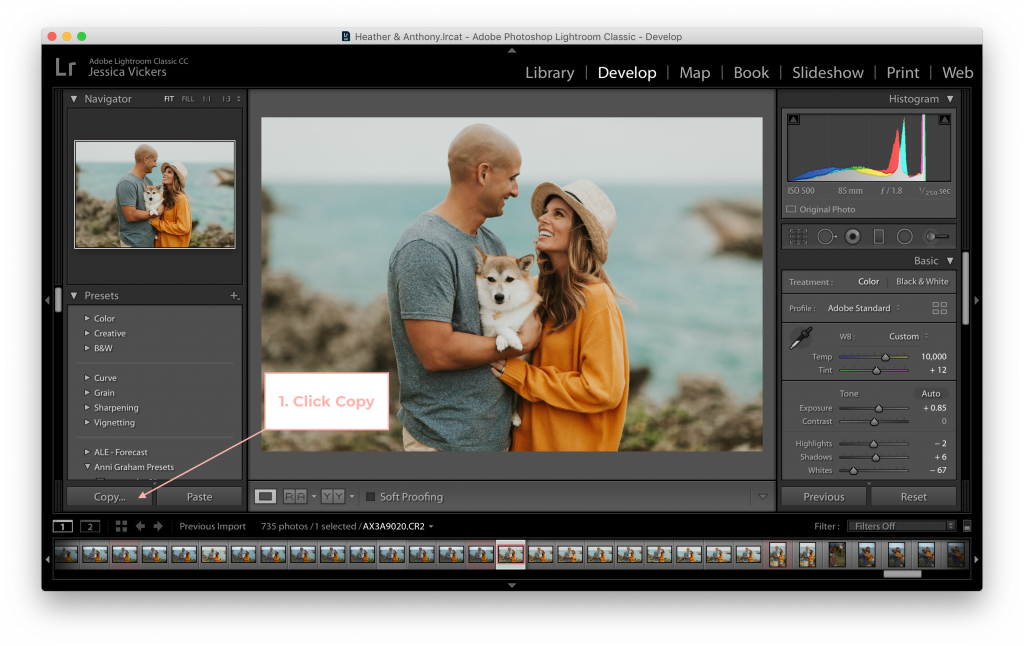
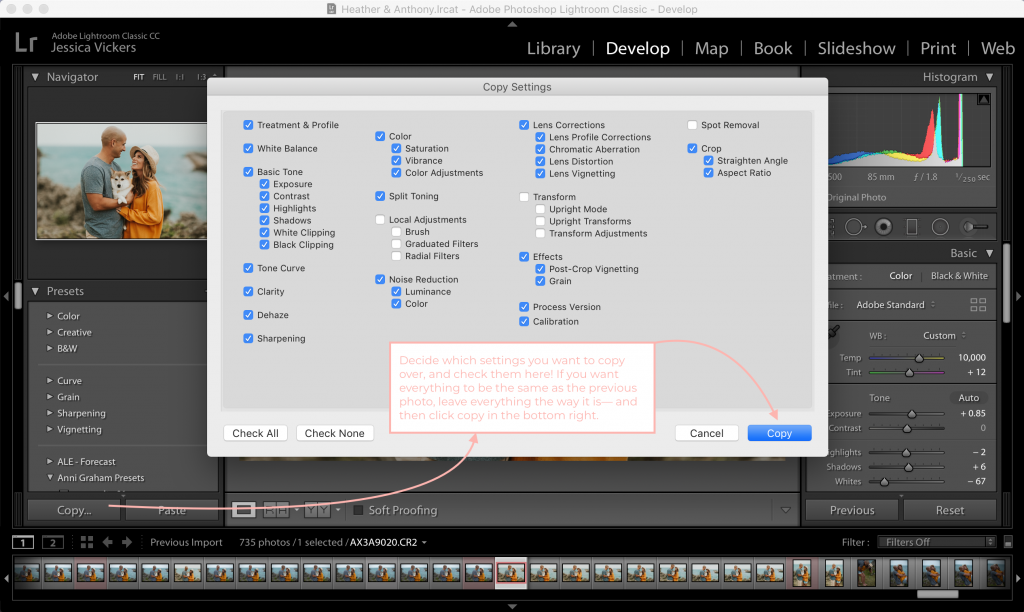
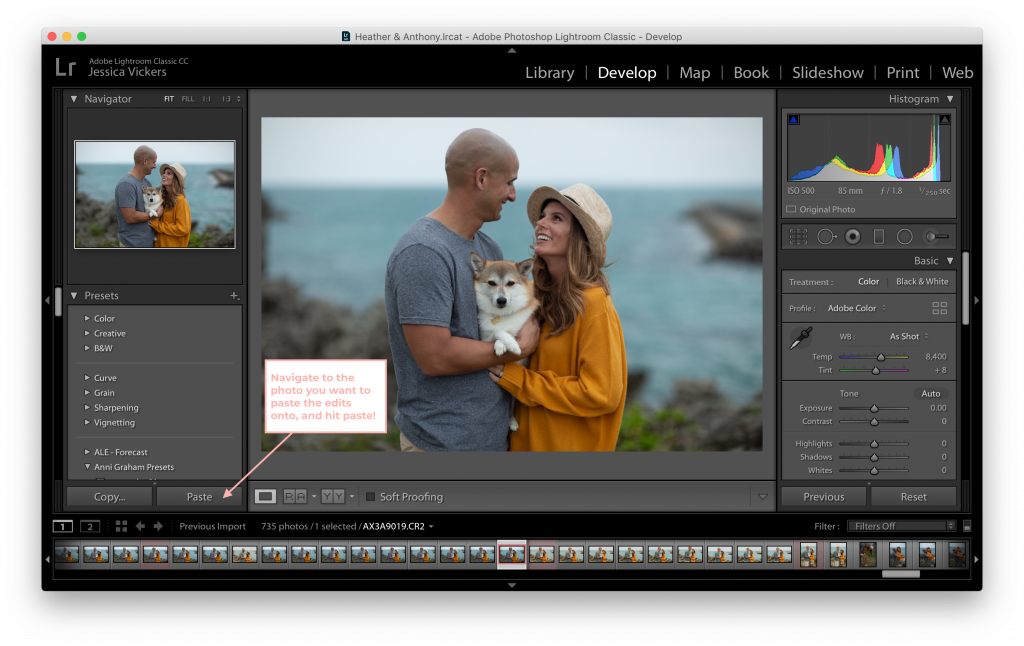
There ya have it, all of the settings you applied to your previous image are just… BAM. Onto your next one! How even!? I know. I can’t believe I was hand editing every single image before. ?
Think that’s cool? Wait ‘till ya see this.
Here’s what it means to ‘sync’ your edits across multiple images.
… Ready?
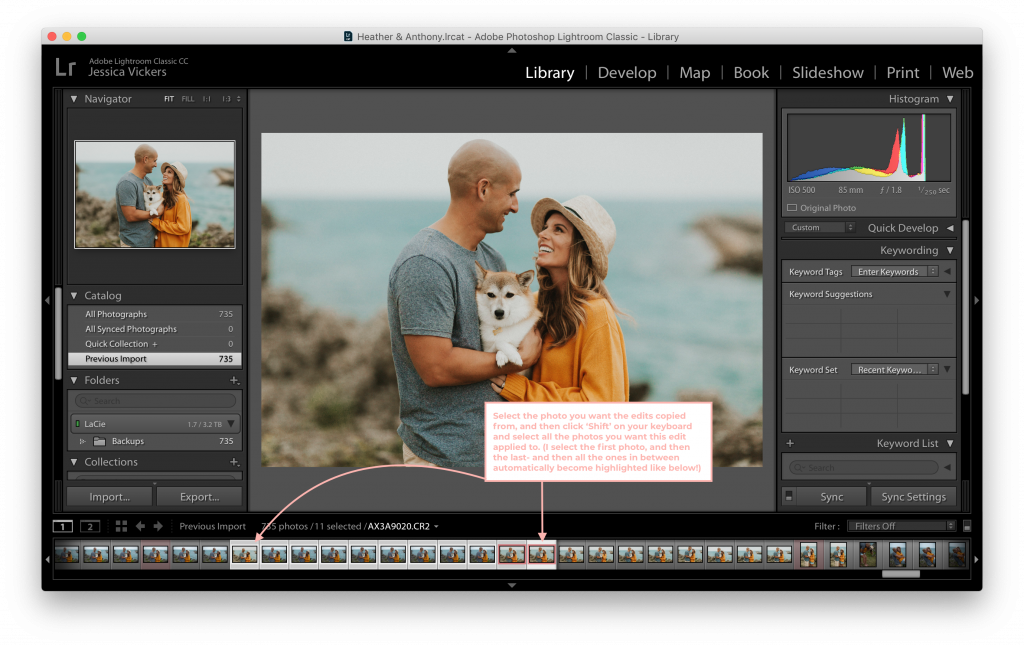
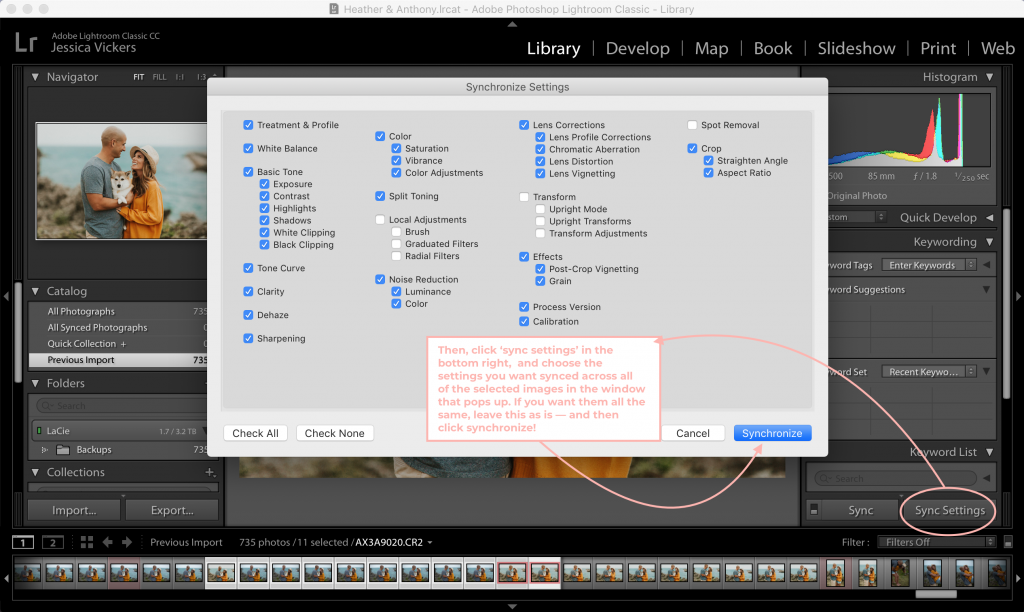
Bam. All 10 images edited in less than five seconds.
Mind-blowing.
Granted, each image may need adjustments (especially if they’re in different locations or lighting scenarios,) but– if they’re taken in the same light and the same spot; chances are you won’t need to adjust anything and you can move right along!
3. Radial Filters
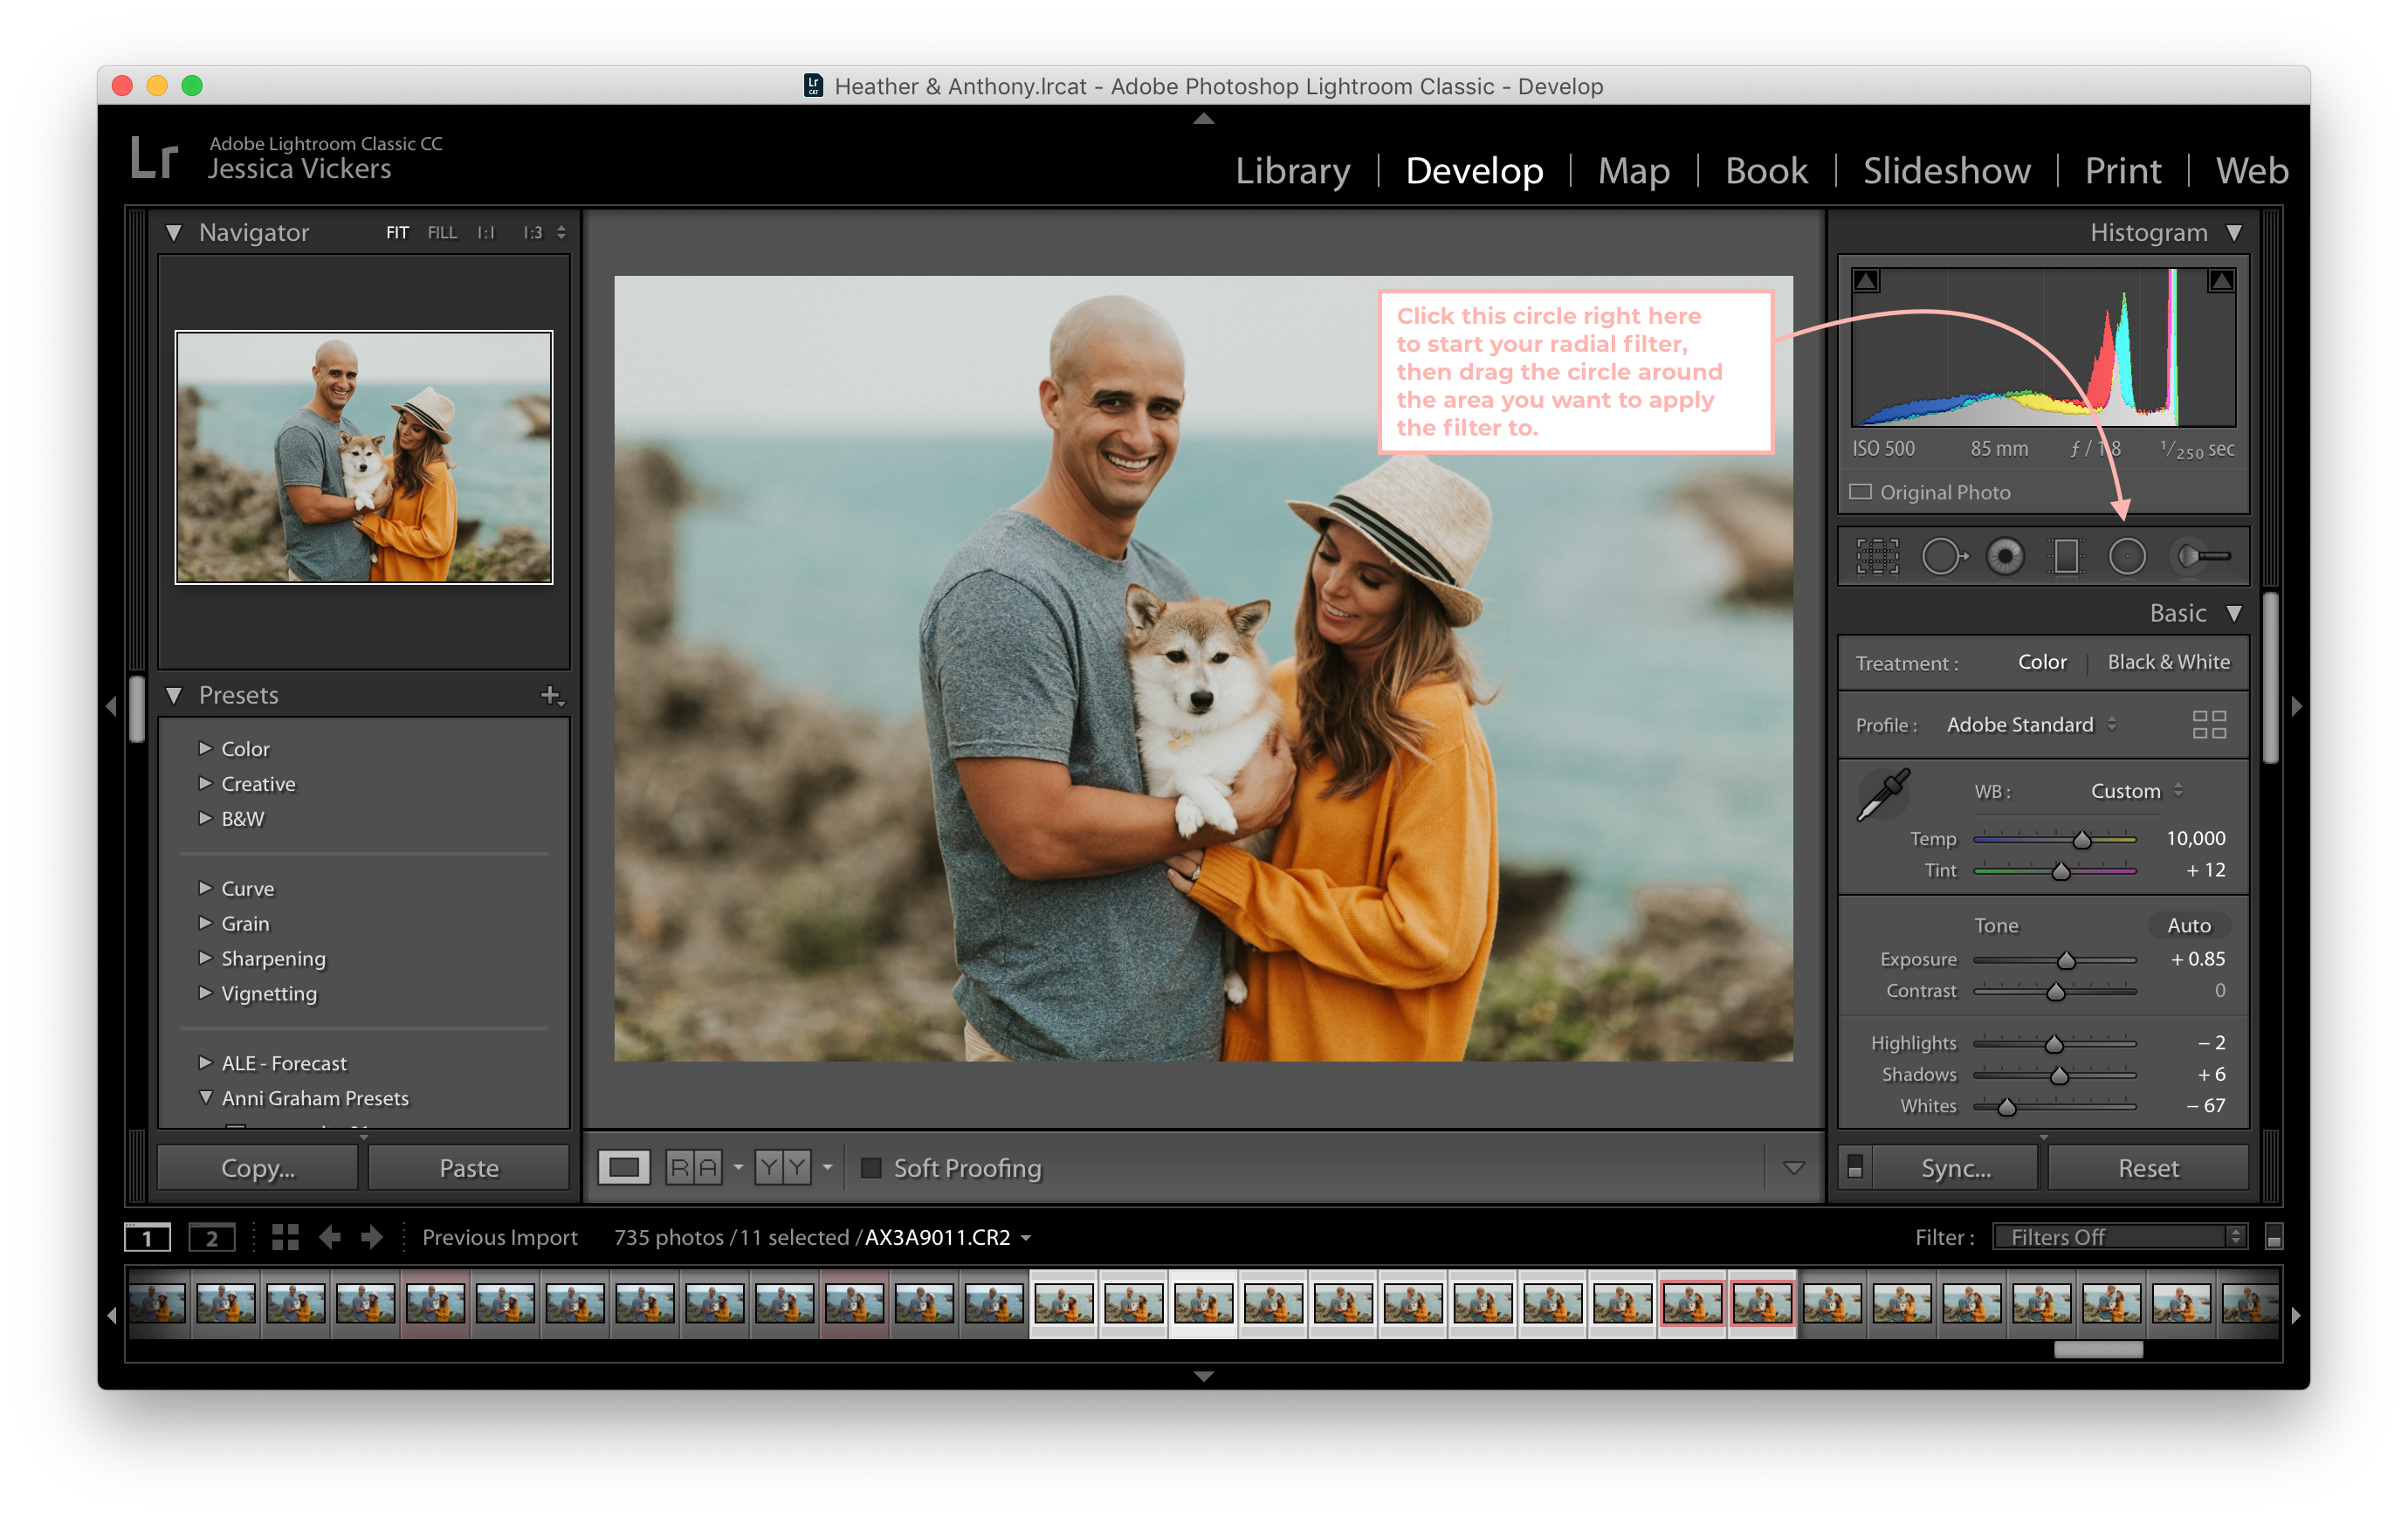
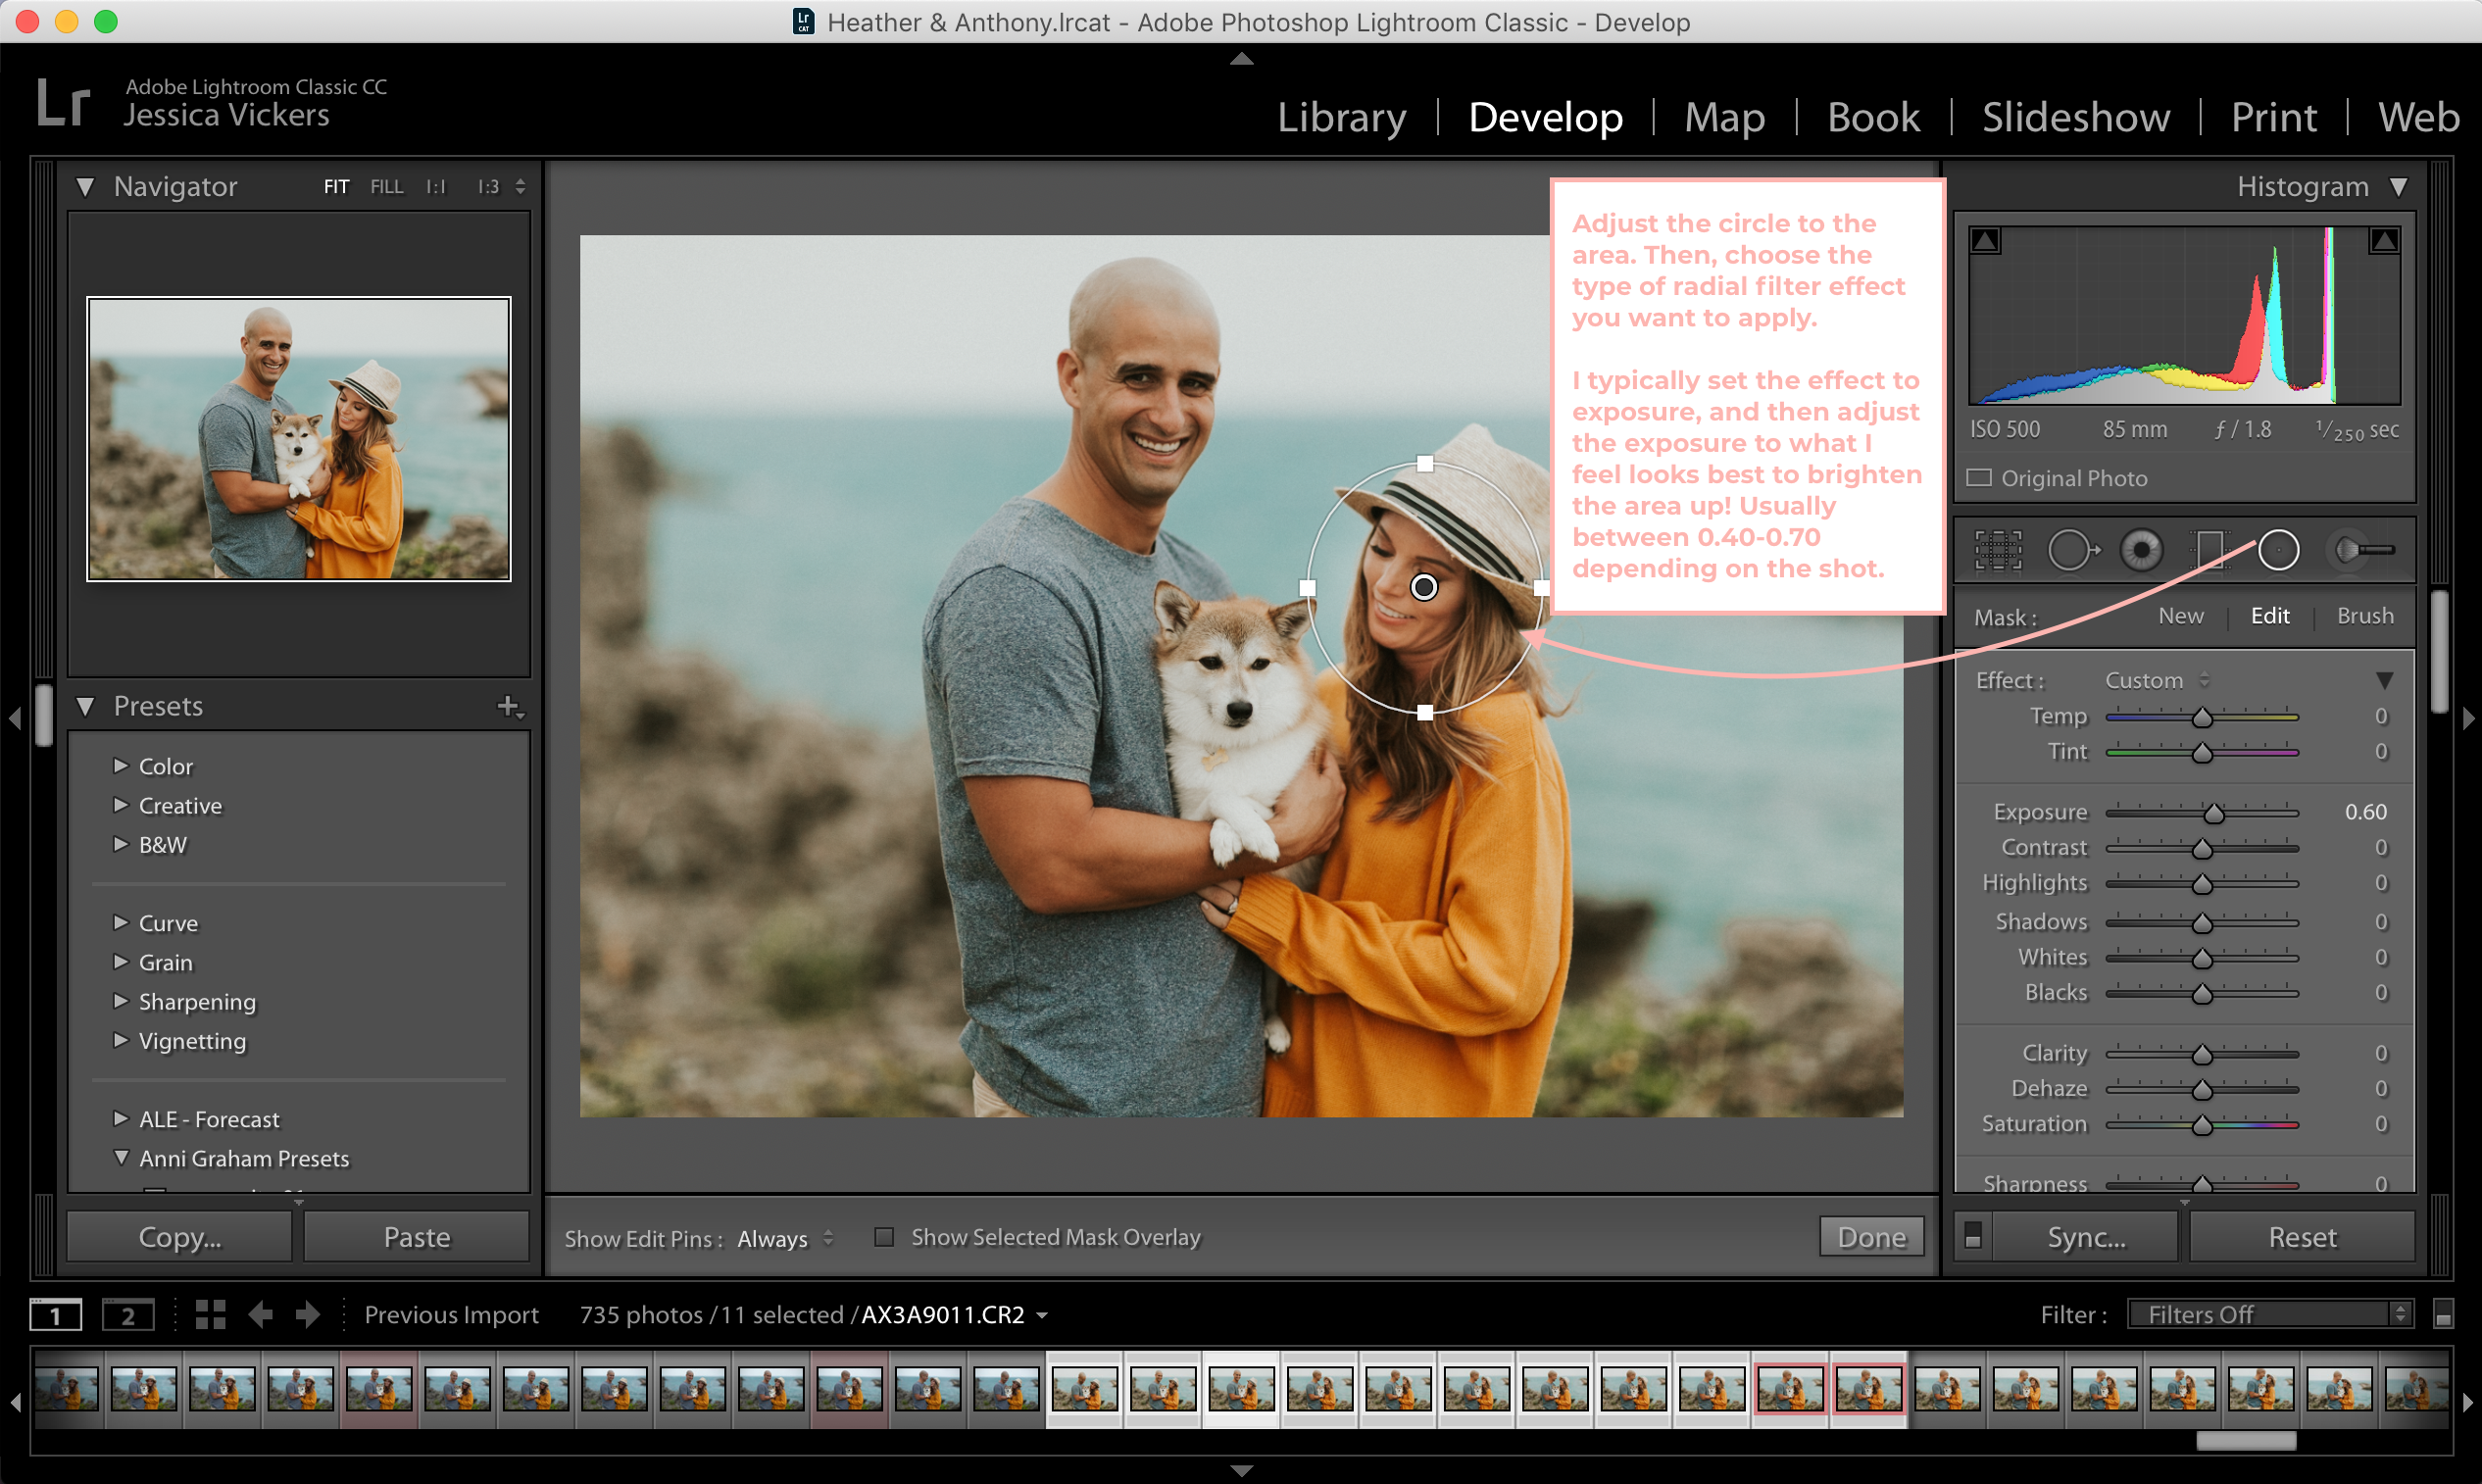
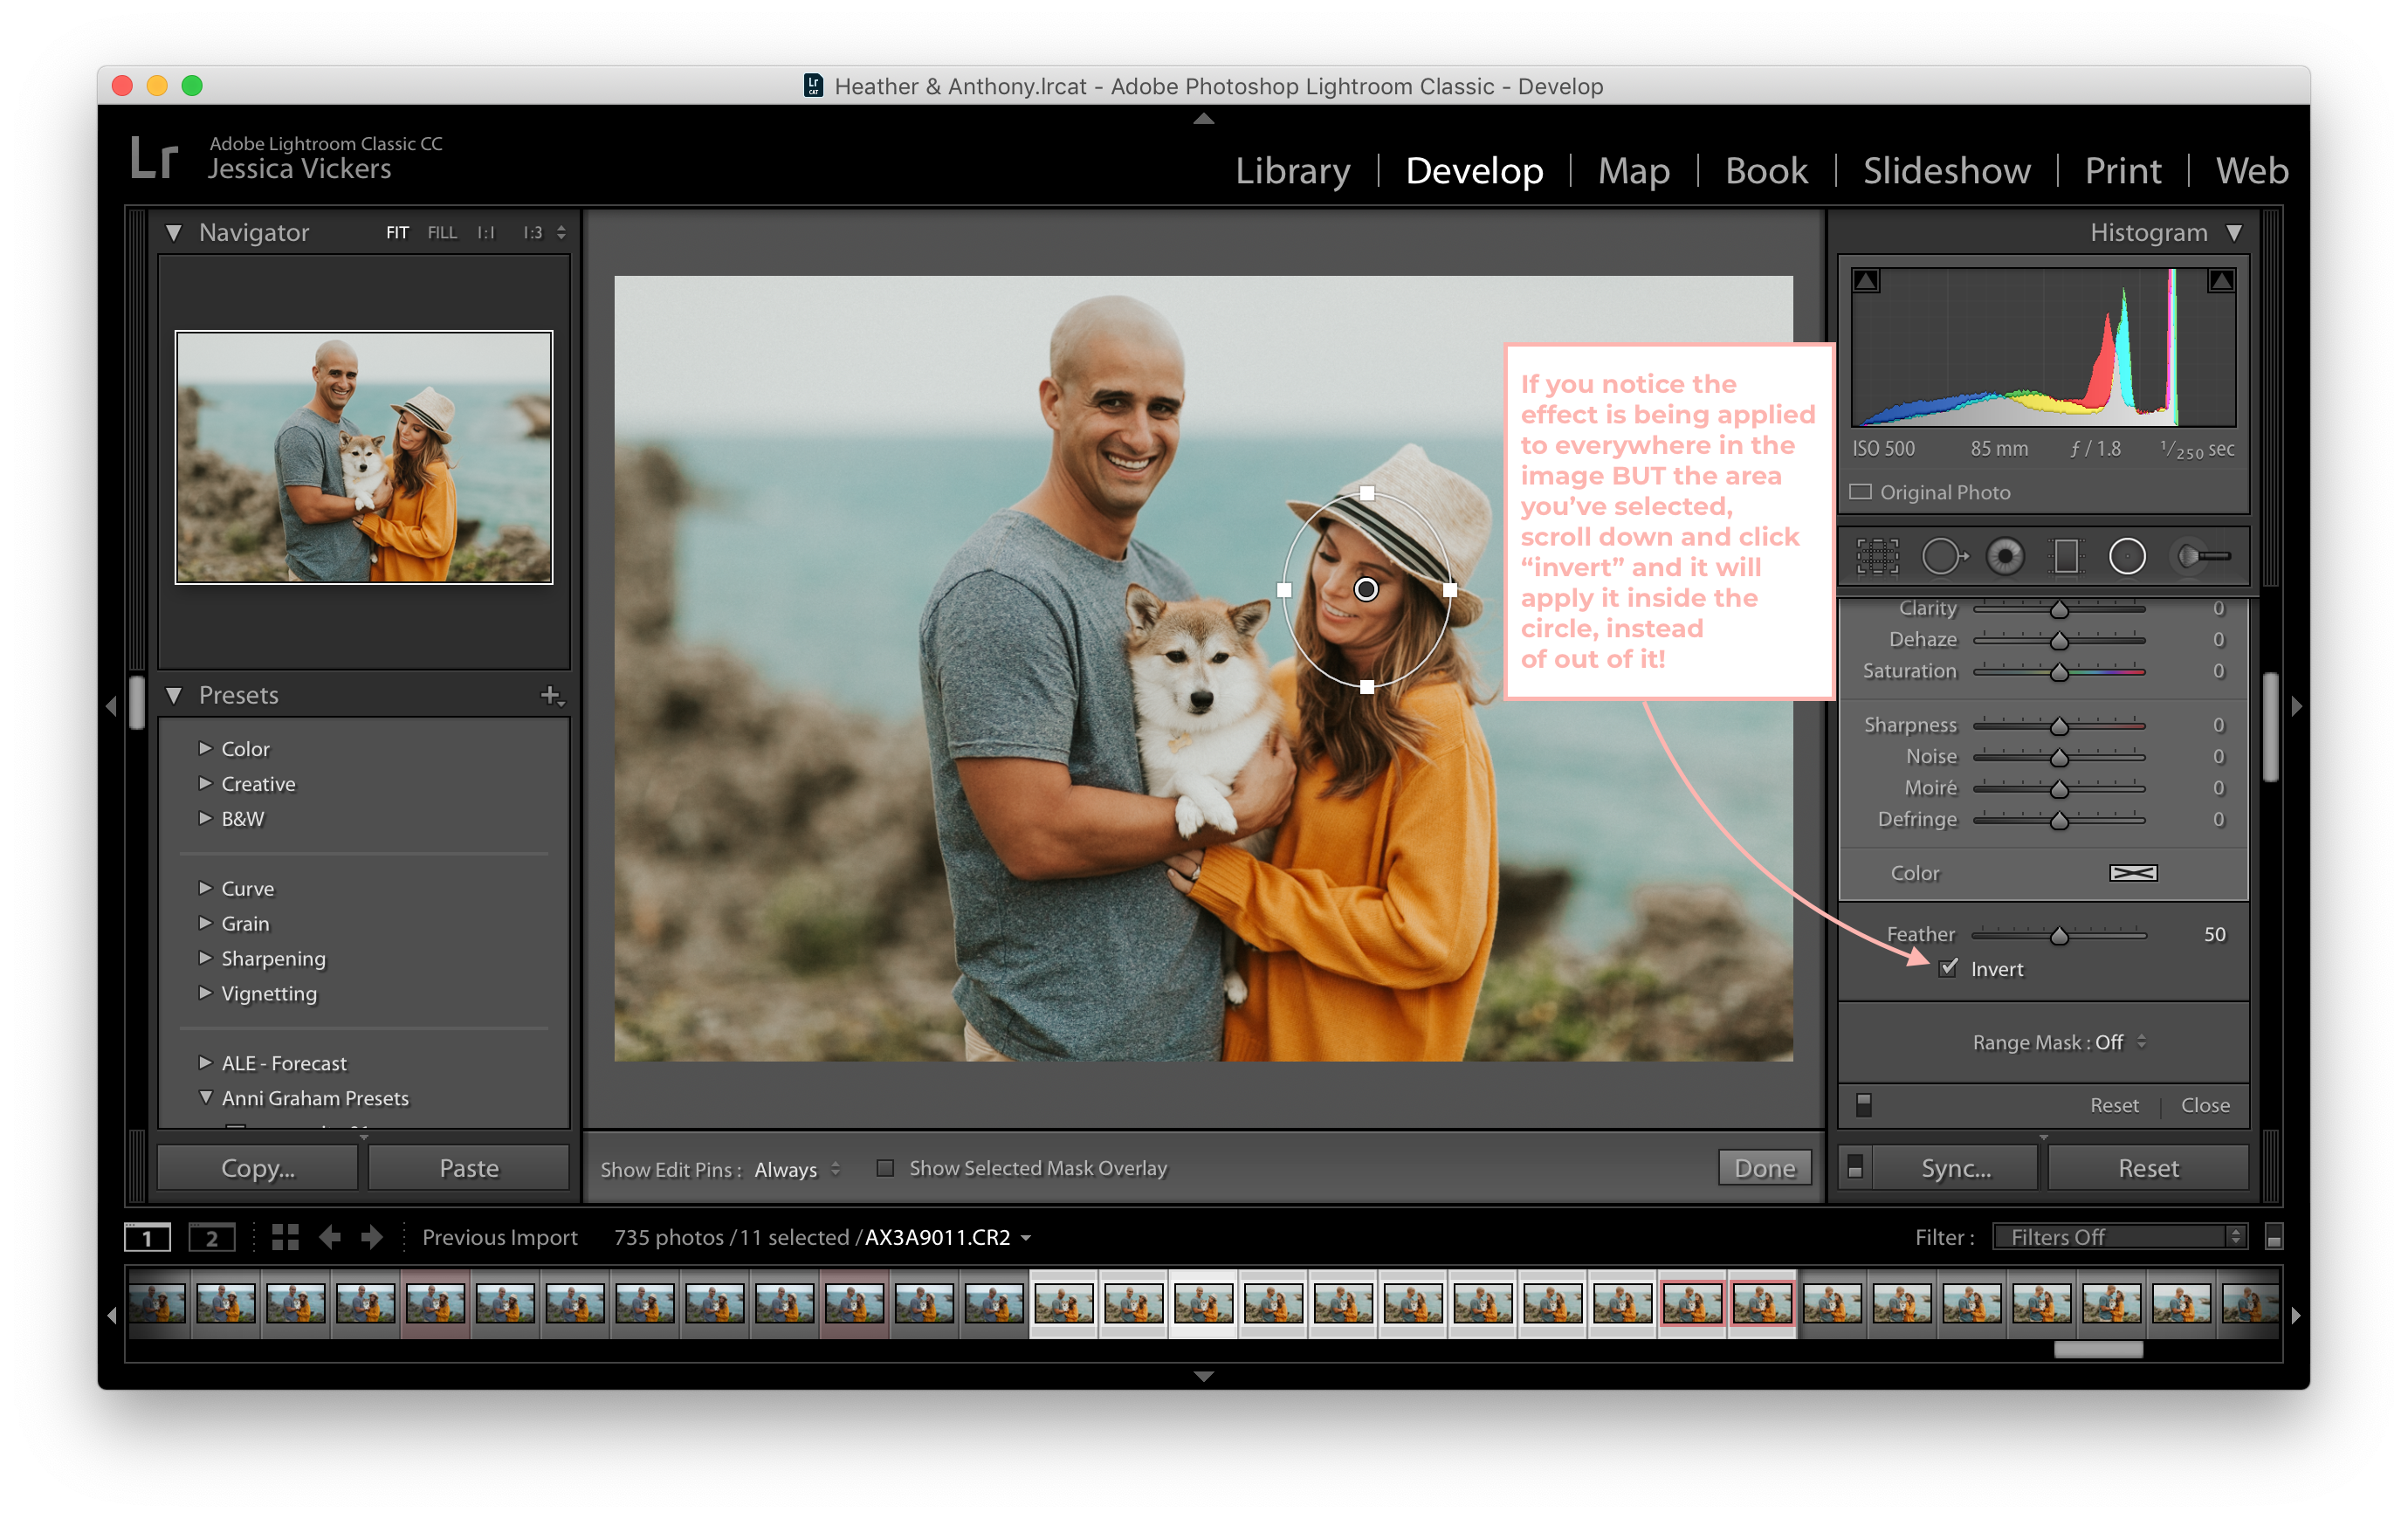
These come in handy for so many things, but one of my favorite uses for them is to brighten up faces in photos, (especially when the shadows in the photo may have caused their faces to really ‘sink’ back into the photo; instead of standing out.)
Here’s an example, see the difference?
4. Transform tool
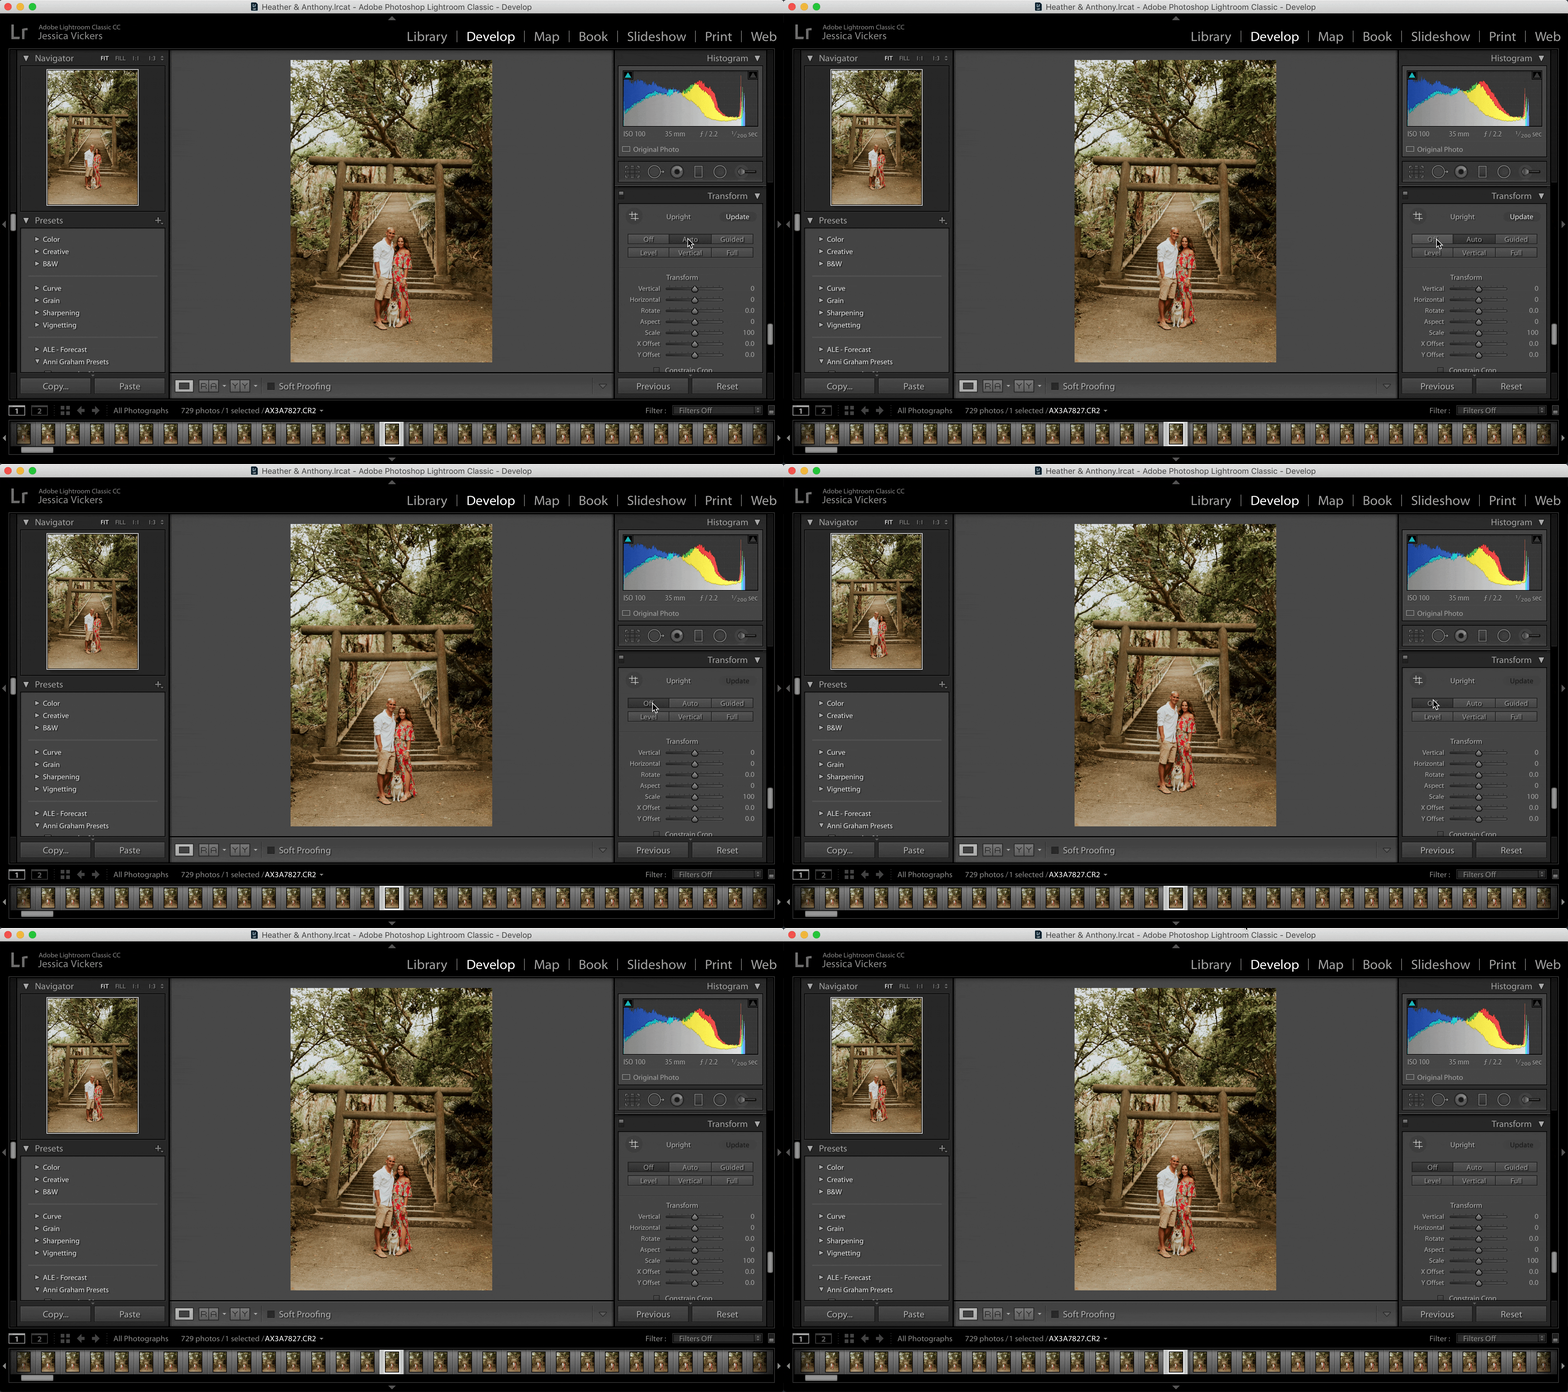
Ya’ll, if you’re photographing anything with straight lines (that weren’t so straight when you shot it, *whoops* ) this tool is a lifesaver!
In the video below, you’ll see the difference between auto-transform being applied to the image vs. not.
5. Presets
Whether you’re purchasing someone else’s preset, or creating your very own– presets are a MAJOR time-saver. Presets are just that; a “pre-set” collection of settings that changes the look and aesthetic of an image.
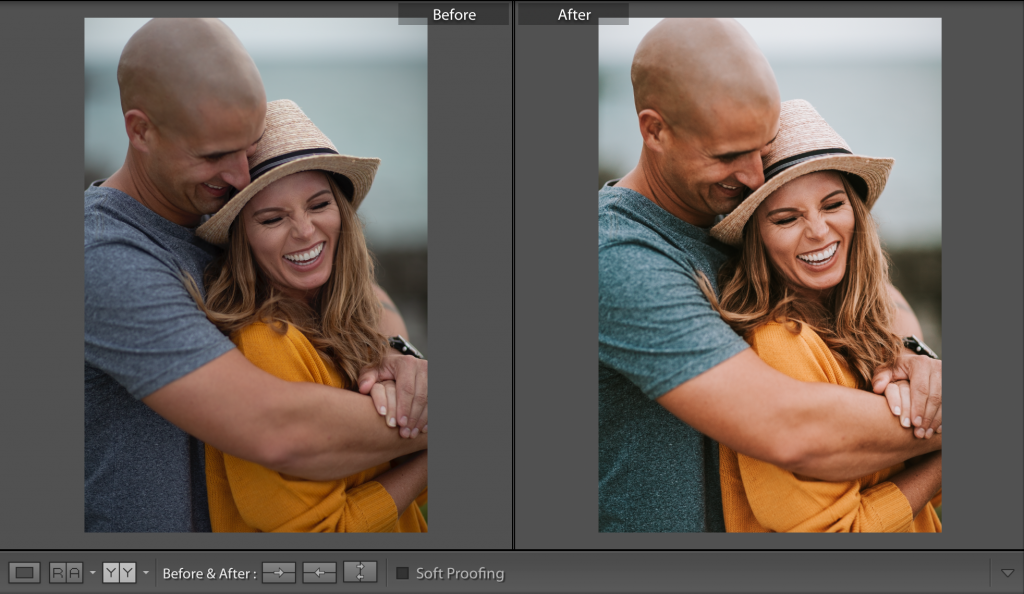
See the image below. ??
On the left is the image with no edits, (so straight out of camera,) and the image on the right has the “Shisa” preset applied from my Mina Marlena Preset Masterclass!
So wild, right!? If you’re using a preset like this one; with just one click, and a few minor adjustments, you can create those images that you’ve been dreamin’ of! ?
If you already have a style developed, but you aren’t already using your own edits as presets – then here’s how to create a preset from what you’ve already been doing to be able to streamline your workflow and work smarter, not harder!
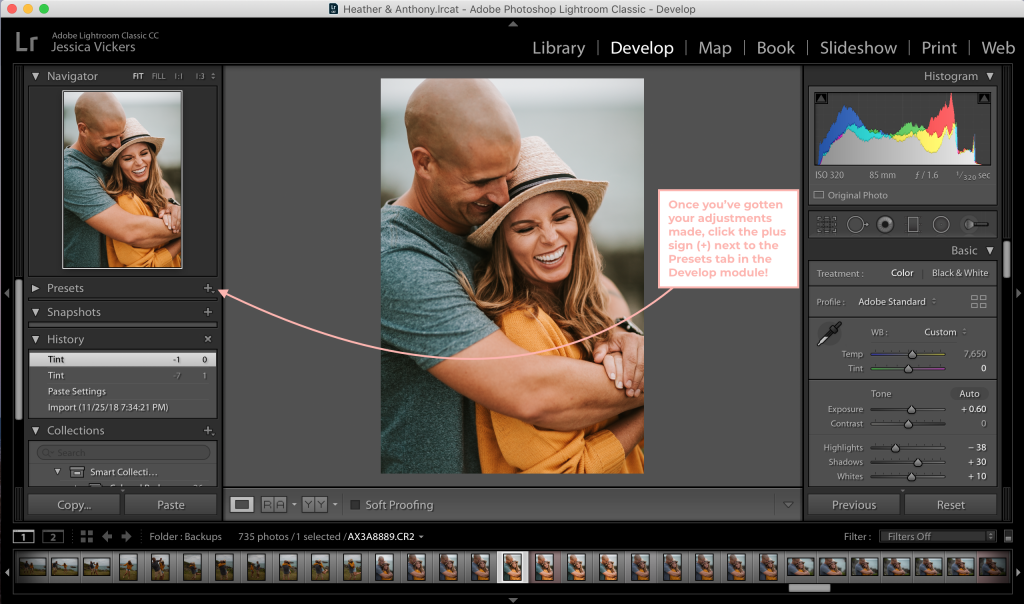
Click the plus sign (+) next to the Presets tab in the Develop module, then click “Create Preset” and give the preset a name.
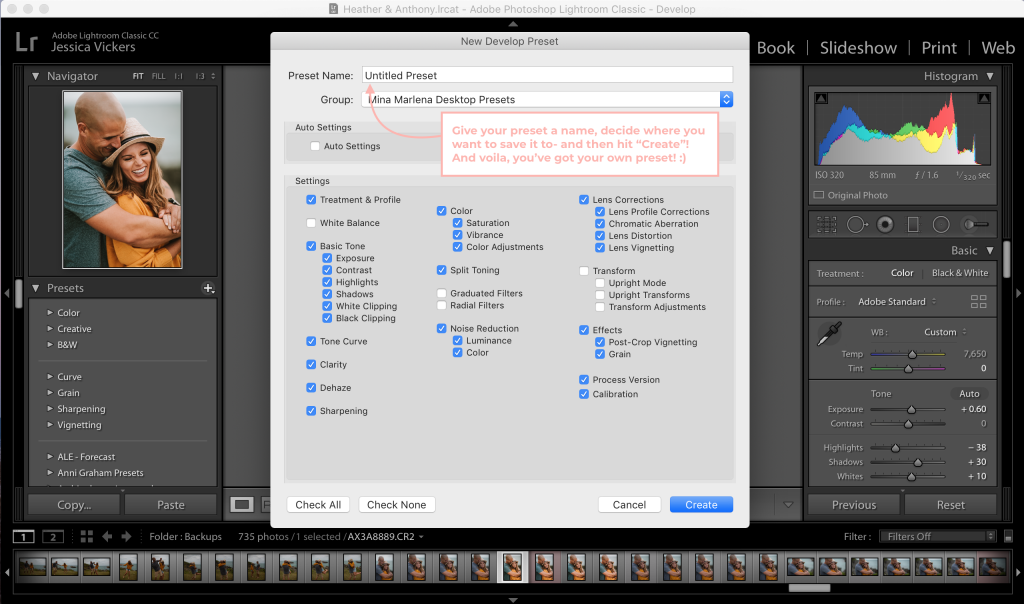
And there ya have it, your very own preset! You can even do this to presets you already have, if you’re regularly making the same adjustments to them. That way, you can speed up your workflow and get galleries edited in next to no time! ??
So, what all are we adding to your “to play with, learn, and master” list?
The 5 Lightroom Tools You Should Be Using:
1. HSL Sliders
2. Batch Editing (Using the Sync tool)
3. Radial filters
4. Transform tool
5. Presets
Using these tools will getcha on the fast track to productivity (as well as some creating some super beautiful images in the meantime.)
If this was helpful, or if you have any questions whatsoever- let me know in the comments below! I’d love to help ya streamline your workflow and start creating images you’re proud of. ?✨
If you need help building, growing, and/or systemizing your photography business, totally reach out and book a free strategy call with me. Helping you flourish is what I do best. 😉
If ya liked this little gem, you’ll LOVE this guide on how to create a photography business with zero competition. (Cause that’s what we all want, right!?)
Wanna stick around and stay learnin’? I knew I liked ya. ?
Feel free to binge on these blog posts, or pin ’em on Pinterest for later! ??
If you’re short on time, follow me on Pinterest – and you’ll get these kinda tips delivered straight to your feed! You know… when you’re scrollin’ through Pinterest with coffee in hand, ready to take on the day… or, procrastinate.
Whatevs. Pinterest biz sesh, anybody!? ??






December 1st, 2018 at 4:38 am
Thank you for taking time to break it all down for everyone! You are an inspiration and your educational videos/advice and all you do to help your fellow photographers is much appreciated! Very, very much so appreciated! Thank you for time spent on all that you share with us! ?
December 1st, 2018 at 4:40 am
Girl!! Thank YOU for letting me know it blesses you!! It means the world to me to recieve encouragement like this, and gives me the fire under my butt to keep going and keep it comin’ for ya!! Love you sweet girl!!! XOXOX <3